

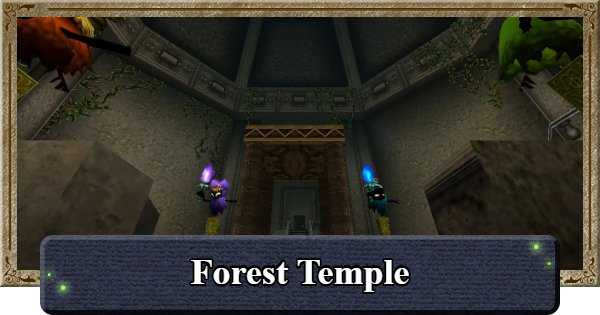
This is a full walkthrough of the Forest Temple in Ocarina of Time, including the Gold Skulltulas' location in the Forest Temple, strategy, and tips for defeating Phantom Ganon.
| ◀ Previous | Next ▶ |
|---|---|
| Inside Jabu-Jabu's Belly | Fire Temple |
Table of Contents
Forest Temple Location
Through the Sacred Forest Meadow
- Exit the Temple of Time after the cutscene
- Head to Kakariko Village
- Head to the Graveyard from Kakariko Village
- Pull grave to reveal hidden opening
- Clear the race against the ghost
- Play the Song of Time at the back block
- Go to Kokiri Forest Through Hyrule Field
- Head to the Lost Woods north of Kokiri Forest
- Head to the End of the Sacred Forest Meadow
- Learn the Minuet of Forest
- Use the Hookshot to enter the Forest Temple
To reach the Forest Temple in Ocarina of Time, you must pass through the Sacred Forest Meadow. The Hookshot is required to complete the dungeon, so first head to the Graveyard in Kakariko Village to obtain the Hookshot.
Exit the Temple of Time After the Cutscene


After claiming the Master Sword, there is a fairly long cutscene. Once it ends, you will be start in the Temple of Time as an adult. From here, head outside.
Some Equipment Cannot Be Used as an Adult

| Equipment that becomes unavailable at this point | ||
|---|---|---|
| Boomerang | Slingshot | Deku Stick |
The equipment you obtained is restricted by whether you're in the Past or Future. Keep in mind that the items listed above cannot be used by an Adult Link.
Head to Kakariko Village

Head to Hyrule Field and make your way to Kakariko Village. Although time has skipped 7 years, the map itself is the same as it was in the Past.
Enemies Can Now Spawn Inside Towns and Villages

In the Future, enemies will can appear even in places that were peaceful in the Past, such as Hyrule Castle Town and Kokiri Forest. You don't need to defeat every enemy, so feel free to simply run past them.
Head to the Graveyard from Kakariko Village

Once you arrive at Kakariko Village, continue southeast to reach the Graveyard.
Pull Grave to Reveal Hidden Opening

Once inside the Graveyard, pull the far-left grave in the left row from behind to reveal an entrance. Drop into the hole to proceed.
Clear the Race Against the Ghost

At the bottom is a ghost. Approach it to start the race. Chase after it while being mindful to avoid getting hit by the flames it throws. Clear the race and a chest will appear containing the Hookshot.
Play the Song of Time in Front of the Block

| Song of Time |
|---|
 |
The passage beyond the finish line is blocked by a stone but playing the Song of Time will allow you to pass through. Continuing onward will bring you to the Windmill in Kakariko Village.
Grab a Piece of Heart After Exiting the Grave

You'll emerge on the second floor of the windmill — use the spinning blades as platforms to reach the Heart Piece. Don't forget to grab it while you're here!
Learn the Song of Storms from the Nearby NPC

Take out your Ocarina in front of the NPC inside the Windmill to learn the Song of Storms. This is needed for later story segments, so make sure to learn it now to avoid backtracking.
 Tip! Tip! | Use the Song of Storms near a Gossip Stone to summon a Big Fairy, which restores 8 Hearts and refills the Magic Meter. |
|---|
Go to Kokiri Forest Through Hyrule Field

From Kakariko Village, head to Hyrule Field and make your way to Kokiri Forest.
Head to the Lost Woods North of Kokiri Forest

| Lost Woods Directions |
|---|
| Right → Left → Right → Left → Straight → Left → Right |
Enter the Lost Woods from the north side of Kokiri Forest and proceed to the Sacred Forest Meadow. You can only reach it by following an exact path, so be sure to keep track of how far you've gone.
Play Saria's Song for the NPC Blocking the Way

| Saria's Song |
|---|
 |
Mido is blocking the path partway through, but he will allow you to pass if you play Saria's Song.
Head to the End of the Sacred Forest Meadow

After making it through the Lost Woods, head to the deepest part of the Sacred Forest Meadow. The Moblins blocking the path can be defeated with the Hookshot if they're hit from behind. Note that if they spot you, they will charge at you at high speeds.
Dodge the Big Moblin's Shockwaves by Strafing
A Big Moblin positioned at the end of the final corridor will continue to fire shockwaves at you. The shockwaves alternate between a left and right pattern, so keep moving from side to side as you advance. You'll be able to defeat the Big Moblin later once you have the Bow, but just slip past it and proceed to the back for now.
Learn the Minuet of Forest

Upon reaching the deepest part, a cutscene with Sheik will begin and you will learn the Minuet of Forest. The Minuet of Forest is a song that warps you to the Forest Temple whenever you play it.
Use the Hookshot to Enter the Forest Temple

Once the cutscene ends, use the Hookshot to latch onto the tree branch above above the entrance. The Hookshot always connects as long as the red targeting reticle appears, so keep that in mind.
Forest Temple Walkthrough
| Table of Contents (Tap to Jump) | |
|---|---|
| 1 | ▼How to Get the Fairy Bow |
| 2 | ▼Up to Defeating All 4 Poes |
| 3 | ▼Up to Boss Phantom Ganon |
How to Get the Fairy Bow

- Climb the Wall Vines and Get the Key
- Proceed to the Back Room
- Head to the Room North of the Main Hall
- Defeat Back Room Enemies For a Key
- Enter Northwest Room from the Main Hall
- Climb the Vines on the Right Wall
- Defeat the Enemy and Obtain the Dungeon Map
- Use the Hookshot on the Left Platform
- Press the Switch and Enter the Well
- Get the Key Inside the Well
- Exit and Return to the Main Hall
- Head to the West Room and Climb Up
- Push the Block in the Direction of the Arrow
- Climb the Ladder Where the Block Was
- Push Block in the Right Corridor to the End
- Circle Around and Push the First Block
- Push the Red Block to the End
- Ignore Enemies and Keep Moving Forward
- Defeat 3 Enemies in the Lowest Room
- Obtain the Fairy Bow from the Treasure Chest
Climb the Wall Vines and Get the Key

Once you enter the Forest Temple, climb the vines on the right side. Cross the branches and open the chest for a Key.
Proceed to the Back Room

After getting the Key, drop down and open the door to find a Skulltula in the corridor. The Hookshot can kill Skulltulas with one hit, so remember this for the future.
Head to the Room North of the Main Hall

Continue to reach the main hall. After watching the Poes carry away the flames, head north.
Defeat Back Room Enemies for a Key
At the end of the north room, you'll encounter a pair of Stalfos.
Repeatedly use your shield to block before countering to defeat it. Stalfos deal a lot of damage, so fight more cautiously than usual. Claim the key from the chest that appears once both Stalfos are defeated.
Extinguish the Flames on the Skulls Before Attacking
You can damage the flaming skulls known as Bubbles
by ramming them with your shield to extinguish the flames.
Enter Northwest Room from the Main Hall

Head back to the main hall and enter the northwest room on the right.
Blocks Can Be Removed with the Song of Time

| Song of Time |
|---|
|
Remove the Time Block with the Song of Time, similar to the one in the graveyard.
Climb the Vines on the Right Wall

Once inside the room, get past the Deku Baba and climb the vines on the right side. Use the Hookshot on the Skulltulas then climb into the opening above.
Drop Down When the Skulltula Turns Purple

Skulltulas flash purple when they're about to attack. Since you're completely vulnerable while climbing, we recommend pressing A to drop down and avoid taking damage.
Defeat the Enemy and Obtain the Dungeon Map

Defeat the Bubble in the next room to spawn a chest containing the Dungeon Map.
Use the Hookshot on the Left Platform

Once you reach the balcony, defeat the Deku Baba blocking the way. Then, use the Hookshot on the target near the vines to access the floor switch.
Press the Switch and Enter the Well

Step on the floor switch to drain the water from the well below. Then, hop off the balcony and enter the well.
Get the Key Inside the Well

Continue following the waterway to reach a chest. Open the chest for a Key before exiting the well via the nearby vines.
Exit and Return to the Main Hall

After surfacing from the well, go right and enter the door to return to the main hall.
Head to the West Room and Climb Up

Enter the western room of the main hall. Continue ahead and climb up the succeeding ladders.
Push the Block in the Direction of the Arrow

You'll eventually reach an area with a moveable block and arrows on the floor. Grab the block and move it in the directions indicated by an arrow.
Climb the Ladder Where the Block Was

You can now access a ladder that was previously blocked. You can only see it from a certain angle, so adjust the camera to see it.
Push Block in the Right Corridor to the End

At the top of the ladder, push the block in the right corridor all the way to the back. Keep pushing it until it won't move any further.
Circle Around and Push the First Block

Climb back down the ladder, then loop around from the left and push the first block towards the back. Once it slides into the indentation, you can climb above it and move forward.
Push the Red Block to the End

As you continue, you'll find another red block. Like earlier, push it into the indentation then climb on top to continue.
Ignore Enemies and Keep Moving Forward

The path is mostly linear, so focus on heading deeper. You don't have to beat every enemy and it's generally fine to prioritize progress over fighting.
Defeat 3 Enemies in the Lowest Room

Proceeding past the staircase triggers a battle vs. three Stalfos. Defeating the first one causes two more to spawn. Once you're fighting two Stalfos, try to defeat them both in quick succession, as taking too long to defeat the second will cause the first to revive.
Fight Carefully to Avoid Falling into the Pit

There is a large pit in the center of the room, and falling in means restarting from the room below. Defeating the solo Stalfos will seal the pit, so be mindful for the first half of the fight.
Obtain the Fairy Bow from the Treasure Chest
Defeating all three enemies spawns a treasure chest containing the Fairy Bow. This is a ranged weapon similar to the Slingshot you could use as a child.
Up to Defeating All 4 Poes

- Shoot the Painting with the Bow
- Defeat the Poe on the Lowest Floor
- Backtrack and Defeat the Poe on the Other Side
- Shoot the Eye Above the Twisted Corridor
- Get Key in the Back Room and Drop into the Pit
- Defeat the Enemy and Proceed
- Enter Back Right Room from Right Corridor
- Defeat the Floor Master for a Key
- Reach the Top Floor Through the Right Door
Twist
the Corridor by Shooting the Eye- Enter from Above the Defeated Poe's Room
- Shoot the Eye with a Fire Arrow
- Turn Back and Fall into the Pit in the Room
- Use the Switch to Avoid the Ceiling and Proceed
- Shoot the Poe's Portrait
- Position the Blocks to Recreate the Portrait
- Defeat the 3rd Poe
- Return to the Main Hall
- Defeat the Poe in the Center
Shoot the Painting with the Bow

After getting the bow, proceed to the back room. Shoot all 3 paintings to materialize the Poes. Getting too close causes them to vanish, so shoot from as far away as possible.
Defeat the Poe on the Lowest Floor
| How to Defeat the Poe |
|---|
| 1. Block its charge attack with your shield twice 2. Attack with your sword once it materializes 3. Repeat the above pattern |
When Beth
the blue Poe appears on the lowest floor. Similar to Bubbles, blocking with your shield makes Poes vulnerable to attacks, so instead of attacking recklessly, guard and approach to counter attack.
Get the Compass from the Chest After Defeating It

Defeating the Poe spawns a chest containing the Compass.
Backtrack and Defeat the Poe on the Other Side

Backtrack through the room where you got the bow and head exit the other side. Spawn and defeat the 2nd Poe, Joelle,
using the same method as before.
Get a Key from the Chest After Defeating It

A treasure chest spawns once Joelle is defeated. It contains a Key needed to progress through the story, so be sure to grab it.
Shoot the Eye Above the Twisted Corridor

Return to the twisted corridor and shoot the eye above the door with your bow. The eye switches the twisted corridor between its normal and twisted states.
Get Key in the Back Room and Drop into the Pit

Pass through the corridor in its normal state and access a treasure chest on the ground to get the Boss Key. After getting the key, fall into the pit directly behind you.
Defeat the Enemies and Proceed

Defeat the Bubbles at the bottom of the pit and move on to the next room.
Enter Back Right Room from Right Corridor

Follow the path carefully to avoid falling into the area below, and enter the room at the back right.
Defeat the Floor Master for a Key

| How to Defeat the Hand Enemy |
|---|
| 1. Block its charge attack with your shield 2. Attack with your sword while it's stunned 3. When it splits, defeat all the small hands |
Defeat the hand-like enemy, a "Floor Master", in this room. Attacking it causes it to split into three, but the smaller hands can be defeated in one hit.
Use Spin Attacks to Hit All Enemies
You can defeat all the split hands with a well-timed Spin Attack. The split hands will recombine after a certain amount of time, so take them out quickly.
Reach the Top Floor Through the Right Door

Exit and go through the door on the right to enter the block room
from earlier. The blocks are still inside their indentations, so use them to climb up to the top floor.
Twist
the Corridor by Shooting the Eye

When you reach the twisted corridor, shoot the eye to twist the corridor again before proceeding.
Enter From Above the Defeated Poe's Room

Pass through the room where you got the bow and proceed from the room where you defeated the first Poe into a new room. Take the corridor on the right side to head into the room further in.
Shoot the Eye with a Fire Arrow
The eye in the back room is frozen, so you need to fire an arrow through the flames and into the eye to melt the ice. Alternatively, you could use Din's Fire to melt the ice from below.
How to Get Din's FireTurn Back and Fall into the Pit in the Room

After shooting the eye, return to the twisted corridor and fall into the pit on the floor of the next room.
Use Switch to Avoid Ceiling and Proceed

The ceiling in the next room will slowly descend to crush you. Using the switch on the far right lets you avoid the ceiling, then you can dash straight towards the exit door. Be careful to avoid the Skulltulas along the way.
Shoot the Poe's Portrait
In the next room, you'll find the 3rd Poe. Before proceeding, save the game to make retrying the puzzle faster. Afterwards, shoot the paintings with the bow.
Position the Blocks to Recreate the Portrait

You'll need to rearrange the blocks to match the portrait. There's a 1-minute time limit, so move quickly. Failing to complete the puzzle within the time limit extends the timer, but also rearranges the image, so it's better to reload your save.
Defeat the 3rd Poe

Clearing the puzzle spawns the green Poe Amy
. Just like the 1st and 2nd Poes, block with your shield, then strike it down.
Return to the Main Hall

You can return to the main hall through the opened door. You'll emerge on the 2nd floor, so drop down.
Defeat the Poe in the Center
| How to Defeat the Poe |
|---|
| Shoot the spinning main body with your bow |
Approach the final Poe Meg
in the center to trigger a battle. The real Meg is the one that spins around once. Lock on with ZL, and keep firing with your bow to defeat it.
Up to Boss Phantom Ganon

- Take the Elevator Down
- Push the Protruding Wall Counterclockwise
- Access Northwestern Switch
- Push Counter Clockwise Again
- Access Eastern Switch
- Push Counter Clockwise for the Chest
- Push Counter Clockwise the Last Time
- Enter Room and Try to Leave to Fight the Boss
- Receive the Forest Medallion in the Cutscene
Take the Elevator Down

Take the elevator in the center of the main hall down.
Push the Protruding Wall Counterclockwise

Push the protruding walls counterclockwise once. The hole in the wall moves, allowing access to the smaller rooms. Repeat this to press each switch.
Access Northwestern Switch

Pushing the wall once moves the opening to the small northwestern room. Enter and step on the first switch.
Push Counter Clockwise Again

After pressing the first switch, exit the small room and push the wall in a counterclockwise direction a second time.
Access Eastern Switch

Pushing the wall a second time reveals access to the Eastern room containing the second switch. Head inside and trigger the second switch.
Push Counter Clockwise for the Chest

After pressing the second switch, push the wall counterclockwise a third time. This should open up the southwestern room. This room has a chest with 5 Arrows guarded by a Skulltula. This room also contains a Gold Skulltula on one of the walls.
Push Counter Clockwise the Last Time

Once you're finished in the southwestern room, exit and push the wall counter-clockwise for the fourth and final time. This should align the north and south openings. First, access the third switch in the southern room before entering the boss room to the north.
Enter Room and Try to Leave to Fight the Boss
| Boss Guide |
|---|
| ・For the first phase, shoot with the bow as it comes out of the painting └There are 2, but the real one is brighter in color ・Standing directly in front of the painting, the lightning won't hit you ・In the second phase, deflect the enemy's projectiles back with your sword |
In the Boss Room, attempting to leave through the entrance locks you in and triggers the Boss fight. During the first phase, damage the boss by shooting it with the Bow as it exits the painting. The second phase is a rhythm game where you bat the boss's projectiles back, so timing is key.
Phantom Ganon Boss GuideReceive the Forest Medallion in the Cutscene

After picking up the heart and warping, a cutscene plays, and the Sage of the Forest Temple gives you the Forest Medallion. After the conversation, you regain control at the location where the Great Deku Tree stood in Kokiri Forest.
You Can Now Return to the Past at the Temple of Time

Clearing the Forest Temple allows you to return to your childhood at the Temple of Time in Hyrule Castle Town. There's no story-driven reason to go back right now, but it's a good opportunity to take a break and tackle optional side content.
| ◀ Previous | Next ▶ |
|---|---|
| Inside Jabu-Jabu's Belly | Fire Temple |
Gold Skulltula Locations
- Forest Temple Skulltula 1On the vines to the east in the first room


- Forest Temple Skulltula 2On the wall in the central hall on 1F


- Forest Temple Skulltula 3On the wall in the northeast room on 1F


- Forest Temple Skulltula 4On the wall in the northwest room on 1F


- Forest Temple Skulltula 5On the wall in the rotating floor area before the Boss room


Phantom Ganon Boss Guide
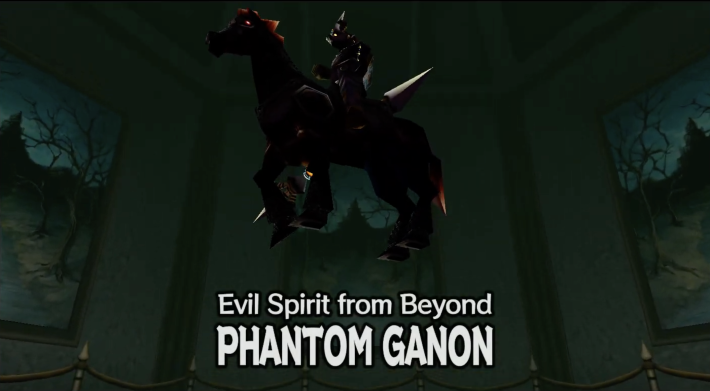
Boss Movements
| Movement | Effect |
|---|---|
| Electric Shock | Lightning bolt that spreads in 6 different directions from its landing point |
| Electroshock | Fires a projectile that can be deflected back with the Sword |
How to Defeat and Tips
Phantom Ganon will use the paintings to get the drop on you during fight. With strong attacks, he can easily take out Link if you don't position yourself well and anticipate his attacks.
Phase 1: Shoot As He Emerges From Painting
In the fight's first phase, Phantom Ganon can only be damaged when he emerges from one of the paintings in the room. Look out for a purple portal as this signals where he will appear.
The Real One is Brighter in Color

Phantom Ganon will try to trick you with an imposter in one of the paintings. Know which is the real one by how much brighter his coloring is. To make it easier, look for the one with the brighter sheen to his armor!
Sound of Hooves in Real One (Earphones Recommended)
Another one of the tells to the real one is that it has the sounds of a horse's hooves. On the Switch's speaker, it can be hard to know where exactly is coming from so it's better to use an earphone here.
Phase 1: Stay in Front of Painting

The electric attack spreads from the center of the room towards all of its corners. This makes it so that by standing in front of one of the painting, you are safe from the attack. You give up one, but it lets you safely focus on the other five paintings, so it's highly recommended.
Phase 2: Deflect Energy Ball
In Phase 2, focus on deflecting the Phantom Ganon's energy ball back at him with your sword. When you are a bit far from him, he will deflect it back so you will need to deflect it again. Don't let your guard down after deflecting it once.
Attack When He is Down
Once the energy ball hits him, Phantom Ganon will be knocked down. Take this chance to move close and slash him with your sword.
Guard to Get Through When He Is Up Close
| When Close | When Far |
|---|---|
 |  |
When Phantom Ganon is at close range, deflecting the ball will just send it flying past him to the side. Since attempting to deflect it puts you at risk of getting hit, guard and wait it out until he moves away.
Ocarina of Time Related Articles
 Story Walkthrough - All Chapters
 1. Opening
 2. Great Deku Tree
 3. Hyrule Castle
 4. Dodongo's Cavern
 5. Lord Jabu-Jabu
 6. Forest Temple
 7. Fire Temple
 8. Ice Cavern
 9. Water Temple
 10. Bottom of the Well
 11. Shadow Temple
 12. Gerudo Fortress
 13. Spirit Temple
 14. Ganon's Castle











