

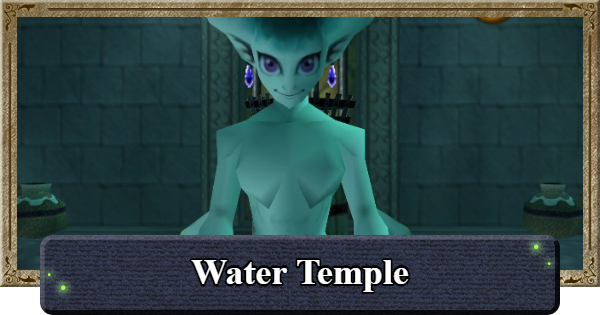
This is a full walkthrough of the Water Temple in Ocarina of Time, including the Gold Skulltulas' location in the Water Temple, and strategies for Dark Link and Boss Morpha.
| ◀ Previous | Next ▶ |
|---|---|
| Ice Cavern | Bottom of the Well |
Water Temple Location
Go Underwater from Lake Hylia's Shore
The Water Temple in Ocarina of Time is accessible from underwater at Lake Hylia. You will need the Iron Boots and the Zora Tunic, so make sure to obtain them at the Ice Cavern first.
Play Serenade of Water to Reach Lake Hylia


First, play the Serenade of Water to warp to Lake Hylia. You can learn the Serenade of Water from Sheik at the Ice Cavern.
Dive from the North Shore Using the Iron Boots
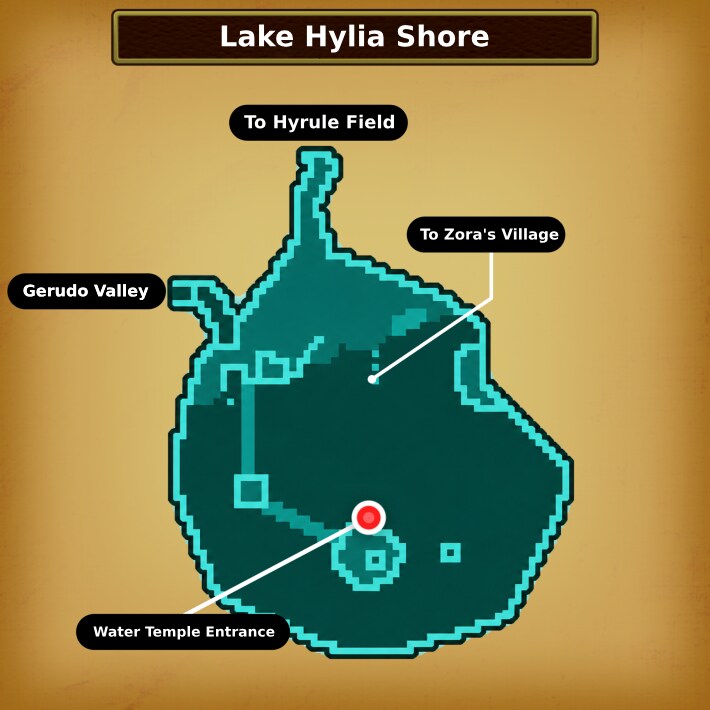
After warping to Lake Hylia, head to the north side of the land you are standing on, equip the Iron Boots, and dive into the water.
Equip the Zora Tunic if You Have It

Equip the Zora Tunic before entering the water. Without it, staying underwater for over 25 seconds results in a Game Over. Obtain it from King Zora after rescuing him or buy it from the Zora's Domain Shop.
Use Hookshot on the Switch to Enter

To enter, Hit the diamond-shaped switch at the top of the gate with the Hookshot to raise the gate and gain entry.
Water Temple Walkthrough
| Table of Contents (Tap to Jump) | |
|---|---|
| 1 | ▼Obtain the 2nd Small Key |
| 2 | ▼Obtain the Compass |
| 3 | ▼Obtain the Longshot |
| 4 | ▼Defeat the Boss |
Obtain the 2nd Small Key

- Head to the Right Side While Underwater
- Defeat the Spikes for the Dungeon Map
- Play Zelda's Lullaby in Front of the Crest
- Light the Torches in the Corners of the Room
- Defeat the Shell Blades for the Small Key
- Return to the Main Hall and Push the Block
- Use the Switch to Trigger the Water Platform
- Use the Hookshot on the
Mouth Switch
Head to the Right Side While Underwater

Equip the Iron Boots and head underwater. Then, proceed through the passage flanked by two torches to locate an adult Princess Ruto. After meeting Retuo, unequip the Iron Boots so you can follow her.
Defeat the Spikes for the Dungeon Map

You'll find spiky enemies known as Spikes
in the next room. Use your shield or the Hookshot to make Spikes vulnerable, and defeating all the Spikes will grant you the Dungeon Map.
Play Zelda's Lullaby in Front of the Crest

| Zelda's Lullaby |
|---|
 |
Return to the previous room and play Zelda's Lullaby in front of the crest to lower the water level. Then, jump into the hole you entered through.
Ocarina Songs and Sheet Music ListLight the Torches in the Corners of the Room
Light both torches in the lower room. You can shoot arrows through the flames, or use Din's Fire if you have it.
How to Get Din's FireDefeat the Shell Blades for the Small Key
There's a clam-like enemy called a Shell Blade
in the following corridor. Shell Blades only take damage when their mouth is open, so approach with your weapon drawn and hit it before it can attack to obtain a Small Key.
Return to the Main Hall and Push the Block

Backtrack towards the Main Hall and look for a movable block on the opposite side of the room. Push the block inwards and proceed.
Use the Switch to Trigger the Water Platform

The switch on the right side of the room triggers a water pillar. Use the pillar as a platform to reach the opposite side.
Use the Hookshot on the Mouth Switch
Equip the Iron Boots and activate the underwater switch with the Hookshot. The gate will rise temporarily, so move quickly before it comes back down.
Swap In and Out of the Iron Boots
For the underwater current room, swap the Iron Boots to control your depth. Use the current to get above the Dragon's Tail, then surface in the upper room to open the chest and get the Small Key.
Obtain the Compass

- Backtrack and Enter the Central Room
- Use the Hookshot on Platform Above
- Play Zelda's Lullaby in Front of the Crest
- Equip the Iron Boots to Descend
- Activate the Switch and Defeat the Enemies
- Surface Opposite of the Switch for a Key
- Go Main Hall and Head to Right Corridor
- Get Compass by Using the Switch
Backtrack and Enter the Central Room

Return to the main hall and use the Small Key to unlock the door on the central structure.
Use the Hookshot on Platform Above
When inside the structure, walk to the end of the platform, turn around, and look upward. Use the Hookshot on the target attached to the platform.
Play Zelda's Lullaby in Front of the Crest
| Zelda's Lullaby |
|---|
|
Play Zelda's Lullaby in front of the Triforce to raise the water level. This raises the block below and allows you to access the lower areas of the main hall.
Ocarina Songs and Sheet Music ListEquip the Iron Boots to Descend
With the water level raised, use the Iron Boots to sink into the hole that was previously blocked.
Activate the Switch and Defeat the Enemies

Follow the path and use the switch on the left to release Spikes and Shell Blades into the room.
Surface Opposite of the Switch for a Key
Once all enemies are down, unequip the Iron Boots and surface on the corner opposite the switch. You'll find a Small Key in the chest above.
Go to Main Hall and Head to Right Corridor
Once you have the key, return to the main hall and head to the corridor on the right.
Aim for the Further Ceiling Target

Inside the corridor are multiple targets lined up on the ceiling. Use the Hookshot on the farthest target to progress.
Get Compass by Using the Switch

In the back room, water is flowing around the chest. Activate the nearby switch to stop the water, then open the chest to obtain the Compass.
Obtain the Longshot

- Go to Main Hall and Head East on the 1st Floor
- Get the Key by Blowing Up the Cracked Wall
- Go to Main Hall and Head West on 2nd Floor
- Ride the Water Jet and Activate the Switch
- Play Zelda's Lullaby in Front of the Crest
- Head to the Western Room on the 3rd Floor
- Use the Hookshot to Traverse the Platforms
- Use Switch and Move to the Western Dragon
- Lower Water Level and Move to Next Dragon
- Climb the Dragon to Move to the 3rd Dragon
- Stand Above the Dragon and Go Up
- Use the Hookshot to Cross to the Door Side
- Battle Dark Link in the Back Room
- Obtain the Longshot in the Building Ahead
Go to Main Hall and Head East on the 1st Floor
After obtaining the Compass, backtrack to the main hall. Jump into the water and equip the Iron Boots. Then, return to the eastern room where you first encountered Ruto. Unequip the Iron Boots and surface in front of a cracked wall.
Get the Key by Blowing Up the Cracked Wall

Destroy the cracked wall with a bomb to continue. Beyond the cracked wall is a chest containing a Small Key.
Go to Main Hall and Head West on 2nd Floor
With the Small Key acquired, return to the main hall and climb to the 2nd floor. Use the Small Key to open the locked door on the west side and enter.
Ride the Water Jet and Activate the Switch
You'll find a floor with water jets and a switch. First, stand on the section with the water jets, then activate the switch using your Bow or similar item to proceed.
Play Zelda's Lullaby in Front of the Crest

| Zelda's Lullaby |
|---|
|
After using the switch and ascending, there is a Triforce just outside the door of the room above. Stand in front of the crest and play Zelda's Lullaby.
Ocarina Songs and Sheet Music ListPlay the Scarecrow's Song to Make Travel Later Easier

If you play the "Scarecrow's Song" next to the same crest, you'll be able to use the Longshot to return to this location, making navigating easier.
Scarecrow Locations and BenefitsHead to the Western Room on the 3rd Floor
Once the Iron Bars are removed, continue and enter the wester room of the 3rd floor.
Use the Hookshot to Traverse the Platforms
There are many platforms near the waterfall. Use your Hookshot on the targets to traverse across the room.
Use Switch and Move to the Western Dragon
Past the waterfall, you'll find a room with dragon statues. First, activate the switch in the center of the room, then use the Hookshot to reach the western dragon.
Lower Water Level and Move to Next Dragon
After moving to the 1st platform, use the central switch again, then use the Hookshot on the wall target to move to the northern platform.
Climb the Dragon to Move to the 3rd Dragon
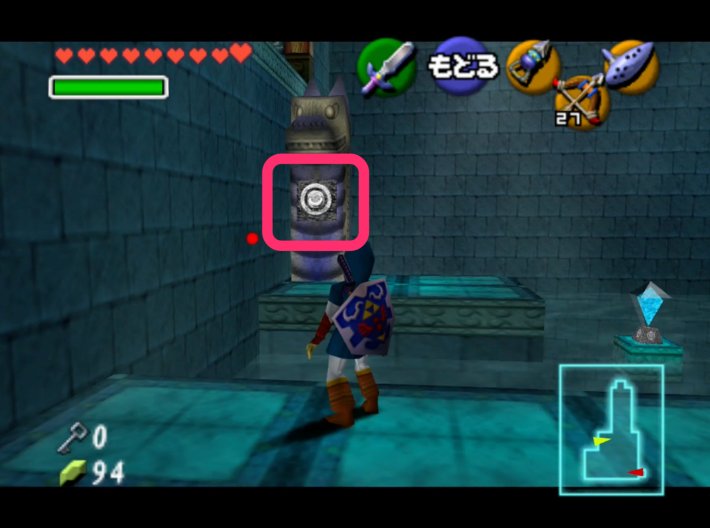
Once you reach the 2nd dragon, climb over it and move to the platform of the 3rd dragon.
Stand Above the Dragon and Go Up
Activating the pedestal switch on the 3rd dragon with the Hookshot will raise the statue. Ride the statue up to the floor above.
Use the Hookshot to Cross to the Door Side
Once you're up top, use the Hookshot to reach the door leading to the next room. Prioritize defeating any enemies to make traversal easier.
Battle Dark Link in the Back Room

| Strategy Tips |
|---|
| ・Attack after baiting out a dodge ・Din's Fire is effective ・After taking damage, he approaches from behind |
You'll face Dark Link in the room ahead. Dark Link mimics your every move, so bait him into dodging then attack the opening, or use Din's Fire which he cannot block.
Dark Link Boss GuideObtain the Longshot in the Building Ahead
After defeating Dark Link, enter the building ahead to get the Longshot, which doubles the range of the Hookshot.
Defeat the Boss

- Play the Song of Time Behind the Chest
- Avoid Touching the Whirlpools
- Shoot Out the Eye Then Hookshot the Cest
- Proceed to the Easter Side of Main Hall
- Pull the Block as Far Back as Possible
- Head to Easter Side of Main Hall 1st Floor
- Play Zelda's Lullaby After Surfacing
- Return to Main Hall's Central Building
- Play Zelda's Lullaby in Front of 2nd Floor Crest
- Backtrack to Main Hall's Southern Corridor
- Push the Block Ahead to Obtain the Key
- Go to the Main Hall then North from 1st Floor
- Blow Up 2 Walls in the Room Ahead
- Push the Block to Activate the Switch
- Use Switch then Cross Water Platforms
- Dodge the Boulders and Obtain the Boss Key
- Return to 3rd Floor via 2nd Floor West Room
- Play Zelda's Lullaby in Front of the Crest
- Head to the Northern Side of the Main Hall
- Avoid Spikes and Move to Boss Room
- Jump to the Platform to Fight
Morpha
- Warp and Obtain the Water Medallion
Play the Song of Time Behind the Chest

| Song of Time |
|---|
 |
Stand in front of the Triforce behind the chest and play the Song of Time (Right・A・Down・Right・A・Down) to open the floor.
Ocarina Songs and Sheet Music ListAvoid Touching the Whirlpools

There are multiple whirlpools in the water channel ahead. Getting sucked into one will return you to the room where you got the Longshot. If you get too close to a whirlpool, mash the B button to increase your swimming speed and swim away from the whirpool.
Do Not Equip Iron Boots
The Iron Boots will make it harder to avoid the whirlpools, so use the Kokiri Boots and rely on regular swimming instead.
Shoot Out the Eye Then Hookshot the Chest
There is an eye switch on the wall in the next room. Shoot the eye with your Bow to open the gate temporarily. Then quickly use the Longshot on the chest to obtain the Small Key.
Proceed to the Eastern Side of Main Hall

Continue to the back to emerge in the main hall, then head down the 3rd floor's eastern corridor.
Pull the Block as Far Back as Possible

Stand in front of the block and press the A button to grab it, then pull it toward you as far as it will go.
Head to Eastern Side of Main Hall 1st Floor

After pulling the block, return to the main hall. Equip the Iron Boots and head back to the eastern room where you found Ruto on the 1st floor.
Play Zelda's Lullaby After Surfacing

| Zelda's Lullaby |
|---|
|
Walk along the bottom and surface up to the 3rd floor, then stand in front of the crest ahead and play Zelda's Lullaby to lower the water level.
Ocarina Songs and Sheet Music ListReturn to Main Hall's Central Building

After the water level changes, return to the main hall. Enter the central structure from the ground floor.
Play Zelda's Lullaby in Front of 2nd Floor Crest

| Zelda's Lullaby |
|---|
|
Use the Hookshot on the upper platforms and play Zelda's Lullaby in front of the Triforce to change the water level again. A new route to the south side of the main hall will open up.
Ocarina Songs and Sheet Music ListBacktrack to Main Hall's Southern Corridor

Exit the building and return to the main hall. Since the water level changed, the southern corridor is now accessible, so unlock the door and proceed using the Hookshot.
Push the Block Ahead to Obtain the Key

There is a block in the back room of the corridor. Pushing the block in will allow you to access a chest and obtain a Small Key.
Go to Main Hall then North from 1st Floor

Return to the main hall and follow the northern corridor on the ground floor. It's a straight path to the deadend, but there are enemies and rolling boulders along the way, so proceed with caution.
Blow Up 2 Walls in the Room Ahead

Use Bombs to destroy 2 walls in the dead-end room on the north side.
Push the Block to Activate the Switch

From the room beyond the bombable walls, move the block and place it on top of the switch. Push the block onto the switch to raise the water and allow you to proceed to the next room.
Use Switch then Cross Water Platforms
The switch in the center of the room causes platforms to appear on the water's surface. Quickly cross the appearing platforms to reach the door ahead. The platforms will eventually sink, so cross them without stopping.
Dodge the Boulders and Obtain the Boss Key
There will be a corridor with large boulders rolling toward you, so dodge them as you advance. Open the chest in the back room for a Boss Key.
Return to 3rd Floor via 2nd Floor West Room
Return to the main hall, enter the room on the west side of the 2nd floor, and use the water current to climb to the 3rd floor.
Play Zelda's Lullaby in Front of the Crest

| Zelda's Lullaby |
|---|
|
Stand in front of the Triforce after climbing to the 3rd floor. Play Zelda's Lullaby to change the water level and open the path to the Boss room area.
Ocarina Songs and Sheet Music ListHead to the Northern Side of the Main Hall

After the water level changes, return to the main hall and head north. Pass through the corridor that became accessible due to the water level change and head toward the Boss room.
Avoid Spikes and Move to Boss Room
The corridor leading to the Boss room has traps with spikes jutting up from the floor. Run through quickly when the spikes retract. At the end of the corridor, use the Boss Key to unlock the large boss door.
Jump to the Platform to Fight "Morpha"
| Strategy Tips |
|---|
| ・Use the Hookshot to pull out the nucleus and attack ・Watch out for tentacle attacks; they hurt a lot ・In the second phase, tentacles increase to two |
Entering the Boss room begins the battle with Boss "Morpha." When fighting Morpha, use the Hookshot to pull out the nucleus and attack it. The attacks hurt, but there is only one pattern; the basic strategy is to keep your distance and wait for the nucleus to come out.
Morpha Boss GuideWarp and Obtain the Water Medallion

Defeating Morpha causes a pillar of light to appear. Touch the pillar of light to warp outside the temple and receive the Water Medallion. This completes the Water Temple.
| ◀ Previous | Next ▶ |
|---|---|
| Ice Cavern | Bottom of the Well |
Gold Skulltula Locations
- Water Temple Skulltula 1At the end of the path to the south on the lowest level

 *Use a Bomb to destroy the floor and proceed; after moving with the Hookshot, activate the switch inside the iron bars with a Spin Attack or similar
 - Water Temple Skulltula 2On the wall in the room where platforms move diagonally

 *Retrieve with Longshot
 - Water Temple Skulltula 3On the wall of the water channel filled with whirlpools
 *Stand still with Iron Boots and retrieve with Longshot
 - Water Temple Skulltula 4On the wall inside the central building

 *Retrieve with Longshot
 - Water Temple Skulltula 5On the wall of the water channel where a large boulder rolls

 *Retrieve with Longshot
Dark Link Boss Guide

Boss Movements
| Movement | Effect |
|---|---|
| Sword Attacks | Uses vertical and horizontal sword slashes |
| Evasion | Evades attacks such as Spin Attack and magic |
| Sword Pin | Counterattacks when you use a stab attack |
How to Defeat and Tips
Dark Link is notoriously one of the hardest boss fights in Ocarina of Time. It mirrors your every move and even employs teleports to get the drop on you.
Mirrors Moves & Melee Attacks
Dark Link will mirror your movements and your horizontal and vertical sword attacks. It cannot copy item usage, magic, and the spin attack, but it will dodge them.
Becomes More Aggressive as It Turns Darker

At the start of the fight, Dark Link will be semi-transparent and will only mirror your moves. It will turn darker as the fight goes on and will become more aggressive, becoming capable of attacking on its own.
Attack After Its Dodge Recovery
Create openings by making Dark Link dodge either by doing moves it cannot copy or when you close in on it. The Shield Stab is great for this since it comes out fast and is easy to land. This is best done by cornering it againt a wall.
Avoid Using the Stab Attack
| How to do the Stab attack |
|---|
+Up+ |
Dark Link is able to counter your Stab attack when it has turned darker in shade. It will jump on your sword and counter you so avoid using the Stab attack.
Din's Fire is Recommended
Dark Link cannot block Din's Fire, making it very effective against it. Close the distance between you and Dark Link to ensure that Din's Fire connects.
Will Teleport Behind When Damaged
Dealing damage to Dark Link will cause it to disappear and reappear behind you. When it has turned a darker shade, when it teleports, it will immediately attack so watch out.
Guide to Easily Defeat Dark Link
- Land one normal attack as soon as you engage
- Hit it once with the Megaton Hammer
- From then on, just keep attacking with the Megaton Hammer
Land One Normal Attack
When Dark Link appears near the tree, approach and perform one normal vertical or horizontal slash. Dark Link will parry this, which will open it up to your next step.
Hit It Once With the Megaton Hammer
Immediately switch to the Megaton Hammer, close in, and land a hit. This causes Dark Link to not raise its shield.
Keep Attacking With the Megaton Hammer
It will then teleport behind you so turn around and hit it with the Megaton Hammer. Repeat this sequence every time it teleports until you beat it.
Morpha Boss Guide

Boss Movements
| Movement | Effect |
|---|---|
| Tentacle Attack | Uses tentacles to constrict and pull Link into the water |
How to Defeat and Tips
- Use the Hookshot to pull out the core and attack
└Cornering it at the edge of the room lets you finish it without it retreating into the water - Watch out — tentacle attacks deal heavy damage
- In the second phase, the number of tentacles increases to two
When fighting Morpha in Ocarina of Time, use the Hookshot to pull out the core and attack. The attacks hit hard, but there is only one attack pattern, so the basic strategy is to keep your distance and wait for the core to emerge.
Use the Hookshot to Pull Out the Core and Attack
Morpha can only be damaged when its core is moving around outside the water. When the core approaches through a tentacle, pull it out with the Hookshot and slash it with your sword.
Cornering It at the Edge of the Room Lets You Finish It Off Without It Retreating
Normally, when you pull Morpha's core out with the Hookshot, it will retreat back into the water. Pull the core out near a corner of the room and use the Hookshot and sword attacks to drive it into the corner so the core can no longer escape back into the water.
Watch Out — Tentacle Attacks Deal Heavy Damage

When Morpha's tentacle attack connects, you get grabbed and dragged into the water. The damage is also significant, so be careful. Since the only attack pattern is the tentacle attack, the safe approach is to keep your distance, wait for the core to appear, and hit it with the Hookshot at maximum range.
Second Phase: Tentacle Count Increases to Two

When Morpha's HP drops, it increases the number of tentacles to two. The attack pattern does not change, so keep the same strategy while watching out for the additional tentacle.
Ocarina of Time Related Articles
 Story Walkthrough - All Chapters
 1. Opening
 2. Great Deku Tree
 3. Hyrule Castle
 4. Dodongo's Cavern
 5. Lord Jabu-Jabu
 6. Forest Temple
 7. Fire Temple
 8. Ice Cavern
 9. Water Temple
 10. Bottom of the Well
 11. Shadow Temple
 12. Gerudo Fortress
 13. Spirit Temple
 14. Ganon's Castle











