

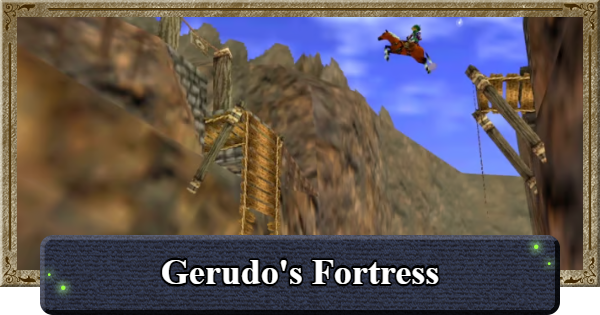
This is a full walkthrough of Gerudo's Fortress in Ocarina of Time, including the locations of the 4 Carpenters, how to enter the fortress, and how to cross the broken bridge.
| ◀ Previous | Next ▶ |
|---|---|
| Shadow Temple | Spirit Temple |
Table of Contents
Gerudo's Fortress Location
Head West Across Hyrule Field
Reach Gerudo's Fortress by heading west from Hyrule Field through Gerudo Valley. You'll need Epona or the Longshot to cross the broken bridge, so obtain either one beforehand.
Head West from Hyrule Field to Gerudo Valley


With Epona or the Longshot in hand, head west across Hyrule Field to reach Gerudo Valley.
Cross the Broken Bridge then Follow the Path

Once you reach Gerudo Valley, use Epona or the Longshot to cross the broken bridge. Then, follow the path straight ahead to arrive at Gerudo's Fortress.
Gerudo's Fortress Walkthrough
| Table of Contents (Tap to Jump) | |
|---|---|
| 1 | ▼ Rescue the 1st and 2nd Carpenters |
| 2 | ▼ Rescue the 3rd and 4th Carpenters |
| 3 | ▼ Haunted Wasteland to the Colossus |
Rescue the 1st and 2nd Carpenters

- Switch to Nighttime
- Infiltrate from Northernmost Entrance
- Proceed to Locate Imprisoned Carpenter
- Defeat the Gerudo Thief
- Unlock the Cell and Rescue Ichiro
- Move Forward and Enter the Left Entrance
- Follow the Path and Take the Right Fork
- Continue South and Re-enter the Fortress
- Defeat Another Gerudo Thief
- Unlock the Cell and Rescue Ichiro
Infiltrate the Gerudo Fortress at night to rescue the first two carpenters. Defeat the Gerudo guards protecting each cell and follow the correct path through the fortress to reach both prisoners.
See Full Walkthrough DetailsSwitch to Nighttime

Sneak through Gerudo Fortress without being seen by the guards. Since Gerudo have poor eyesight at night, switch to nighttime using the Sun's Song or by waiting outside before entering the fortress.
Ocarina Songs and Sheet Music ListInfiltrate from Northernmost Entrance

Once you arrive at Gerudo Fortress, climb the stairs on the right and head for the entrance on the upper left.
Stun Guards with the Bow
If a roaming guard inside the fortress spots you, you will be thrown into a jail cell. You can stun them with an arrow, so use Z-Targeting to neutralize enemies as you advance.
Use the Upper Window to Escape Prison
If a guard catches you and throws you in a cell, fire the Hookshot at the upper window and climb onto the ledge. Then drop straight down and enter the nearby entrance to get back to your previous route.
Proceed to Locate Imprisoned Carpenter

Follow the path through the fortress to find a carpenter locked in a jail cell, then talk to him.
Defeat the Gerudo Thief
| Tips for Fighting Gerudos |
|---|
| - Their attacks are fast, so keep your shield up at all times. - Dodge their spin attack and counterattack when open. L Getting hit returns you to jail, so prioritize guarding. - Use Deku Nuts to stagger them and create openings. |
Talking to the carpenter triggers a Gerudo fight. Keep your shield up, sidestep their fast spin attack, and counterattack, as getting hit sends you straight to jail.
Unlock the Cell and Rescue Ichiro

Defeat Gerudo to obtain a Small Key, then unlock the jail cell and rescue the carpenter. Repeat this process to rescue all 4 carpenters and clear Gerudo Fortress.
Proceed and Take the Left Entrance
After defeating the Gerudo, keep moving forward. You will step outside, so head straight into the entrance on the left.
Follow the Path and Take the Right Fork
Once back inside the fortress, follow the path and take the right fork at the junction.
Continue South and Re-enter the Fortress
Once outside, head west then south, climb up the low ledge, and enter the entrance on the left.
Defeat Another Gerudo Thief

| Tips for Fighting Gerudos |
|---|
| - Their attacks are fast, so keep your shield up at all times. - Dodge their spin attack and counterattack when open. L Getting hit returns you to jail, so prioritize guarding. - Use Deku Nuts to stagger them and create openings. |
Talk to the imprisoned carpenter to trigger another Gerudo battle. Use Deku Nuts to stagger her and counterattack after the spin attack.
Unlock the Cell and Rescue Jiro
After defeating the Gerudo, unlock the cell and rescue the 2nd carpenter.
▲Back to topRescue the 3rd and 4th Carpenters

- Move Forward and Enter the Nearby Entrance
- Use the Hookshot to Cross and Follow the Path
- Exit and Drop Down One Level Below
- Inside the Fortress, Go Right then Left
- Defeat the Thief and Rescue Shiro
- Retrace Your Steps and Head Outside
- Descend Another Level and Re-Enter the Fort
- Proceed and Face the Gerudo Thief
- Rescue Sabooro and Get the Membership Card
Continue through the Gerudo Fortress to rescue the remaining two carpenters by navigating the upper levels and defeating the guards. After rescuing the fourth carpenter, you'll receive the Gerudo Membership Card, allowing you to move freely within the fortress.
See Full Walkthrough DetailsMove Forward and Enter the Nearby Entrance
Move forward, step outside, and immediately re-enter the entrance right in front of you.
Use the Hookshot to Cross and Follow the Path
Once back inside the fortress, fire the Hookshot at the ceiling pillars to cross the platforms and follow the path forward.
Exit and Drop Down One Level Below
Once outside the fortress, drop down one level and enter the entrance in front of you.
Inside the Fortress, Go Right then Left
Inside the fortress, proceed right then left. There are guards along the way, so hide behind crates and stun them with your bow as you advance.
Defeat the Thief and Rescue Shiro

| Tips for Fighting Gerudos |
|---|
| - Their attacks are fast, so keep your shield up at all times. - Dodge their spin attack and counterattack when open. L Getting hit returns you to jail, so prioritize guarding. - Use Deku Nuts to stagger them and create openings. |
You will fight another Gerudo at the jail cell, so prepare to dodge spinning attacks again and use Deku Nuts to create more openings defeat her to rescue the 3rd carpenter.
Retrace Your Steps and Head Outside
After the rescue, retrace your steps and head back outside. Watch out for guards on the way back just like on the way in.
Descend Another Level and Re-Enter the Fort
Once outside, drop down another level and enter the entrance.
Proceed and Face the Gerudo Thief
| Tips for Fighting Gerudos |
|---|
| - Their attacks are fast, so keep your shield up at all times. - Dodge their spin attack and counterattack when open. L Getting hit returns you to jail, so prioritize guarding. - Use Deku Nuts to stagger them and create openings. |
Follow the path inside and you will reach a jail cell where you will fight a Gerudo again.
Rescue Sabooro and Get the Membership Card

Rescue the 4th carpenter after defeating the Gerudo. Obtain the Gerudo Membership Card to explore the fortress freely by rescuing all carpenters.
The Broken Bridge in Gerudo Valley is Repaired
After rescuing all four carpenters, the broken bridge in Gerudo Valley is repaired, allowing you to cross without Epona or the Longshot.
Haunted Wasteland to the Colossus

Make your way through the Haunted Wasteland by using the Longshot or Hover Boots to cross the quicksand and following the desert's landmarks. Use the Lens of Truth to follow the Poe to the Desert Colossus, where you'll learn the Requiem of Spirit.
See Full Walkthrough DetailsPrepare the Longshot or Hover Boots
The Haunted Wasteland’s quicksand blocks progress on foot, so you need the Longshot or Hover Boots. Get the Longshot from the Water Temple or Hover Boots from the Shadow Temple if you do not have them yet.
Talk to Guard Above the Northwest Lookout

A watchtower is located northwest of Gerudo Fortress. Climb the ladder and talk to the guard at the top.
Head into the Haunted Wasteland

After talking to the guard, the gate in front of you opens, giving you access to the Haunted Wasteland.
Longshot Over the Quicksand
Once inside the Haunted Wasteland, cross the quicksand by using the Longshot on the crate ahead or walking across with the Hover Boots.
Getting Lost Sends You Back to the Entrance

In the Haunted Wasteland, follow the flags carefully, as taking the wrong route sends you back to the entrance.
Follow the Flags and Climb the Building
After crossing the quicksand, follow the west and north flags until you reach a building, then climb the slope at the side to enter.
Use the Lens of Truth on the Stone Tablet

Use the Lens of Truth in front of the stone tablet on top of the building. A Poe that will guide you through the desert will become visible.
Follow the Poe to the Colossus
Following the Poe will lead you to the Colossus. Keep the Lens of Truth active as you go so you don't lose sight of it.
Learn the Requiem of Spirit
Enter and exit the Spirit Temple to meet Sheik and learn the Requiem of Spirit, allowing you to return as young link and warp to the Spirit Temple.
Ocarina Songs and Sheet Music List▲Back to top| ◀ Previous | Next ▶ |
|---|---|
| Shadow Temple | Spirit Temple |
Ocarina of Time Related Articles
 Story Walkthrough - All Chapters
 1. Opening
 2. Great Deku Tree
 3. Hyrule Castle
 4. Dodongo's Cavern
 5. Lord Jabu-Jabu
 6. Forest Temple
 7. Fire Temple
 8. Ice Cavern
 9. Water Temple
 10. Bottom of the Well
 11. Shadow Temple
 12. Gerudo Fortress
 13. Spirit Temple
 14. Ganon's Castle











