

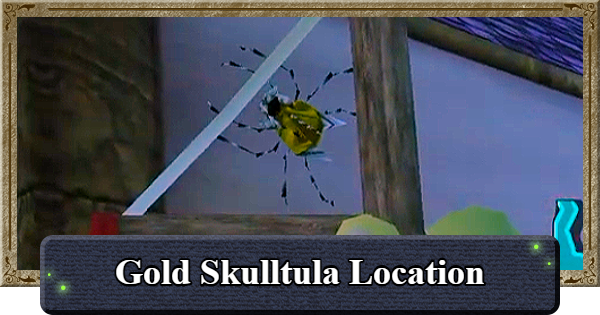
There's a total of 100 Gold Skulltulas in Ocarina of Time that can be collected and returned to the House of Skulltula. Read on for all locations, requirements, and all rewards.
Table of Contents
Gold Skulltula Location List
- Inside the Deku Tree Skulltula 1Wall in the room with the compass


- Inside the Deku Tree Skulltula 2On the vines after falling through the web

 *Use the Slingshot
 - Inside the Deku Tree Skulltula 3Behind the iron bars at the bottom of the cobweb


- Kokiri Forest Skulltula 1Behind the Know-It-All Brothers' house


- Hyrule Castle Market Skulltula Inside the wooden crate in the building near the entrance

 *Roll into it to break
 - Hyrule Castle Skulltula 1In the tree surrounded by three small rocks

 *Roll into the tree
 - Lon Lon Ranch Skulltula 1In the tree inside the ranch

 *Roll into the tree
 - Lon Lon Ranch Skulltula 2On the outside of the ranch fence


- Kakariko Village Skulltula 1In the tree near the entrance

 *Roll into the tree
 - Kakariko Village Skulltula 2On the wall of the building under construction


- Kakariko Village Skulltula 3On the outer wall of the Skulltula House


- Kakariko Village Skulltula 4On the ladder of the watchtower

 *Use the Slingshot
 - Kakariko Village Skulltula 5On the outer wall of the building near the Death Mountain entrance


- Kokiri Forest Skulltula 2In the soil next to the Kokiri shop

 *Release a Bug from a Bottle
 - Lost Woods Skulltula 1In the soil in the southwest area

 *Release a Bug from a Bottle
 - Lost Woods Skulltula 2In the soil in the central area

 *Release a Bug from a Bottle
 - Graveyard Skulltula 1In the soil in the northwest

 *Release a Bug from a Bottle
 - Death Mountain Trail Skulltula 1In the soil at the entrance to Dodongo's Cavern

 *Release a Bug from a Bottle
 - Dodongo's Cavern Skulltula 1In the room filled with Bomb Flowers

 *Use the Slingshot
 - Dodongo's Cavern Skulltula 2Past the wall in the eastern corridor on 1F

 *Use a Bomb to destroy the wall
 - Dodongo's Cavern Skulltula 3Past the wall in the north on 1F

 *Use a Bomb to destroy the wall
 - Goron City Skulltula 1In the wooden crate in the northwest room

 *Use Bombs to destroy rocks as you advance and roll into it to break
 - Death Mountain Crater Skulltula 1In the wooden crate near the entrance

 *Roll into it to break
 - Zora's River Skulltula 1In the tree near the entrance

 *Roll into the tree
 - Zora's River Skulltula 2On the ladder near the waterfall


- Lake Hylia Skulltula 1In the soil near the Lake Hylia Laboratory

 *Release a Bug from a Bottle
 - Lake Hylia Skulltula 2On the side of the stone monument on the small island


- Zora's Fountain Skulltula 1In the tree on the land to the southeast

 *Roll into the tree
 - Inside Jabu-Jabu's Belly Skulltula 1On the wall in the area before the Boss room


- Inside Jabu-Jabu's Belly Skulltula 2Past the hole in the central area of 1F

 *Retrieve with Boomerang
 - Inside Jabu-Jabu's Belly Skulltula 3Past the hole in the central area of 1F
 *Retrieve with Boomerang
 - Inside Jabu-Jabu's Belly Skulltula 4On the vines in the eastern area of B1F

 *Raise the water level by pressing the switch, or retrieve with Boomerang
 - Zora's Fountain Skulltula 2On the wall visible from the floating log

 *Retrieve with Boomerang
 - Lake Hylia Skulltula 3On the outer wall of the Lake Hylia Laboratory

 *Retrieve with Boomerang
 - Dodongo's Cavern Skulltula 4Above the stairs in the room filled with Bomb Flowers

 *Go around to the upper floor and retrieve it and retrieve with Boomerang
 - Death Mountain Trail Skulltula 2Past the broken wall

 *Use a Bomb to destroy the wall and retrieve with Boomerang
 - Graveyard Skulltula 2On the wall to the southeast

 *Retrieve with Boomerang
 - Lon Lon Ranch Skulltula 3On the outer wall of the building's second floor

 *Retrieve with Boomerang
 - Lon Lon Ranch Skulltula 4On the outer wall to the southwest

 *Retrieve with Boomerang
 - Hyrule Field Skulltula 1In the hole at the base of the tree near Kakariko Village

 *Use a Bomb at the base of the tree and retrieve with Boomerang
 - Hyrule Field Skulltula 2In the hole in the center of the stone circle to the west

 *Use a Bomb in the center of the circle and use Din's Fire to burn the spiderweb
 - Inside the Deku Tree Skulltula 4Past the wall in the room where three baby Gohmas appear

 *Use a Bomb to destroy the wall and retrieve with Boomerang
 - Kakariko Village Skulltula 6On the roof of the building to the south

 *Use the Hookshot to get on top of the Skulltula House roof, then move to the top of the building to the south
 - Sacred Forest Meadow Skulltula On the wall to the east


- Forest Temple Skulltula 1On the vines to the east in the first room


- Forest Temple Skulltula 2On the wall in the central hall on 1F


- Forest Temple Skulltula 3On the wall in the northeast room on 1F


- Forest Temple Skulltula 4On the wall in the northwest room on 1F


- Forest Temple Skulltula 5On the wall in the rotating floor area before the Boss room


- Kokiri Forest Skulltula 3On the roof of the Twins' House

 *Use the Hookshot to retrieve
 - Zora's River Skulltula 3On the wall near the pit

 *Use the Hookshot to retrieve
 - Zora's River Skulltula 4On the wall near the bridge

 *Use the Hookshot to retrieve
 - Zora's Domain Skulltula On the wall near the frozen waterfall

 *Retrieve with Hookshot
 - Goron City Skulltula 2On the rope-suspended platform

 *Retrieve with Hookshot
 - Hyrule Castle Skulltula 2In the hole near the tree at the bend in the water channel

 *Play the Song of Storms near the tree and destroy the wall inside the hole with a Bomb and retrieve with Boomerang
 - Fire Temple Skulltula 1In the room on the east side of 1F accessible via the Song of Time

 *Play the Song of Time to move the block
 - Fire Temple Skulltula 2In the room where a large boulder rolls

 *Destroy the wall with a Bomb
 - Fire Temple Skulltula 3On the fence reached by riding the rising floor

 *Use the Scarecrow's Song to summon the scarecrow and use the Hookshot to move to the upper floor
 - Fire Temple Skulltula 4On the wall in the room with the large hole on 5F

 *Retrieve with Hookshot
 - Fire Temple Skulltula 5Past the door beside the stairs at the temple entrance


- Dodongo's Cavern Skulltula 5In the corridor to the east on 1F

 *Scarecrow's Song and retrieve with Hookshot
 - Death Mountain Trail Skulltula 3Behind the large boulder near the Bomb Flowers

 *Use the Megaton Hammer to destroy the large boulder
 - Death Mountain Trail Skulltula 4Behind the large boulder partway up the path to the summit

 *Use the Megaton Hammer to destroy the large boulder
 - Death Mountain Crater Skulltula 2In the soil near the warp point

 *Warp with Bolero of Fire and release a Bug from a Bottle
 - Ice Cavern Skulltula 1On the wall in the room with spinning blades

 *Retrieve with Hookshot
 - Ice Cavern Skulltula 2On the wall in the room with moveable ice platforms

 *Retrieve with Hookshot
 - Ice Cavern Skulltula 3Wall in the room with the compass

 *Retrieve with Hookshot
 - Lake Hylia Skulltula 4In the wooden crate at the bottom of the pool inside the Lake Hylia Laboratory

 *Dive with Iron Boots and Roll to break it, then retrieve with Hookshot
 - Water Temple Skulltula 1At the end of the path to the south on the lowest level

 *Use a Bomb to destroy the floor and proceed; after moving with the Hookshot, activate the switch inside the iron bars with a Spin Attack or similar
 - Water Temple Skulltula 2On the wall in the room where platforms move diagonally

 *Retrieve with Longshot
 - Water Temple Skulltula 3On the wall of the water channel filled with whirlpools
 *Stand still with Iron Boots and retrieve with Longshot
 - Water Temple Skulltula 4On the wall inside the central building

 *Retrieve with Longshot
 - Water Temple Skulltula 5On the wall of the water channel where a large boulder rolls

 *Retrieve with Longshot
 - Lake Hylia Skulltula 5Atop the tree near the warp point

 *Climb the tree with Longshot
 - Bottom of the Well Skulltula 1Past the locked door to the west of the central hall

 *Use a Small Key to open the door and retrieve with Boomerang
 - Bottom of the Well Skulltula 2Past the locked door to the east of the central hall

 *Use a Small Key to open the door and retrieve with Boomerang
 - Bottom of the Well Skulltula 3Past the locked door in the eastern corridor

 *Use a Small Key to open the door and retrieve with Boomerang
 - Shadow Temple Skulltula 1Inside the cell in the room with spikes moving up and down


- Shadow Temple Skulltula 2On the wall behind the large skull pot


- Shadow Temple Skulltula 3In the room beyond the room with invisible spinning blades

 *Defeat all enemies in the room and proceed
 - Shadow Temple Skulltula 4On the wall in the room where the boat is docked

 *Play Scarecrow's Song then move with Longshot to retrieve
 - Shadow Temple Skulltula 5On the wall in the room with three large spinning skull pots


- Gerudo Valley Skulltula 1On the wall behind the tent


- Gerudo Valley Skulltula 2On the arch-shaped rock

 *Retrieve with Hookshot
 - Gerudo's Fortress Skulltula 1On the wall on top of the fortress roof

 *Retrieve with Hookshot
 - Gerudo's Fortress Skulltula 2On the target to the northeast

 *Retrieve with Hookshot
 - Haunted Wasteland Skulltula On the wall inside the building

- Desert Colossus Skulltula 1In the palm tree to the south

 *Retrieve with Longshot
 - Desert Colossus Skulltula 2On top of the rock near the center

 *Retrieve with Longshot
 - Gerudo Valley Skulltula 3On the wall near the wooden bridge

 *Retrieve with Boomerang
 - Gerudo Valley Skulltula 4In the soil near the river

 *Release a Bug from a Bottle
 - Desert Colossus Skulltula 3In the soil near the entrance to the Spirit Temple

 *Release a Bug from a Bottle
 - Spirit Temple Skulltula 1In the room with the fence

 *Retrieve with Boomerang
 - Spirit Temple Skulltula 2In the vertical shaft leading to the room where a Bombchu breaks the wall

 *Retrieve with Boomerang
 - Spirit Temple Skulltula 3In the corridor before the room with the Iron Knuckle

 *Retrieve with Boomerang
 - Spirit Temple Skulltula 4Behind the block in the room where boulders roll

 *Play the Song of Time to move the block
 - Spirit Temple Skulltula 5On the wall to the right side of the large statue

 *Retrieve with Longshot
 - Zora's Fountain Skulltula 3Past the hole beneath the rock

 *Move the boulder with Silver Gauntlets
 - Lost Woods Skulltula 3On the high ledge

 *Plant a Magic Bean in the nearby soil as a child, then visit as an adult
 - Ganon's Castle Skulltula Behind the broken gate to the east


Gold Skulltula Reward List
| Tokens | Reward |
|---|---|
| 10 Tokens | Adult's Wallet (Hold up to 200 Rupees) |
| 20 Tokens | Stone of Agony |
| 30 Tokens | Giant's Wallet (Hold up to 500 Rupees) |
| 40 Tokens | Bombchu x10 |
| 50 Tokens | Heart Piece |
| 100 Tokens | 200 Rupees (repeatable every time you talk to them) |
There are six types of rewards available from Gold Skulltulas in Ocarina of Time. Since the wallet upgrades increase the amount of Rupees you can carry and expand your purchasing options, it is recommended to collect at least 30 Gold Skulltula Tokens.
What are Gold Skulltulas?
A Collectible Found in Each Map
Gold Skulltulas are collectible enemies in Ocarina of Time that drop Gold Skulltula Tokens when defeated. There are 100 tokens in total, and the rewards improve as you collect more of them. If you're aiming for full completion, it's worth tracking down all 100.
Rewards Available at the House of Skulltula

You can get your rewards by going to the House of Skulltula in Kakariko Village and talking to the people who have been freed from the curse.
Collect 100 to get infinite Rupees
Collecting 100 tokens will allow you to get infinite Rupees. By going to the House of Skulltula and talking to the person freed from the curse, you can get 200 Rupees as many times as you want.
Ocarina of Time Related Articles

Recommended Guides
| Story Walkthrough | Boss Guide | Side Quests | Minigames |
| Equipment | Items | Ocarina Songs | Piece of Heart |
| Gold Skulltulas | Magic Beans | Scarecrow's Song | Post-Game Content |
 Switch 2 Remake News
 How to Play on Switch











