

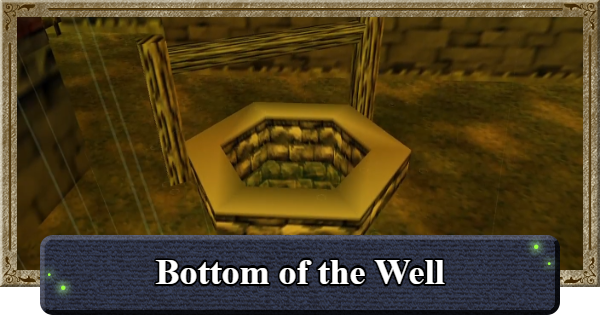
This is a full walkthrough of Bottom of the Well in Ocarina of Time, including Gold Skulltulas' location in Bottom of the Well, how to enter, and the location of the Lens of Truth.
| ◀ Previous | Next ▶ |
|---|---|
| Water Temple | Shadow Temple |
Table of Contents
Bottom of the Well Location
Play Song in Kakariko Windmill
The Bottom of the Well in Ocarina of Time can only be accessed as a child, through the well in the center of Kakariko Village. The well is filled with water at first and cannot be entered, so play the Song of Storms at the windmill to drain the water.
Learn the Song of Storms in Kakariko Village


First, learn the Ocarina song, Song of Storms, as an adult. Head to the windmill in Kakariko Village, then talk to the man inside and take out your ocarina to have him teach you the song.
Return as Child to Play Song of Storms in the Windmill

After learning the Song of Storms, return to the Temple of Time and place the Master Sword back into its pedestal to become Child Link. Then, head to the windmill in Kakariko Village and play the Song of Storms.
Enter the Well in the Center of the Village

Playing the Song of Storms will drain the water from the well in the center of the village. Jump straight down to arrive at the Bottom of the Well.
Bottom of the Well Walkthrough
| Table of Contents (Tap to Jump) | |
|---|---|
| 1 | ▼How to Get Lens of Truth |
| 2 | ▼Additional Side Quests |
How to Get the Lens of Truth

Go Through the Crawlspace and Follow Path

Once you reach the Bottom of the Well, pass through the small crawlspace and follow the path forward.
Pass Through the Dead-End Wall

Following the path will lead you to a dead end, but the wall is fake, and you can walk straight through it.
Play Zelda's Lullaby at the North Crest

| Zelda's Lullaby |
|---|
 |
Continue further, and you will enter a large hall. Go around to the north side via either the east or west passage, and play Zelda's Lullaby on top of the Royal Family's Crest.
Return to Entrance and Enter the Drained Hole

Return to the entrance side. With the water drained, enter the hole, collect the Bombs from the chest, and continue through the passage.
Follow the Path and Fight Dead Hand

Follow the path to fight Dead Hand. Let one of the hands grab you to make its body appear. When it lowers its head to attack, strike it with your sword. Repeat until Dead Hand is defeated.
Open the Chest to Get the Lens of Truth
Defeat Dead Hand, and a treasure chest will appear. Open it to obtain the Lens of Truth. With this, your main objective in the Bottom of the Well is complete. You can now leave and head to the Shadow Temple, or stay to find the remaining optional items.
Additional Side Quests

- Enter Hidden Room From West Side of Hall
- Get the Compass From the Large Chest
- Jump Through the Hole to the Lower Floor
- Get the Dungeon Map Between Lit Torches
- Collect 5 Silver Rupees and Return Upstairs
- Find the Hidden East and West Small Keys
- Go West Down the Passage to a Small Room
- Light the Back-Left Torch to Get a Small Key
Enter Hidden Room From West Side of Hall
Return to the large hall, and there is a hidden room facing inward from the west side. Use the Lens of Truth and hidden rooms will become visible at the cost of MP, so make use of it.
Get the Compass From the Large Chest

There is a large treasure chest in the hidden room. Open it to obtain the Compass.
Jump Through the Hole to the Lower Floor

With your back to the treasure chest that held the Compass, continue forward, and you will fall through a hole to the lower floor. If you can't find the hole, use the Lens of Truth.
Get the Dungeon Map Between Lit Torches

Drop to the lower floor and follow the path between the lit torches. Bomb the rocks, then open the chest ahead to get the Dungeon Map.
Collect 5 Silver Rupees and Return Upstairs

After getting the Dungeon Map, collect all 5 Silver Rupees. Three are on the lower floor, and two are above the ladder near the blue flame torch. The door by the fifth Silver Rupee leads back to the upper floor.
Find the Hidden East and West Small Keys
| West Hidden Room |
|---|
| East Hidden Room |
There are hidden rooms near the entrance of both the east and west passages of the large hall. Open the treasure chests inside to obtain one Small Key each.
Go West Down the Passage to a Small Room

Follow the west passage, and around the middle, you will find a corridor leading further west. Drop down once, then climb the wall ahead and proceed through the door.
Light Back-Left Torch to Get a Small Key
Light the back-left torch with a Deku Stick to open the nearby coffin and get the Small Key. Ignore the other coffins, as they only spawn enemies.
Items Available After Obtaining the Small Key
| Items Requiring a Small Key | |
|---|---|
| Deku Shield | Hylian Shield |
| Gold Skulltula ×3 | - |
*If you already have a shield, you will obtain 5 Rupees instead.
Once you have all 3 Small Keys, you will be able to access every area in the Bottom of the Well. Items such as Gold Skulltulas can be collected, so gather them all if you have time.
| ◀ Previous | Next ▶ |
|---|---|
| Water Temple | Shadow Temple |
Gold Skulltula Locations
- Bottom of the Well Skulltula 1Past the locked door to the west of the central hall

 *Use a Small Key to open the door and retrieve with Boomerang
 - Bottom of the Well Skulltula 2Past the locked door to the east of the central hall

 *Use a Small Key to open the door and retrieve with Boomerang
 - Bottom of the Well Skulltula 3Past the locked door in the eastern corridor

 *Use a Small Key to open the door and retrieve with Boomerang
Ocarina of Time Related Articles
 Story Walkthrough - All Chapters
 1. Opening
 2. Great Deku Tree
 3. Hyrule Castle
 4. Dodongo's Cavern
 5. Lord Jabu-Jabu
 6. Forest Temple
 7. Fire Temple
 8. Ice Cavern
 9. Water Temple
 10. Bottom of the Well
 11. Shadow Temple
 12. Gerudo Fortress
 13. Spirit Temple
 14. Ganon's Castle











