

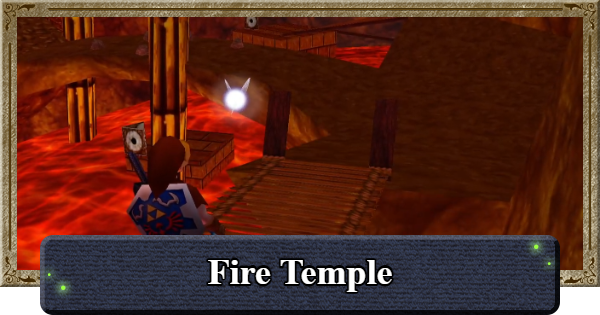
This is a full walkthrough of the Fire Temple in Ocarina of Time, including the Gold Skulltulas' location in the Fire Temple, strategy, and tips for defeating Boss Volvagia.
| ◀ Previous | Next ▶ |
|---|---|
| Forest Temple | Ice Cavern |
Table of Contents
Fire Temple Location
Head to Darunia's Room in Goron City
The Fire Temple in Ocarina of Time is accessible from Darunia's room on the lowest floor of Goron City. You need the Goron Tunic to get through, so stop the rolling Goron on the second floor of Goron City to receive the Goron Tunic.
Stop the Rolling Goron in Goron City
First, head to Goron City and stop the rolling Goron on the third floor by hitting it with an explosion. There are two Bomb Flowers available, so try a few times to get the timing right. After stopping the Goron, talk to it to receive the Goron Tunic.
Equip the Goron Tunic


Equip the Goron Tunic before heading to the next area. You cannot proceed through Death Mountain Crater without wearing it, so make sure to equip it beforehand.
Darunia's Room to Death Mountain Crater

Once you have the Goron Tunic, descend to the lowest floor and head to Darunia's room. Move the stone statue where Darunia was standing to reveal a hidden passage leading to Death Mountain Crater.
Cross the Broken Bridge Using the Hookshot

Once inside Death Mountain Crater, head to the broken suspension bridge slightly to the left. You cannot cross it by jumping, so use the Hookshot instead. After crossing, a cutscene with Sheik will begin, and you will learn the Ocarina Song, Bolero of Fire.
Head North to the Fire Temple

After the cutscene, head north toward the Fire Temple.
Fire Temple Walkthrough
How to Get to the 2nd Floor

- Enter the Left Door via the Front Stairs
- Go Left Through the Rocky Area to Rescue Goron
- Return to Front Stairs and Enter the Opposite Room
- Cross the Suspension Bridge and Break the Wall
- Rescue the Goron Across the Room
- Return to the Bridge and Use Left Door
- Climb the Chain-link Fence on the Right Side
- Drop to the Center and Push the Block Down
- Jump on the Block and Go to the 2nd Floor
Enter the Left Door via the Front Stairs

Once you enter the Fire Temple, climb the stairs and head left to trigger a cutscene.
Go Left Through the Rocky Area to Rescue Goron

After the cutscene, jump across the platforms on the left and head to the cage. Press the switch nearby to open the cage and rescue the Goron. Afterward, be sure to collect the Small Key from the chest inside the cage.
Return to Front Stairs and Enter the Opposite Room

After rescuing the Goron, return to the stairs and proceed into the locked room across the way.
Cross the Suspension Bridge and Break the Wall

Cross the suspension bridge and go around the rocky area on the right. You'll find a bombable
wall. On the other side, enter a small room to rescue the Goron. Like before, there's a Small Key in the chest, so don't forget to grab it.
Rescue the Goron Across the Room

Exit the small room and cross to the other side. You can rescue another trapped Goron by pressing the switch to release them. Don't forget to grab the third key while you're here.
Return to the Bridge and Use Left Door

Return to the suspension bridge and traverse the platform on the left. Proceed through the locked door.
Climb the Chain-link Fence on the Right Side

Climb the chain-link fence on the right side. Keese lurk at the top, so we recommend raising your shield as soon as you reach the top to safely check for any enemies.
Drop to the Center and Push the Block Down

From above the fence, drop to the center and push the block down.
Jump on the Block and Go to the 2nd Floor
After knocking the block down, jump onto it and head up to the 2nd floor.
How to Get the Dungeon Map

- Climb the Left Ledge and Reach the Switch
- Line Up the Block With the Groove
- Use the Block to Climb the Fence
- Activate the Switch and Climb the Fence
- Open the Door and Go to the Next Floor
- Head to the Right Room While Dodging Boulders
- Rescue the Goron in the Other Small Room
- Go Right After Exiting and Enter the Locked Door
- Shoot the Upper-Right Eye With Your Bow
- Get the Dungeon Map in the Unlocked Room
Climb the Left Ledge and Reach the Switch
Inside the room with the blue walls, climb the ledge on the left and jump to the platform with the switch. The Torch Slugs will damage you if you touch them, so fight them from a comfortable distance.
Line Up the Block With the Groove
After jumping across, push the block into the groove below. Then push it further until it won't move anymore.
Use the Block to Climb the Fence

With the block in place, use it as a platform to reach the adjacent platform. Then climb the fence to reach the upper level.
Activate the Switch and Climb the Fence

Activate the switch from the top of the ledge using either the Hookshot or a Bomb. Aiming from the edge of the ledge makes it easier to line up the shot. After activating the switch, wait for the camera to stop moving, then climb the ledge and scale the fence.
Open the Door and Go to the Next Floor

Continue on and open the door to advance to the next floor.
Head to the Right Room While Dodging Boulders
There will be boulders rolling around on the next floor. Getting hit causes damage so avoid the boulders and make your way to the room on the right. Rescue the imprisoned Goron and collect the Small Key from the chest.
Rescue the Goron in the Other Small Room
Return to the room with rolling boulders and head to the other side. Rescue the Goron there as well and collect the Small Key as usual.
Go Right After Exiting and Enter the Locked Door
Return to the room with rolling boulders, head to the right, and enter the locked door.
Shoot the Upper-Right Eye With Your Bow

The door on the right is blocked. There is an eye on the upper wall that must be shot with your Bow to unlock it.
Get the Dungeon Map in the Unlocked Room
Continue forward and get the Dungeon Map from the chest. It's easy to fall off the narrow platforms, so move carefully.
How to Get the Compass

- Return to the Previous Room and Go Right
- Jump Over the Fences to the Northeast Room
- Cross the Platforms and Bomb the Floor
- Jump Into the Hole and Rescue the Goron
- Climb the Fence and Return to the Last Room
- Cross Platforms and Rescue the South Goron
- Go Back to the Lava Room and Enter West Door
- Get the Compass From the Northeast Room
Return to the Previous Room and Go Right

Return to the previous room and carefully traverse the platforms to enter the room on the right.
Jump Over the Fences to the Northeast Room
Jump over the fences and make your way to the northeast room. Fire will begin to encroach towards you, so move quickly.
Cross the Platforms and Bomb the Floor

Jump across the platforms and blow up the cracked floor with a Bomb.
Jump Into the Hole and Rescue the Goron

Drop down through the hole, follow the path, rescue the Goron, and collect the Small Key.
Climb the Fence and Return to the Last Room

Climb the fence and return to the room above.
Cross Platforms and Rescue the South Goron
Once back in the upper room, cross the platforms and rescue the Goron to the south.
Go Back to the Lava Room and Enter West Door

Retrace your steps to the northwest and return to the fence-and-lava room. From there, follow the fence to reach the locked door to the west.
Get the Compass From the Northeast Room
Follow the corridor to come out into an open room. Head northeast and get the Compass from the chest in the small room. This area contains multiple hazards: flame throwers, rolling boulders, and fire walls that appear when you get close, so proceed with caution.
How to Get the Megaton Hammer

Go to the South Locked Door
Exit the small room and head to the locked door on the south side. Be mindful of the hazards ahead.
Use the Northwest Switch and Enter West Door
Head through the door and emerge on the other side of the hazardous room. Press the northwestern switch and head towards the western door. This door is fake, so blow it up and enter the real door behind it.
Defeat Flare Dancer Past the Door
| Walkthrough Tips |
|---|
| - Focus on guarding while it circles the perimeter - When it stops, use the Hookshot to pull out the core and counterattack - Watch out for the fire on the ground L The blue-purple flames home in on you, so guard while running away |
A Flare Dancer awaits beyond the door. Focus on guarding and watch out for the fire on the ground while it circles the area. When it stops moving, use the Hookshot to pull out its core and attack. The core will run away, so circling around from the opposite side makes it easier to land hits.
Ride the Central Pedestal to the Upper Floor

With the Flare Dancer defeated, step onto the central pedestal and go to the upper floor.
Activate the Switch Above and Climb

Go right and climb the upper level. Use the switch with a Bomb from the upper level, then climb the fence now that the fire is out.
Press Switch and Cross Before Time Runs Out

Inside the next room, press the switch and then cross the platforms to reach the top within the time limit.
Get the Megaton Hammer Beyond the Platforms
At the top is a chest containing the Megaton Hammer. This item is essential for clearing the puzzles ahead.
How to Get to the Boss Room
- Return Down the Platforms and Hammer the Block
- Hit the Pillar From the Side and Enter the Door
- Strike the Block to Reveal a Staircase
- Carry the Wooden Crate Downstairs
- Smash the Block and Drop Down
- Hit the Rusted Switch With the Hammer
- Enter the Open Door and Play the Song of Time
- Cross the Platforms and Hammer the Switch
- Rescue the Goron to Get the Small Key
- Hit the Block In the Previous Room
Return down the platforms and hammer the block

After getting the Megaton Hammer, head back down and strike the face block on the ground with the Hammer. This reveals a hole, so drop into it.
Hit the pillar from the side and enter the door

In the room below, there is a face pillar. Strike it from the side with the Hammer to move it out of the way and reveal a door.
Strike the block to reveal a staircase

The next room also has a face block. Strike it with the Hammer to reveal a staircase.
Carry the wooden crate downstairs

Pick up the wooden crate and carry it down the stairs. Place the crate on the switch and proceed through the door.
Smash the block and drop down

This room also has a face block. Strike it with the Hammer and drop down.
Hit the rusted switch with the Hammer

After dropping through the hole, there is a rusted switch nearby. Strike it with the Hammer. This allows you to enter the door behind you.
Enter the open door and play the Song of Time

Enter the room beyond the door and play the Song of Time on your Ocarina.
Cross the platforms and hammer the switch

Platforms will appear below. Cross them to reach the other side. Strike the switch on the other side with the Hammer to open the cage.
Rescue the Goron to get the Small Key

With the cage opened, drop down into the corridor below and rescue the Goron. Don't forget to grab the Small Key from the chest.
Hit the Block In the Previous Room

Climb the platforms and return to the previous room, then strike the face block with the Hammer to knock it down. The fallen block can be used as a stepping stone, allowing you to reach the Boss Room. A hole also opens where the block was, so drop straight down to the 1st floor.
How to Get Key and Defeat Boss

- Go Through the Unlocked Door to the First Room
- Hammer the East Pillar then Defeat the Enemies
- Use Guard on Flying Tiles and Defeat Like Like
- Fight Flare Dancer in the Next Room
- Get Bombs From Chest and Enter Next Room
- Open the Cage and Get the Boss Key
- Use the Door Ahead to Return to the 1st Room
- Go Left of the Stairs and Enter Boss Room
- Fight Boss Volvagia Across the Platforms
- Enter the Warp and Get the Fire Medallion
Go Through the Unlocked Door to the First Room

After dropping to the 1st floor, head through the unlocked door and return to the first room.
Hammer the East Pillar then Defeat the Enemies

There is a face pillar east of the stairs. Strike it from the side with the Hammer to move it, then proceed through the next room. Defeat all enemies inside to unlock the door.
Use Guard on Flying Tiles and Defeat Like Like

Inside the next room, floor tiles will fly at you. Use your shield to deflect them all. After, defeat the Like Like lurking in the back. You'll lose your tunic and shield if you get swallowed, but you can recover both by defeating it, so don't forget to re-equip yourself once you get them back.
Fight Flare Dancer in the Next Room

| Walkthrough Tips |
|---|
| - Focus on guarding while it circles the perimeter - When it stops, use the Hookshot to pull out the core and counterattack - Watch out for the fire on the ground L The blue-purple flames home in on you, so guard while running away |
In the next room, you will fight Flare Dancer again. Just as the first time, use your shield and Hookshot skillfully to defeat it.
Get Bombs From Chest and Enter Next Room

After defeating Flare Dancer, a chest will appear on the central pedestal. Open it to get Bombs. Then proceed to the next room.
Open the Cage and Get the Boss Key

Follow the path to find a rusted switch. Strike it with the Hammer. Open the cage to rescue the Goron, then get the Boss Key from the chest.
Use the Door Ahead to Return to the 1st Room

After getting the Boss Key, proceed forward. Opening the door will take you back to the first room.
Go Left of the Stairs and Enter Boss Room

Climb the stairs and go through the room on the left. Opening the large locked door will take you to the Boss Room.
Fight Boss Volvagia Across the Platforms
| Walkthrough Tips |
|---|
| - Strike with the Hammer when it emerges from a hole L It may feint when low on health - Attack with the Bow while it is flying - For the falling rock attack, hang on the edge of a platform to avoid it |
Once inside the Boss Room, cross the platforms and head to the center. You will face off against Volvagia. When it emerges from the ground, strike it with the Hammer to to create an opening to attack. The falling rocks won't hit you if you hang onto a ledge, so fly up high and grab the edge.
Enter the Warp and Get the Fire Medallion

After defeating Volvagia, collect the Heart and enter the warp point. After the cutscene, you will obtain the Fire Medallion.
| ◀ Previous | Next ▶ |
|---|---|
| Forest Temple | Ice Cavern |
Gold Skulltula Locations
- Fire Temple Skulltula 1In the room on the east side of 1F accessible via the Song of Time

 *Play the Song of Time to move the block
 - Fire Temple Skulltula 2In the room where a large boulder rolls

 *Destroy the wall with a Bomb
 - Fire Temple Skulltula 3On the fence reached by riding the rising floor

 *Use the Scarecrow's Song to summon the scarecrow and use the Hookshot to move to the upper floor
 - Fire Temple Skulltula 4On the wall in the room with the large hole on 5F

 *Retrieve with Hookshot
 - Fire Temple Skulltula 5Past the door beside the stairs at the temple entrance


Volvagia Boss Guide

Boss Movements
| Movement | Effect |
|---|---|
| Head Swing | Swings the flame plum on its head after emerging from a hole |
| Rock Barrage | Flies up high and drops rocks over a wide area |
| Aerial Turn | Circles through the air at low altitude |
How to Defeat and Tips
Volvagia can be tricky to fight due to having moments when it is in the ground or in the air. Creating openings is essential in order to damage this boss!
Hit With Hammer After Emerging From Hole
Volvagia will go in and out of underground holes during the fight. Strike its head with the Megaton Hammer when it emerges to stagger it. This will allow you to continuously attack it before it recovers.
Dodge Flames First Before Striking
There is a damage hitbox the instant Volvagia emerges from its hole. When closing in on it, dodge the flames first, then go in for the hit!
Can Fake Which Hole When HP is Low
When you've done enough damage to Volvagia, it may try to confuse you by faking which hole it will come out of. Confirm if it will really come out of that hole first before committing with the Megaton Hammer.
Stay on Platform's Edge to Dodge Boulder
During the fight, Volvagia will go up and drop boulders around the area. Stay on the edge of the platform as soon as Volvagia flies up to escape the boulders.
Shoot with Bow When Airborne
When Volvagia goes airborne, he will be out of range from your melee attacks. Switch to your bow and use your Z-targeting to attack it instead.
Ocarina of Time Related Articles
 Story Walkthrough - All Chapters
 1. Opening
 2. Great Deku Tree
 3. Hyrule Castle
 4. Dodongo's Cavern
 5. Lord Jabu-Jabu
 6. Forest Temple
 7. Fire Temple
 8. Ice Cavern
 9. Water Temple
 10. Bottom of the Well
 11. Shadow Temple
 12. Gerudo Fortress
 13. Spirit Temple
 14. Ganon's Castle











