Learn how to clear Sewer ~ Downtown in Resident Evil 3 Remake (RE3 Remake) with this walkthrough. This guide includes video tips, Nemesis boss fights, secret item location & more!
Table of Contents
Campaign Progression & Walkthrough
| << Previous Mission | Next Mission >> |
|---|---|
 2. Subway ~ Sewers 2. Subway ~ Sewers | 4. RPD Police Station |
Sewers ~ Top Of Building Quick Video Guide
This video guide features your progression up to the battle with Nemesis on the construction site's rooftop.
Sewers ~ Downtown Stage Map
Lower Level

Upper Level
 Map Symbol Legend
Get Out of the Sewers Walkthrough
Get Out of the Sewers Walkthrough Chart
| No. | Procedure |
|---|---|
| 1 | Exit the Save Room and walk down metal walkway |
| 2 | Slide down the ramp with sewer water |
| 3 | Continue straight then go left |
| 4 | Keep moving forward then climb the ladder to the left to get to the Save Room |
| 5 | Go back towards the ramp then head to the pathway to the right of the path |
| 6 | Continue straight. Kill the Hunter γ when it shows up |
| 7 | Turn left at the fork then keep moving forward |
| 8 | Climb up the stairs at the end and go in the door to the lab |
| 9 | Grab the Battery Pack, then return to the ramp your dropped down from |
| 10 | Climb the ladder to next to it and head up the stairs to get back to the Save Room |
| 11 | Use the Battery Pack on the closed door near the Save Room |
| 12 | Go straight then climb up the ladder at the end |
3. Continue Straight then Go Left - Tips
Hunter γ Will Slide Out of Pipe

A Hunter γ will come out of the pipe when you continue to the left path. Move back immediately! If you get too close, it will open its mouth and eat Jill!
Hunter γ (Gamma) - How To Kill GuideCan One Shot Jill

When the Hunter γ gets too close, it can launch an attack that will immediately kill Jill. It will open its mouth wide and swallow Jill whole.
Shoot at Mouth when Open
This Hunter γ's weak spot is its mouth. When it advances towards you with its mouth open, walk backwards and start shooting at it with your weapon.
Check Out the Beginner's Guide & Tips HereUse Shotgun to Flinch

Since it's a huge target, the Shotgun is great for dealing against this enemy. When its mouth is open, keep shooting it with your Shotgun to cause flinch.
Check Out the All Weapons Guide Here4. Get to the Save Room - Tips
Grenade Launcher Inside Save Room

The powerful Grenade Launcher can be found and acquired inside the Save Room. It doesn't require puzzles or anything else. You can simply take it from the table.
Check Out The Grenade Launcher Guide Here!8. Go to the Lab - Tips
Don't Forget to Take the Battery Pack

The Battery Pack needed to open the locked door can be found in the lab. Make sure to have enough inventory space because it takes up 2 slots.
Check Out How To Get Battery Pack!Battery Pack Can be Reused
There are two locked doors that require a Battery Pack. Don't worry about only finding one. Simply take it again from the door you used it to be able to use it again on another one.
Escape from Nemesis Walkthrough
Escape from Nemesis Walkthrough Chart
| No. | Procedure |
|---|---|
| 1 | Go inside the opened building |
| 2 | Open the brown door to get to the Save Room |
| 3 | Go up the escalator then up the stairs at the other end of the room |
| 4 | Keep going up until the stairs are blocked |
| 5 | Interact with the orange planks to create a walkway |
| 6 | Climb the stairs at the end of the room |
| 7 | Go up the stairs. Walk across planks and walkways until you get to another ladder. Climb it. |
| 8 | Keep going up. Follow the path and climb stairs at the end. |
| 9 | Save at the typewriter then continue your climb up |
| 10 | Defeat Nemesis |
1. ~ 9. Escape from Nemesis - Tips
Keep Your Health Up to Move Faster

The lower your health, the slower you will move and this is not the time to be slow. Keep your health high by healing up when you receive significant damage!
Focus on Dodging Zombies, Nemesis

Don't bother shooting down any of the enemies you come across to. Focus on getting as far away from Nemesis as possible. Dodge any attacks that comes your way.
Check Out the How to Dodge Guide Herevs. Nemesis - Boss Fight Tips
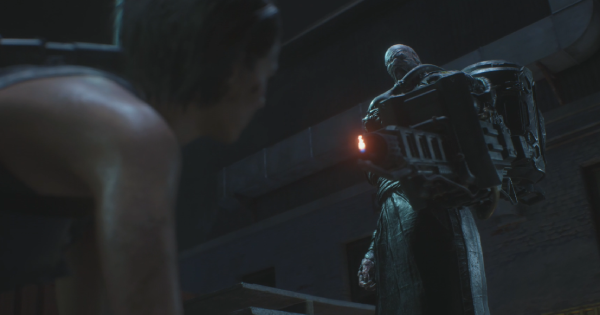
vs. Nemesis First Form
Shoot from Behind Cover

Do not engage Nemesis out in the open with its flamethrower. Use the structures around the rooftop as cover and shoot nemesis by peeking out of it.
Change Positions when it does Upward Fire Attack

When Nemesis aims its flamethrower upwards, immediately move to another cover. That attack can reach behind your cover!
Being on Fire will Kill You

Stay on fire for too long and you will die immediately. This is why it's important to switch positions whenever Nemesis tries to smoke you out of your cover.
Aim for its Fuel Tank
At Nemesis' back is a Fuel Tank that you need to keep shooting. Focus all of your attacks here to quickly detonate it and deal enough damage against Nemesis to start its second phase.
vs. Nemesis Second Phase
Nemesis Becomes More Aggressive

After its tank explodes, Nemesis will start gunning after you with physical attacks. It will also follow after you even when you go behind cover.
Engage Nemesis from a Distance

Always keep your distance from Nemesis. Staying close to it is very dangerous since it has multiple physical attacks that it can bombard you with.
Use Grenade Launcher & Shotgun

Since you don't have to focus your attacks in a single part of Nemesis, you can now use your Grenade Launcher to deal huge damage against it. The Shotgun is also great for this since Nemesis has a wide torso.
Use Generators to Stun It
There are generators around the rooftop that you can use to stun Nemesis for a few seconds. Take this time to deal as much damage to it before it shakes off the stun.
Dodge Out of Charge Attack

Nemesis will assume a charging pose before it actually does it. When you see this, either duck behind cover or quickly turn away from it to dodge it.
Return to the Subway Station Walkthrough
Return to the Subway Station Chart
| No. | Procedure |
|---|---|
| 1 | Head out to the street |
| 2 | Continue down the street and head towards the firetruck |
| 3 | Climb its side then walk across its ladder |
| 4 | Continue forward. Go inside the Gun Shop |
| 5 | Move through the store to trigger cutscene with Kendo |
| 6 | Take Kendo's Gate Key hanging on the wall. Use it to open the gate to the side of the shop |
| 7 | Turn left. Enter the door at the end |
| 8 | Exit through the front door |
| 9 | Head towards the alley |
| 10 | Run to the other side of the alley |
| 11 | Go to the barricade to trigger a cutscene |
| 12 | Climb the staircase then the ladder at the end. Drop down to the other side |
| 13 | Continue down the walkway till you get to the Donut Shop |
| 14 | Head towards Toy Uncle. Outrun the giant head |
| 15 | Continue forward till you get to the street |
| 16 | Head toward the gated fence near the blockade |
| 17 | Go down the alley to meet with Carlos. Keep following him |
| 18 | Follow Carlos down to the subway |
1. Head Out to the Street - Tips
Heal Immediately

After getting back on your feet, you will be at low health. It's best to heal first before going out of the street and risk dying.
4. Go Inside the Gun Shop - Tips
Loot the Shelves

The Shelves in the Gun Shop has a number of ammo that you can take. Get as much as you can and if you don't have space, you can always place it in the Item Box within the shop.
Get the Semi-Auto Barrel (Shotgun)

Other than ammo, you can also get a Semi-Auto Barrel for your Shotgun in one of the shelves.
6. Open Gate to the Side of the Shop - Tips
Mutated Zombie will Show Up

Mutated Zombies have a longer range and a weak spot that is hidden behind its claws. Keep your distance from it when you engage it.
Glowing Spot is Weak Point

When its claws open, a bright orange spot will appear on its head. Aim for that because that is the zombie's weak spot!
9. Head Towards the Alley - Tips
Nemesis Will Show Up Again

Nemesis isn't down for the count yet. It will reappear here again with a stronger weapon at its hand, a rocket launcher!
Dodge Away when Laser Turns Red

When the laser turns red, it mean the position where the rocket will be shot is locked. When it turns red, dodge to the side to escape from its splash damage.
11. Go to the Barricade - Tips
Open Box for First Aid Spray

After the cutscene, walk towards the lone box and open it with your knife. Inside is a First Aid Spray you can use to heal yourself back to full health.
14. Outrun the Giant Head - Tips
Go Down Stairs and Head to the Alley

Escape the head by running back down the stairs and immediately running to the right where there is an alley to hide on. Touching the head will immediately crush Jill!
16. Head Toward the Gated Fence - Tips
Nemesis Will Teleport in Front of Gate

Get close to the gate and Nemesis will teleport there instantly. Even if its at your back aiming with the rocket launcher, it will show up there!
Sewer ~ Downtown - Secret Item Location
NOTE: This section is currently a work in progress. Come back later for updates!
Item Location Map
Check Out All Item List

Campaign Progression & Walkthrough
| << Previous Mission | Next Mission >> |
|---|---|
| 2. Subway ~ Sewers | 4. RPD Police Station |
>> Pt.3 (Downtown ~ City Hall) In RE3 Original

