Act 6 Main Story Walkthrough Guide for Seven Deadly Sins Origin (7DSO). This guide includes main quest walkthroughs, how to complete, puzzle guides, objectives, and more.
Main Story Walkthrough GuideTable of Contents
Act 6 Walkthrough Guide
Walkthrough Chart

| Episode | Objective |
|---|---|
| 1 | Go to the Entrance of the Sand Valley |
| 2 | Talk to Frightened Gorra |
| 3 | Find Nene Komi’s Friend Near the Barrier |
| 4 | Defeat the 3 Abyss Monsters |
| 5 | Examine the Two (2) Corrupted Gorra |
| 6 | Follow Nene Komi to the Abyss Barrier. |
| 7 | Approach the Abyss Flower and Purify It. └ You can find the Constellation Stone: Purification on the side to recharge your Book of Stars |
| 8 | Purify the Second Abyss Flower |
| 9 | Defeat Enemies En Route to Final Pillar |
| 10 | Go to the Third Abyss Flower (Pillar). |
| 11 | Defeat the Fused Abyss Monster |
| 12 | Purify Final Pillar to Remove Barrier |
| 13 | Go to the Abyss Flower Near the River |
| 14 | Defeat the Corrupted Laruka |
| 15 | Break the Barrier Around the Abyss Flower └ Use the cannon on the ground to break the barrier. Use the cannon on the right |
| 16 | Purify the Abyss Flower |
| 17 | Go to the Sand Valley Exit |
| 18 | Say Goodbye to Nene Komi |
| 19-20 | Track Down the Gorra |
| 21 | Talk to the Scholar |
Act 6 - Strategy Tips
How to Break the Abyss Flower Barrier
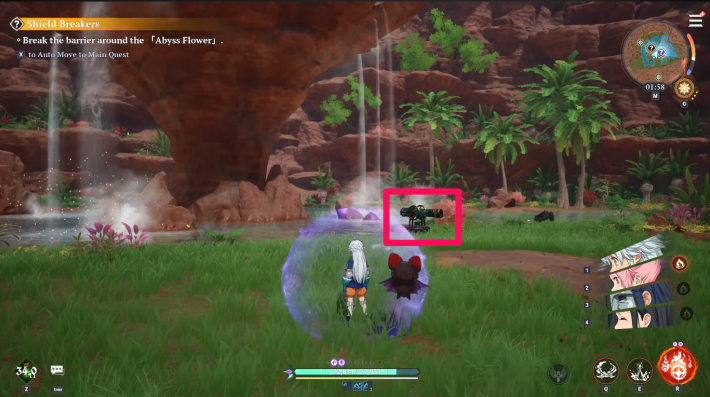 Use the Cannon Use the Cannon | 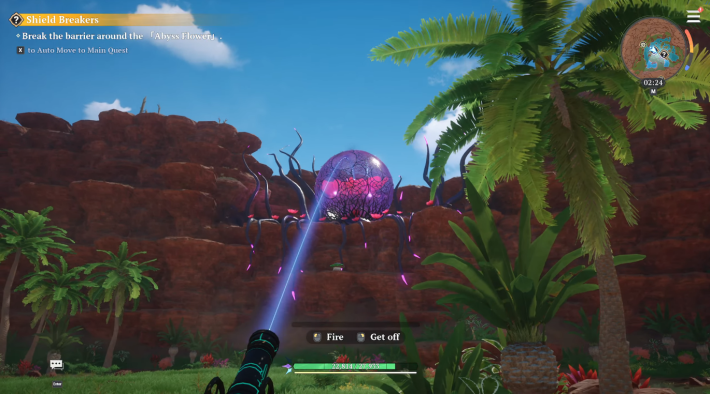 Aim and Shoot Aim and Shoot |
To destroy the Abyss Flower's barrier, use one of the nearby cannons. Aim at the top of the barrier and fire to break it.
Boss Has Predictable Attack Patterns
Laruka relies on long-range AoE attacks with visible indicators. Monitor its position and move to safe zones accordingly. A long, extended indicator signals a beam attack. Sidestepping is insufficient, as it will track you. Dodge safely by moving to the enemy's flank.
Add A Healer to Your Team
| Recommended Heroes | |||||
|---|---|---|---|---|---|
(Grimoire) | [Ultimate Move] Forest's Protection Grants all allied heroes "Forest's Protection" for 20 sec. Forest's Protection: Grants a Barrier equal to 18% of Max HP. Restores HP equal to 0.8% of Max HP + 25% of Attack every 2 sec. | ||||
| Dianne (Nunchaku) | [Passive] Breath of the Giants (Nunchaku) After landing 20 hits on enemies, she inflicts Taunt on nearby targets for 5 sec. and grants all party members the "Heart of the Land" effect for 20 sec. *Heart of the Land: Shield equal to 15% of Max HP, HP Recovery equal to 10% of Defense every 0.5 seconds | ||||
| Tioreh (Wand) | [Passive] Spirit's Blessing: Fox: If her remaining HP is 30% or less, using a Tag Skill restores 15% of her HP. (Cooldown: 30s) [Normal Skill] Healing Fox: Restores HP of allies in range by 0.35% of Max HP + 14% of Attack every 0.7 sec for 10 sec. | ||||
| Hendrickson (Longsword) | [Ultimate Move] Magic Unleashed: Restores HP of allies in range by 0.5% of Max HP + 25% of Attack every 1 sec for 10 sec. | ||||
The boss fights in this quest will be quite tougher compared to the previous Acts, and it is recommended that you add a healer to your team. For F2P players, you can use Tioreh since she can be obtained early in the game. Make sure that she is fully equipped before starting or progressing to this quest.
HP Recovery and Healer Heroes ListRelated Articles

 Act 1
Act 1 Act 2
Act 2 Act 3
Act 3 Act 4
Act 4 Act 5
Act 5 Act 7
Act 7 Act 8
Act 8 Act 9
Act 9 Act 10
 Act 11
 Act 12
 Albion Guide
 Banakro Guide
 Draco King Drake Guide
 Red Demon Guide
 Corrupted Guardian Golem
 Gray Demon Guide
 Twigo Boss Guide
 Molbog Guide
 Corrupted Warden Orgot Guide
 Guila Boss Guide
 Corrupted Ancient Dragon
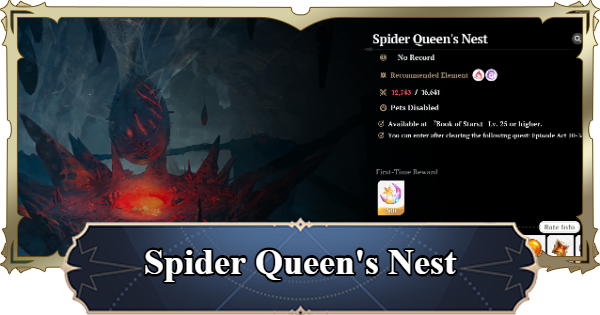 Spider Queen's Nest Guide
