Gray Demon boss guide in Seven Deadly Sins: Origin (7DOS). Guide includes Gray Demon how to unlock, location, attacks & moves, strategy, how to prepare, rewards, and more.
All Boss Locations & Strategy Guide
Table of Contents
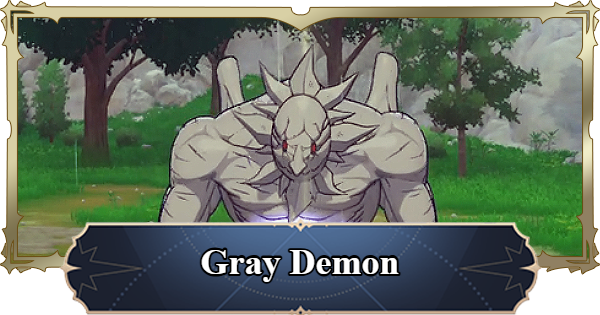
Gray Demon's Location
Unlocks After Completing Act 11


The Gray Demon in The Seven Deadly Sins: Origin is a quest-locked boss that becomes available only after reaching Vanya and completing Act 11.
Rewards

| Cube Key | 15 |
| Main Rewards | - Gray Demon Meat - Courage Token - Enhancement Stone - Refinement Stone - Equipment |
Gray Demon Team & Characters
Sample Team
 Drake DrakeGreatsword |  Gilthunder GilthunderLongsword |  Tristan TristanDual Swords |  Tioreh TiorehWand |
The Gray Demon is weak to lightning. With this team, you can fully take advantage of this weakness to deal more damage than with other elements.
Recommended Characters
| Character | Details |
| Drake | - All his weapons are Lightning element - Greatsword is highly recommended to use for his main DPS role |
| Gilthunder | - All of his weapons are Lightning element - Easy to get since he's a 4-Star - Passive Skill reduces the enemy's Lightning Defense |
| Tristan | - Can increase Burst efficiency with Dual Swords - Starter character |
Since the Gray Demon is weak to Lightning, having a team with predominantly Lightning attacks is recommended. Dual Swords Tristan is great because he can increase Burst efficiency, but since you will generally build Burst with Gilthunder, it's better to swap him with another Lightning character if you have one.
Gray Demon Basic Strategy
Dodge Opening Attack by Running
When you attack the shaman performing a ritual, the Gray Demon will come from the sky and land with an attack. It will be invincible after this attack, so focus more on dodging by running away before attacking.
Attack the Gray Demon's Right Side
It is highly recommended to position yourself on its right side throughout the fight. This side has fewer attack patterns, and their telegraphs are easier to read, allowing you to engage more safely compared to other positions.
Move Back to Dodge
Hover with Charge Indicates a Combo Attack
If Gray Demon hover mid-air while raising its left charging hand, it will attack three times in a row. The first hit will have a wide horizontal range, so move back. After the third attack, you can start to attack.
Body Twist Signals a Sweeping Attack
When the Gray Demon twists its body to the right, it signals a frontal sweeping attack. The safe zones are behind the Gray Demon or by dashing away to create distance.
Leg Lift Signals a Stomp Attack
The Gray Demon will lift its left leg and attack forward in a stomp. The range is hard to read. It's better to just move back or circle wide to its right side.
Left Hand on Ground Signals to Dodge Left
The Gray Demon swings its left hand upward from the ground, releasing purple energy forward. This attack can hit even if you dodge backward, so dodge to the left instead.
Red Charge Signals a Frontal Beam
The beam is fired in the direction the Gray Demon is facing. The safest way to avoid it is by dodging sideways. The Gray Demon remains stationary during this attack, providing an opportunity to strike.
Gray Demon Combat Tips
Wide-Range Explosion is Easy to Avoid
When the Gray Demon charges its orb and the red circle reaches the edge of the arena, it will unleash a devastating attack. The charging phase lasts long enough to deal damage, so focus on filling the gauge to stun instead of retreating.
All-in Attack to Fill Gauge Fast
During this charge, you can attack the Gray Demon to fill the gauge and immobilize it. This will also cause any buffs that the Gray Demon has to become debuffs instead. Save your Ultimate Moves for this to deplete the gauge on time.
Buffs Statuses at Regular Intervals
Periodically during the fight, the Gray Demon will raise its arms and give itself an Attack & Defense buff. The buffs can stack up to 10 times. This action will not deal damage to you. Take this chance to land some of your attacks.
Downing It Turns Buffs Into Debuffs

When you down the Gray Demon, all the buffs it has will automatically be converted into a 3% decrease in All Element Defense.
Airborne Signals to Focus Dodging
When the Gray Demon floats into the air, it becomes out of reach for most attacks. At this stage, it is best to focus solely on dodging.
Camera Change Signals to Run Left or Right
A camera angle shift indicates an incoming series of ranged attacks. Dodge by moving left or right, as the attacks travel in a straight line.
Second Phase Unlocks Additional Moves
During the second aerial phase, it circles the arena before unleashing a ranged attack followed by a slam. The slam has a wide area of effect, so use your dash to evade rather than attempting to outrun it.
Ranged Attack From Center is Easy to Dodge
In the final phase, the Gray Demon floats to the center and unleashes a series of ranged attacks. Be ready to dash to avoid incoming projectiles while moving either left or right.
Preparing for Gray Demon
Register Potions To Your Quick Slot

Before challenging the Gray Demon, make sure to assign healing potions to your Quick Slot. This allows you to recover HP during battle without relying solely on healer support.
Enhance Your Equipment
Enhance your characters as much as possible before facing the Gray Demon. Optimize their equipment and upgrade their Mastery, as this is a challenging fight that requires well-built characters.
| How to Level Mastery Fast | Character Progression Priority |
Related Articles