 Acambe
 Afra
Afra Agata
Agata Alexei
 Auguste
 Ayishah
 Beryl
Beryl Camelot
 Caris
Caris Ciri
Ciri Clara
Clara Cocoa
Cocoa Col
Col Credenza
 Dantalion
 Edda
Edda Estra
Estra Falin
Falin Faycal
 Flavia
 Garcia
 Geralt
 Gloria
 Guzman
 Hasna
Hasna Heshan
 Homa
Homa Iggy
Iggy Inanna
 Kianshir
 Kiya
Kiya Kvare
Kvare Layla
Layla Leonide
 LilyWill
 Lukamar
 Lutfi
Lutfi Luvata
 Magnus
 Maitha
 Marcille
 Miguel
 Momo
Momo Nergal
 NonoWill
 Nungal
 Nydia
Nydia Pamina
 Parsifal
 Pooch Runrun
 Rawiyah
 Rico
Rico Safiyyah
 Samantha
 SchackLulu
 Selina
 Senshi
 Shahnaz
 Shams
Shams Simona
 SP Faycal
 SP Inanna
 SP Maitha
 SP Nungal
 SP Rawiyah
 SP Safiyyah
 SP Samantha
 Taair
Taair Teadon
 Team Meteor
 Triss
Triss Tristan
 Xavier
 Yeganeh
 Yennefer
 Yserinde
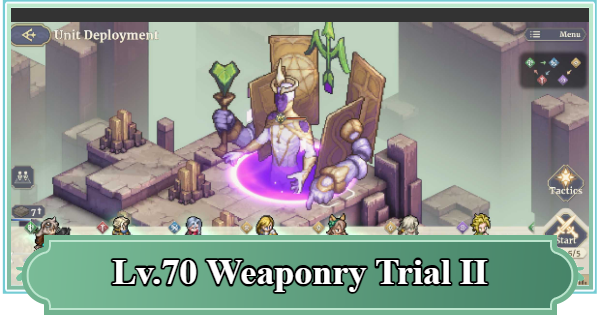
This is a guide for Weaponry Trial II (Lv.70) in Sword of Convallaria (SoC). Read on for strategy points, as well as recommended characters and gear for Stage 11 Weaponry Trial II.
| Weaponry Trial Related Articles | ||
|---|---|---|
| I | II | III |
| Lv.65 | Lv.65 | Lv.65 |
| Lv.70 | Lv.70 | Lv. 70 |
Table of Contents
*This guide is written based on the content of Stage 11 (Lv. 70).
Boss Overview
Calamity I "Magician"
| Calamity I "Magician" | ||
|---|---|---|
  | HP 214,523 | SPD 150 |
| P.ATK 7,686 | P.DEF 2,753 | |
| M.ATK 5,703 | M.DEF 3,203 | |
The only enemy that appears in Weaponry Trial II is Calamity I "Magician". Using Ranged attacks will grant it a permanent buff and trigger a Strike Back, so you should only attempt the stage with Melee or AoE attacks.
Passive Skills of Calamity I "Magician"
- Always active
- Next ATK increases by 20% when hit by a Ranged attack or when a character is defeated
- Nullifies 95% of percentage-based damage and completely immune to Disruption
- Acts Again after defeating a Summoned Unit
Calamity I "Magician" Skill Rotation
| Turn | Skills and Details |
| 1st Turn | [Thunderbolt] - Used only on turn 1 - Damages 2 characters who are far away - Applies a Healing Received debuff for 3 turns - Place characters with high P.DEF far away |
| 2nd Turn | [Furious Wallop] - Deals massive damage to the farthest character - Applies Knockback & Healing Received debuff - Damage decreases for each tile of distance - Place a durable character in charge of taking the hit far away - Be careful not to get knocked back too far from allies |
| 3rd Turn | [Shackles of Fate → Voltage Shock] - Deals Ignore Dodge damage to 2 nearby characters - Applies Voltage Shock - Deals Piercing DMG in a cross shape at the end of the turn - Be careful not to overlap the cross-shaped areas - Taking damage from one is not a problem |
| 4th Turn | [Smashing Comet]- Deals damage in a 3x7 line area - 4-tile Knockback - Summons 3 Potent Comet Debris - P.DEF -30% & DMG Taken +20% in a 5-tile radius - Explodes from the boss's attack or Voltage Shock - The damage itself is low |
| 5th Turn+ | Repeats turns 2-4 - Destroys the Potent Comet Debris within the range of [Smashing Comet] - If necessary, you can face tank [Smashing Comet] and spend the turn attacking instead of moving away |
Weaponry Trial II Strategy Points
- Do not use Ranged attacks
- Tank Furious Wallop with P.DEF
- Position units with Voltage Shock mindfully
- Destroy Comet Debris with Voltage Shock
- Include a healer in your formation
Do Not Use Ranged Attacks

In Weaponry Trial II, every time the Magician is hit with a Ranged attack, he negates 40% of the DMG, gains a stacking 20% ATK buff and applies [Voltage Shock], making the stage much more difficult to clear. Therefore, you should only challenge this boss with Melee or AoE attackers.
AoE Attacks are Fine

Even attack skills used from a distance, such as Gloria's [Lance of Longinus] or Beryl's [BOOOOOM!], are fine as long as they deal AoE damage and do not target the boss directly.
Tank Furious Wallop with P.DEF

We recommend designating a character with high P.DEF or damage reduction skills to take the hit from "Furious Wallop", which deals massive damage to the farthest character. The Magician uses this on turn 2 for the first time, and then repeats the same action every 3 turns, so make sure to have an adequately durable character take this attack.
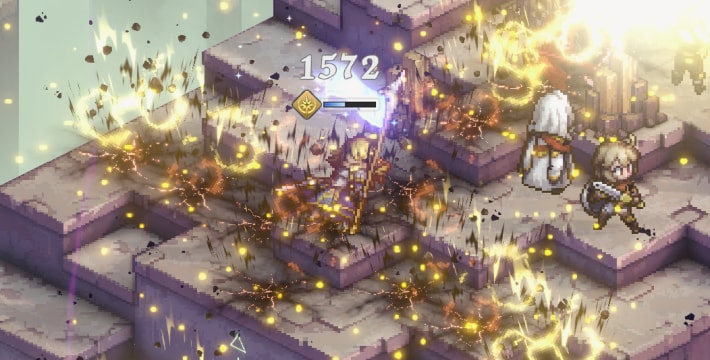
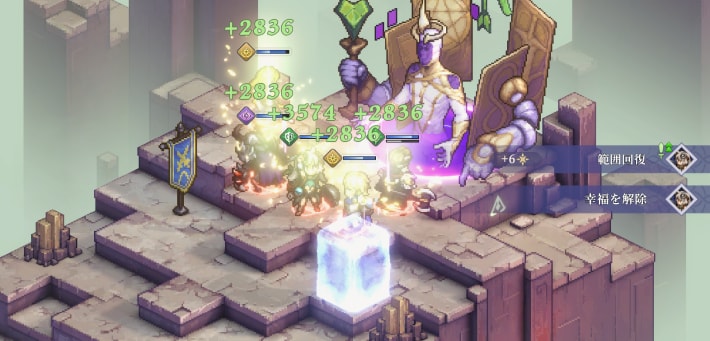
Position Units with Voltage Shock Mindfully
![]()
Characters afflicted with the "Voltage Shock" debuff from "Shackles of Fate" will receive Piercing DMG equal to 60% of their Max HP in a cross-shaped area centered on themselves at the end of the turn. Getting hit by two Voltage Shocks at the same time is a guaranteed death, so be mindful not to overlap their AoEs.
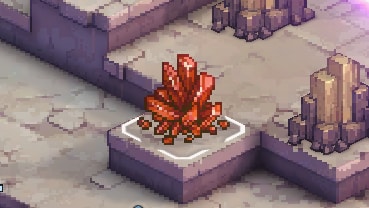
Prioritize Attacking Potent Comet Debris
![]()
The 'Potent Comet Debris' object placed by 'Smashing Comet' not only has the troublesome effect of lowering P.DEF by 30%, but it also deals Piercing DMG equal to 80% of HP in a 5-tile radius when hit by the boss's attack or a Voltage Shock. Prioritize destroying or pushing the Comet Debris away over attacking the boss.
Utilize AoE Damage and Knockback
If it takes several characters and too much time to destroy a single Comet Debris, clearing within the turn limit will be difficult. Prepare methods like AoE attacks, knocking them off the map with knockback, or ways to move the Comet Debris. It's important that your party can handle the debris with minimal effort.
Include a Healer in Your Formation
![]()
If you're not trying to clear the stage within a specific number of turns, including a dedicated healer is essential. However, a character who only heals might not provide enough damage output or utility. Therefore, it's important to include characters who can fill multiple roles, such as applying buffs/debuffs or handling [Furious Wallop].
Weaponry Trial II (Lv. 70) Sample Parties
Our First Time Clear Party
 Cocoa CocoaHandles Furious Wallop |  Guzman GuzmanAttacker/Debuffer |  Gloria GloriaBuffer/Attacker |
 Magnus MagnusSupport/Attacker |  Simona SimonaBuffer/AoE Damage | ー |
This is an example clear formation from our guide team, used right after the content was released. To handle [Furious Wallop], we used Cocoa, who can also provide party-wide healing and buffs. The rest of the team consists of attackers who can also apply buffs and debuffs, allowing for a balanced strategy. Magnus can move the Comet Debris, making it possible to hit them all at once with subsequent AoE damage.
Recommended Characters and Gear
Recommended Characters
Furious Wallop Tanker
| Character | Details |
|---|---|
| Cocoa | - Crit support, CD/cost reduction are powerful. - High durability with [Invulnerable]. - Recommended for more than just countering Furious Wallop. |
 Momo Momo | - Reduces P.ATK with her Trait. - Knocks Comet Debris off the map with knockback. - Can nullify enemy knockback. |
 Maitha Maitha | - Heals allies after taking a hit from Furious Wallop. - Can also apply buffs, though the effect is small. |
 Papal Guard Papal Guard | - Extremely durable with Physical Shield. - Be aware that they don't contribute to damage dealt. |
 Teadon Teadon | - Extremely durable with Physical Shield. - Can grant Physical Shield to nearby allies. - Can also use AoE attacks + apply debuffs. |
Attackers
| Character | Details |
|---|---|
 Garcia Garcia | [Attacker/Debuffer] - Damage increases as turns pass. - P.DEF DOWN from RK1 Lock-On is also powerful. - Has self-healing, great survivability. |
 Rawiyah Rawiyah | [Attacker] - High single-target damage. - Strengthens Sword of Convallaria with her Leader's Aura. - Has self-healing, great survivability. |
| Guzman | [Attacker/Debuffer] - Powerful self-buffs with ATK UP/Regen. - Applies DMG Dealt DOWN/DMG Taken UP debuffs to enemies. |
 Faycal Faycal | [Attacker/Debuffer] - AoE damage with [Gale - Billow Volley]. - Powerful debuff application via his Trait. - Requires support like NRG Recovery and cost reduction. |
 Beryl Beryl | [Attacker] - AoE damage with [BOOOOOM!]. - Requires Trait enhancement and NRG supply from allies. - Deals massive damage when conditions are met. |
 Dantalion Dantalion | [Attacker] - Has AoE attacks and high-damage Skills. - Needs NRG supply/cost reduction from allies. - Powerful Leader's Aura that strengthens Iria. |
 Auguste Auguste | [Attacker/] - Top-class single-target damage. - Can apply P.DEF Down. - Recommended even for quick-clear strategies. |
 Agata Agata | [Attacker/Debuffer] - High single-target damage. - DMG Taken UP + SPD DOWN debuff. - Can also heal. |
 SP Rawiyah SP Rawiyah | [Attacker/Debuffer] - High single-target damage via Act Again. - Applies multiple debuffs while attacking. |
Buffers/Debuffers
| Character | Details |
|---|---|
| Gloria | [Attacker/Buffer] - Strengthens allies with multiple buffs. - High attack performance in Sword mode. - Can also use AoE attacks. |
 Inanna Inanna | [Healer/Buffer] - Powerful Act Again for the main attacker. - Can also heal. - Ranged attacks are strictly prohibited. |
| Magnus | [Attacker/Debuffer] - Lowers enemy ATK & DEF with his Trait. - Extremely powerful buffs/debuffs. - Moves Comet Debris with [Foreceful Cast]. |
 NonoWill NonoWill | [Debuffer] - Powerful DMG Taken 30% UP debuff. - Excellent 99% reduction of AoE damage. - Can also use AoE attacks. |
| Simona | [Buffer] - Can grant Physical Shield/Regen. - Damages Comet Debris with AoE attacks. |
Healers
| Character | Details |
|---|---|
| Cocoa | [Healer/Counter for Furious Wallop] - Heals while providing critical support. - Also recommended for countering Furious Wallop. |
 Angel Angel | [Healer/Buffer] - Can apply buffs while healing. - Has a 0 CD AoE heal. - Additional NRG Recovery when taking damage. |
 Butterfly Butterfly | [Healer/Buffer] - Has a 0 CD AoE heal. - Powerful DMG Dealt UP & Life Steal. - Can also participate in attacking. |
Recommended Gear
| Character | Details |
|---|---|
 Disaster Bottle Disaster Bottle | - Can apply debuffs multiple times. - Effective when held by multiple people. |
 Cooling Powder Cooling Powder | - Nullifies Healing Received debuff & increases healing amount. - Effective when held by the character handling Furious Wallop. |
 Coexist Armor Coexist Armor | - Reduces damage taken while Healthy. - Recommended if you want to increase durability. |
 Unique Coat Unique Coat | - Reduces physical damage taken. - Recommended if you want to increase durability. - Be aware of the CD. |
Recommended Tactical Skills
| Tactical Skills | Details |
|---|---|
 | - Strengthens nearby allies. - Additional NRG recovery and CD-1 are especially powerful. - Allows for a stable battle. |
 | - Greatly increases enemy damage taken. - Essential when aiming for a quick battle. |
 | - Act Again + ATK UP. - Use for dealing with Comet Debris or for a final push. |
 | - Warps a character to any position. - For dealing with knockback or for sudden movements. - Also has an HP recovery effect. |
 | - Greatly increases SPD + recovers 2 NRG. - For manipulating turn order or when you're short on NRG. |
Basic Stage Information
Obtain Weapons as Rewards
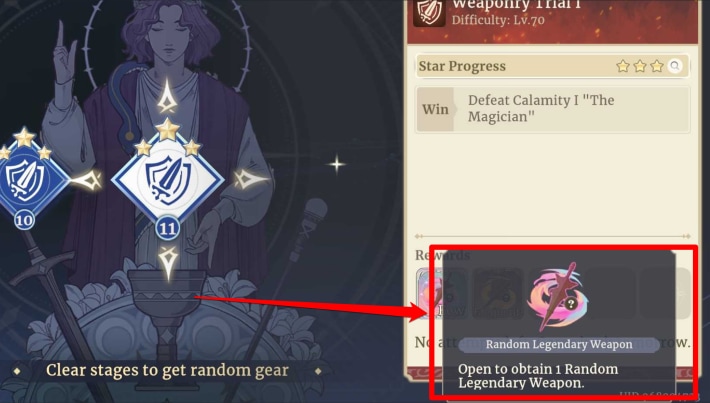
In Weaponry Trial II, you can obtain Gear such as Weapons and Trinkets as rewards. The rarity of the Gear increases in proportion to the stage's difficulty, so aim to clear higher difficulty stages.
Epic and Higher Rewards
Reward Weapons
 Void Stab
 Beheading Machete
 Brutal Axe
 Whale Hunter
 Irian Combat Bow
 Senator Swift Sword
 Feast Axe
 Star-Raid Crossbow
 Melee Mega Crossbow
 Ceremonial Knife
 Sharp Spear
 Guardian Spear
 Steel Crossbow
 Explosive Crystal
Reward Trinkets
 Rejection Mask Rejection Mask |  Thorny Ring Thorny Ring |  Mist Necklace Mist Necklace |
| Disaster Bottle | - | - |
Weaponry Trial II Basic Information
| Victory Conditions | Defeat Calamity I "Magician" |
| Mission Objective 1 | Clear the stage |
| Mission Objective 2 | Clear within 15 turns |
| Mission Objective 3 | 2 or fewer allies defeated |
Sword of Convallaria (SoC) Related Articles

Spiral of Destinies
| Eternal Awakening | Night Crimson Guide | Sand-made Scales Guide |
| Hero's Quest Chronicles | - | - |
Weaponry Trials
| I | II | III |
|---|---|---|
| Lv.65 | Lv.65 | Lv.65 |
| Lv.70 | Lv.70 | Lv.70 |

