 Acambe
 Afra
Afra Agata
Agata Alexei
 Auguste
 Ayishah
 Beryl
Beryl Camelot
 Caris
Caris Ciri
Ciri Clara
Clara Cocoa
Cocoa Col
Col Credenza
 Dantalion
 Edda
Edda Estra
Estra Falin
Falin Faycal
 Flavia
 Garcia
 Geralt
 Gloria
 Guzman
 Hasna
Hasna Heshan
 Homa
Homa Iggy
Iggy Inanna
 Kianshir
 Kiya
Kiya Kvare
Kvare Layla
Layla Leonide
 LilyWill
 Lukamar
 Lutfi
Lutfi Luvata
 Magnus
 Maitha
 Marcille
 Miguel
 Momo
Momo Nergal
 NonoWill
 Nungal
 Nydia
Nydia Pamina
 Parsifal
 Pooch Runrun
 Rawiyah
 Rico
Rico Safiyyah
 Samantha
 SchackLulu
 Selina
 Senshi
 Shahnaz
 Shams
Shams Simona
 SP Faycal
 SP Inanna
 SP Maitha
 SP Nungal
 SP Rawiyah
 SP Safiyyah
 SP Samantha
 Taair
Taair Teadon
 Team Meteor
 Triss
Triss Tristan
 Xavier
 Yeganeh
 Yennefer
 Yserinde
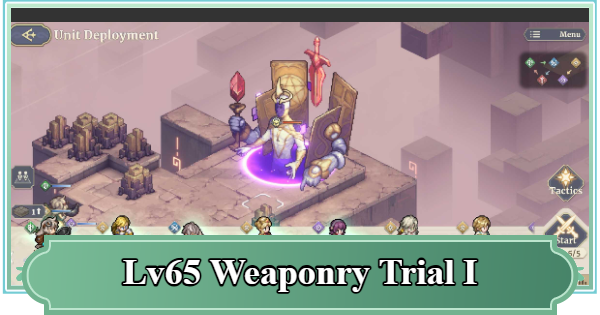
This is a guide for Weaponry Trial I (Lv.65) in Sword of Convallaria (SoC). Read on for strategy points, as well as recommended characters and gear for Stage 10 Weaponry Trial I.
| Weaponry Trial Related Articles | ||
|---|---|---|
| I | II | III |
| Lv.65 | Lv.65 | Lv.65 |
| Lv.70 | Lv.70 | Lv. 70 |
Table of Contents
*The guide information is based on the content of Stage 11 (Lv70).
Boss Overview
Calamity I "Magician"
| Calamity I "Magician" | ||
|---|---|---|
  | HP 126,760 | SPD 150 |
| P.ATK 4,262 | P.DEF 2,029 | |
| M.ATK 6,088 | M.DEF 2,097 | |
The enemy that appears in Weaponry Trial I is Calamity I Magician
. Using Melee Attacks will trigger a Strike Back that also applies a debuff, so you should only use Ranged or AoE attacks.
Passive Skills of Calamity I Magician
- Reduces damage received from melee attacks and performs a [Strike Back]
- Nullifies percentage-based damage and Disruption.
- Gains [Act Again] when a Summoned Unit is defeated.
Calamity I Magician
Skill Rotation
| Turn | Skills and Details |
| Note | - Every turn, applies 2 stacks of [Stigmata] (DoT) to 3 random characters and changes panels to [Stigmata Realm] (applies Stigmata). |
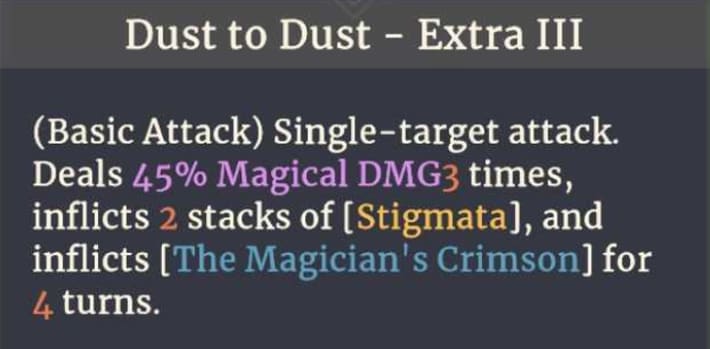
| 1st Turn | [Dust to Dust] - Deals magic damage 3 times to the nearest single character. - Applies 2 stacks of [Stigmata]. - Move character with highest M.DEF towards the boss. |
| 2nd Turn | [Calamitous Erosion] - Prepares [Calamitous Erosion]. - Deals massive damage in a 3x6 area in front on the next turn. - Applies 3 stacks of Stigmata on hit. - Move out of the area. |
| 3rd Turn | Activates [Calamitous Erosion] → Prepares [Abyssal Gaze] - [Calamitous Erosion] activates. - Prepares [Abyssal Gaze]. - Targets the character with the lowest HP percentage. - On the next turn, damages characters within 1 tile of the target. - Damage is reduced by having multiple characters take the hit (max 3). - Group 2 characters around the main target to reduce damage taken. |
| 4th Turn | Activates [Abyssal Gaze] → [Dust to Dust] - [Abyssal Gaze] activates, dealing AoE damage. - [Dust to Dust] deals single-target damage to the nearest character. |
| 5th Turn+ | Repeats from turn 2-4. |
Weaponry Trial I (Lv.65) Strategy Points
- Do not use melee attacks
- Prepare Dispels for Stigmata
- Beware of The Magician’s Crimson
- Tank [Abyssal Gaze] with 3 characters
- Be careful of simultaneous attacks
- A Healer is essential
Do Not Use Melee Attacks
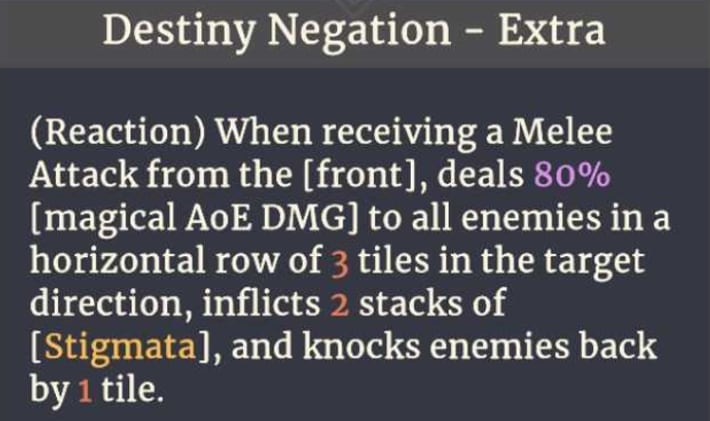
In Weaponry Trial I, The Magician not only mitigates melee damage, but also triggers a counterattack with a debuff, making the stage harder. Therefore, you should only use Ranged or AoE attacks.
AoE Damage is Fine
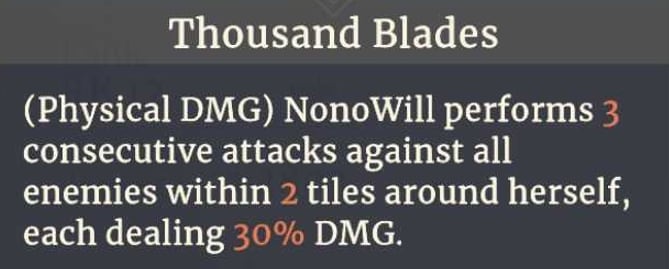
Even attack Skills from Melee-focused characters like Gloria's [Sword - Full Moon] or NonoWill's [Thousand Blades] are fine as long as they deal AoE damage.
Prepare Dispels for Stigmata
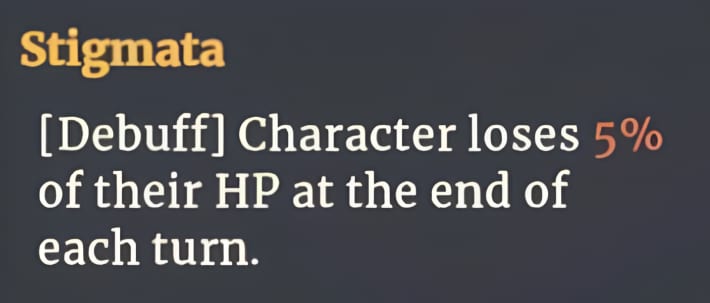
Dispeling the [Stigmata] debuff, which is constantly applied to multiple targets, is essential. As stacks accumulate, you'll end up losing a lot of HP each turn and won't be able to withstand the boss's attacks, so be sure to include characters who can remove debuffs.
A Long Fight is Difficult
A drawn out fight means more characters will eventually be afflicted with [The Magician’s Crimson], making it progressively harder to deal with [Abyssal Gaze] and [Dust to Dust]. Use buffs/debuffs and aim for a quick battle.
Tank Abyssal Gaze with 3 Characters
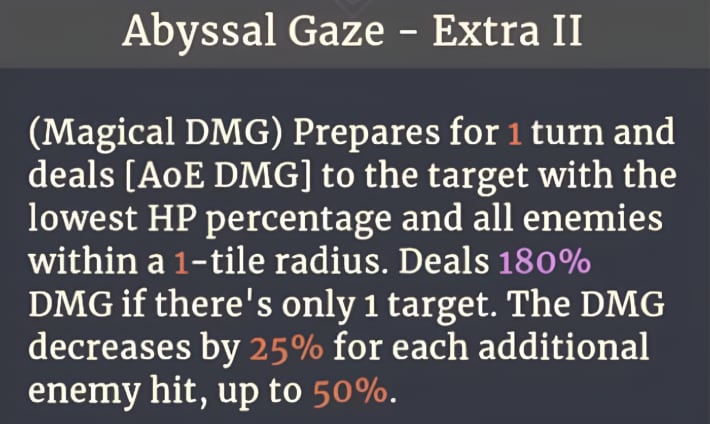
[Abyssal Gaze], which targets the character with the lowest HP percentage and then damages characters within 1 tile on the next turn, has its damage significantly reduced when taken by multiple characters simultaneously. The effect works for up to 3 characters, so have 3 characters, including the target, take the hit to reduce the damage taken.
Ignore the Gimmick with NonoWill
By using "NonoWill," who reduces AoE damage by 99%, and adjusting her HP with [Stigmata] to make her the target of [Abyssal Gaze], you can clear the stage very easily. The only damage she'll effectively take is from [Dust to Dust], so if you have NonoWill, be sure to include her in your formation.
NonoWill Best Build and Skill Tree Guide
Be Careful of Simultaneous Attacks
On the turn you are hit by [Abyssal Gaze], the boss will also use [Dust to Dust] on the nearest character. Position two characters around the [Abyssal Gaze] target, and place the one character who will take the [Dust to Dust] hit closest to the boss to withstand the simultaneous attacks.
A Healer is Essential
Including a Healer to dispel the [Stigmata] debuff and restore HP is essential. However, due to the turn limit and the [The Magician’s Crimson] debuff, be careful not to focus too much on durability.
Weaponry Trial I (Lv70) Sample Parties
Our Team's Clear Party
 Beryl BerylAttacker |  Edda EddaAttacker/Support |  Abyss AbyssDebuff |
 Angel AngelBuff/Heal |  Samantha SamanthaBuff/Recovery | ー |
Have two healers in charge of healing and debuff removal, while the support buffer and debuffer will increase damage dealt and reduce damage taken, allowing for a consistent battle. If healing is sufficient for that turn, use Samantha to attack.
Low Rarity Sample Party
 Flame Sorceress Flame SorceressAttacker |  Divine Grace Divine GraceAttacker | Abyss Debuff |
| Angel Buff/Heal |  K.A. Light Conjurer K.A. Light ConjurerHeal | ー |
This is a sample party consisting of only low-rarity characters. Use two healers for healing and dispels, while two attackers attack.
Recommended Characters and Gear
Recommended Characters
Recommended Attackers
| Character | Details |
|---|---|
| Beryl | [Attacker] - Powerful single-target attack that ignores DEF. - Recovers NRG with Trait and Passive. - High durability with damage reduction. |
 Nungal Nungal | [Attacker] - Top-class damage dealer. - Be aware that she has no support or healing. |
 Momo Momo | [Attacker] - High damage with Alert + single-target attack. - The Trinket "Hunter's Intuition" is required. - Has a Skill to reduce AoE damage for allies. |
 Acambe Acambe | [Attacker/Buff] - Attacks with abundant NRG. - High-damage Skill that ignores DEF. - Excellent AoE buffs as well. |
 Faycal Faycal | [Attacker/Debuff] - Applies debuffs on attack due to his Trait. - High damage output through NRG Recovery. |
 Hasna Hasna | [Attacker/Debuff] - An Attacker powerful with critical hits. - Applies ATK/DEF DOWN + Crit Rate Taken UP. - Excellent NRG Recovery allows for Skill use every turn. |
| Divine Grace | [Attacker] - Self-buffs when having 3 or more buffs. - Especially powerful attack power for an Epic or lower character. |
| Flame Sorceress | [Attacker] - Powerful Scorch application & high-damage Skill. - High firepower if NRG can be supplied. |
 Darkin Darkin | [Attacker] - Powerful initial Skill that deals massive single-target damage. - A Trinket with an Instant Skill is required. |
Recommended Buff/Debuff Characters
| Character | Details |
|---|---|
| Edda | [Buff/Debuff/Attacker] - Powerful Damage Dealt/M.DEF UP. - Lowers M.DEF and SPD with Liquor panels. |
 Gloria Gloria | [Buff] - Supports allies with numerous buffs. - Can participate in attacks with AoE attacks. - Be careful not to use Melee attacks. |
 Caris Caris | [Buff/Debuff] - Can apply a Magical Shield. - Applies 3 random debuffs. - Also has a -60% M.DEF debuff. |
| Abyss | [Debuff] - Applies debuffs via attacks/Trait/Passive. - Weakening enemies gives you an advantage. |
 Night Raven Night Raven | [Debuff] - Applies debuffs via attacks/Passive. - Weakening enemies gives you an advantage. - Applies Damage Dealt DOWN when taking damage. |
 Cocoa Cocoa | [Buff/Healer] - Powerful Crit support and CD/Cost reduction. - Can also heal/remove debuffs. - Be careful not to use Melee attacks. |
 NonoWill NonoWill | [[Abyssal Gaze] Counter/Debuff] - Can take [Abyssal Gaze] with 99% AoE reduction. - Important to keep HP percentage low. - Can also apply debuffs, but Melee attacks are a no-go. |
Recommended Healer Characters
| Character | Details |
|---|---|
 Homa Homa | [Buff/Debuff/Healer] - Has 2 types of healing Skills. - Powerful P.DEF DOWN debuff. - High damage output with Pursuit. |
| Angel | [Buff/Healer] - Can heal/buff/remove debuffs simultaneously. - Can also increase M.DEF of nearby allies. - Additional NRG Recovery upon taking damage. |
| Samantha | [Buff/Healer] - Supports allies with healing and debuff removal. - Can also act as a tank with Resolve. - Powerful damage reduction effect. |
| K.A. Light Conjurer | [Healer] - A healer specializing in debuff removal. - Excellent debuff removal + regeneration. - Can also increase ally ATK. |
 Bitterwort Bitterwort | [Healer] - Can heal + apply buffs. - Automatically heals Injured or Dying allies. - Also has an AoE NRG Recovery Skill. |
Recommended Gear
| Gear | Details |
|---|---|
 Elegance of the Empress Elegance of the Empress | - Using a Skill on an ally converts their debuffs into buffs. - Good for Healers to equip. |
 Disaster Bottle Disaster Bottle | - Can apply debuffs multiple times. - Effective when equipped by multiple characters. |
 Focus Wand Focus Wand | - Increases single-target Range when Unharmed. - Allows attacking while avoiding [Calamitous Erosion]. |
 Reorganized Cube Reorganized Cube | - Removes an additional debuff when healing. - Optimal for Healers. |
 Spring Pill Spring Pill | - Heals + removes debuffs with its Gear Skill. - Can be activated up to 2 times. |
 Fancy Hat Fancy Hat | - Reduces magic damage taken when HP is 70% or more. - Recommended if you want to increase durability. |
 Rejection Mask Rejection Mask | - Greatly reduces magic damage taken. - Be aware of its CD. - Recommended if you want to increase durability. |
 Coexist Armor Coexist Armor | - Reduces damage taken while Healthy. - Recommended if you want to increase durability. |
Basic Stage Information
Obtain Gear as Rewards
In Weaponry Trial I, you can obtain Gear such as Weapons and Trinkets as rewards. The rarity of the Gear increases with the stage's difficulty, so aim to clear higher difficulty stages.
Tarot Cards Cannot Be Obtained
Tarot cards do not drop from Weaponry Trial I rewards. If you want to collect Tarot cards, challenge "Tarot Residual".
Epic and Higher Rewards
Reward Weapons
 Newborn Blade
 Pendant Halberd
 Denial Hammer
 Meteor Line
 Skeleton Spear
 Tuning Hammer
 Guardian's Will
 Precision-forged Dagger
 Dueling Dagger
 Balanced Heavy Axe
 VIderian Longbow
Reward Trinkets
 Unique Coat Unique Coat | Coexist Armor |  Mist Necklace Mist Necklace |
 Gazing Orb Gazing Orb | - | - |
Weaponry Trial I Basics
| Victory Conditions | Defeat Calamity I [Magician]. |
| Mission Objective 1 | Clear the stage. |
| Mission Objective 2 | Clear within 15 turns. |
| Mission Objective 3 | 2 or fewer allies defeated. |
Sword of Convallaria (SoC) Related Articles

Spiral of Destinies
| Eternal Awakening | Night Crimson Guide | Sand-made Scales Guide |
| Hero's Quest Chronicles | - | - |
Weaponry Trials
| I | II | III |
|---|---|---|
| Lv.65 | Lv.65 | Lv.65 |
| Lv.70 | Lv.70 | Lv.70 |

