 Acambe
 Afra
Afra Agata
Agata Alexei
 Auguste
 Ayishah
 Beryl
Beryl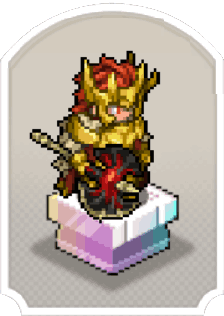 Camelot
 Caris
Caris Ciri
Ciri Clara
Clara Cocoa
Cocoa Col
Col Credenza
 Dantalion
 Edda
Edda Estra
Estra Falin
Falin Faycal
 Flavia
 Garcia
 Geralt
 Gloria
 Guzman
 Hasna
Hasna Heshan
 Homa
Homa Iggy
Iggy Inanna
 Kianshir
 Kiya
Kiya Kvare
Kvare Layla
Layla Leonide
 LilyWill
 Lukamar
 Lutfi
Lutfi Luvata
 Magnus
 Maitha
 Marcille
 Miguel
 Momo
Momo Nergal
 NonoWill
 Nungal
 Nydia
Nydia Pamina
 Parsifal
 Pooch Runrun
 Rawiyah
 Safiyyah
 Samantha
 SchackLulu
 Selina
 Senshi
 Shahnaz
 Shams
Shams Simona
 SP Faycal
 SP Inanna
 SP Maitha
 SP Nungal
 SP Rawiyah
 SP Safiyyah
 SP Samantha
 Taair
Taair Teadon
 Team Meteor
 Triss
Triss Tristan
 Xavier
 Yeganeh
 Yennefer
 Yserinde
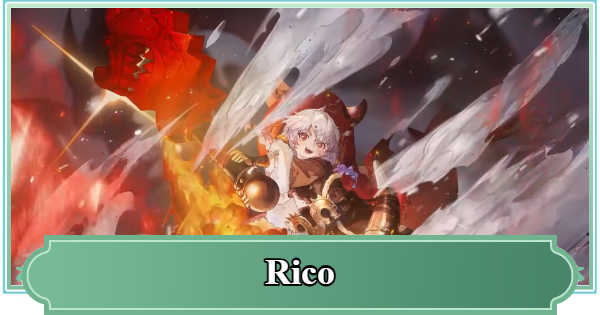
Build and skill tree guide for Rico in Sword of Convallaria (SoC). See the best gear (weapon/trinket/tarot), skin, tier, and review here!
Table of Contents
Rico's Tier & Basic Info
 | |
| Rarity |  Legendary Legendary |
|---|---|
| Role |  Defender Defender |
| Faction |  Drifter Drifter Aggression Aggression |
Movement Stats
| Move | Stand | High Jump | Low Jump |
|---|---|---|---|
| 3 | Normal | 2 | 2 |
Rico's Tier
| Overall Rating | Reroll Rating | ||||
|---|---|---|---|---|---|
▶ Character Tier List | ▶ Reroll Tier List | ||||
| Single-Target Rating | Multi-Target Rating | ||||
User Score
Review & How to Get
| Review | - Excels at Knockback and Strike Backs - Performs AoE attacks via Trait skill - Requires management of unique buff stacks - Increased DMG against foes immune to Knockback |
|---|---|
| How to Get | - Obtain from Gacha (Summon) |
Rico Pros and Strength
Rico's Character Overview
- Excels at AoE attacks and Counterattacks
- Powerful Trait Skill
- Top-class attack performance
- Also has excellent buffs/debuffs
- Requires Move/NRG support
Excels at AoE Attacks and Strike Backs
Rico excels at "AoE attacks & Knockback" and "Counterattacks such as Strike Back/Preempt," and it is recommended to create a build that specializes in one or the other. While not adept at protecting allies, as a Defender, she has extremely high offensive power and can be used as an active Attacker in many stages.
Powerful Trait Skill
| Trigger Condition | Activated by accumulating and consuming 8 stacks of "Fur Rage" - Stacks via Skills and Traits |
| Effect | - Deals high AoE damage + inflicts Vulnerable - Also inflicts Stunned if the target is Dying - Reduces damage taken & gains the Be Serious! buff - Increases next attack performance & specific Skill performance - Gains the "Quiet Mode" debuff - Cannot gain Fur Rage for 2 turns |
Rico possesses the Trait Skill [Awoo! Dragon Roar!], which can be used by accumulating "Fur Rage stacks". It's an easy-to-use instant Charge & AoE attack Skill, and its additional effects, such as inflicting the [Vulnerable] debuff to increase damage taken and gaining the [Be Serious!] buff that greatly enhances criticals, are also extremely potent.
Top-Class DMG
Rico's attack performance increases against enemies immune to Knockback, allowing her to exhibit extremely high damage numbers even against single-target bosses. She shines as a critical Attacker who can deal high damage every turn with NRG Recovery and CD reduction, so be sure to pair her with characters who excel at support.
Has Excellent Buffs/Debuffs
Rico possesses a rare buff, "DMG Lock," which prevents her from taking damage equal to 45% of her Max HP or more, and a powerful Passive that inflicts ▽P.DEF II/▽M.DEF II debuffs before attacking, making her a character with excellent buffs and debuffs. She also has a Leader's Aura that greatly strengthens the Drifter Faction, so be sure to utilize it when deploying them together.
Requires Move/NRG Support
She is a powerful character with excellent attacks and durability, capable of self-buffs and debuffs. However, an Attacker build consumes a lot of NRG, and she has no means of directly increasing her Move, requiring support from allies. She has many useful Skills, so there is no single best Skill build, and be aware that she can show her true potential by swapping Skills as needed depending on the stage.
Star Level Up Priority & Recommended Stars for Rico
Aim to Reach 3★ → 4★ → 5★
| Star Level Up Priority | Recommended Star Level |
|---|---|
 | 3★ → 4★ → 5★ |
Aim for upgrades based on your goals: At 3★, your initial Fur Rage stacks increase, and using Quiet Mode grants additional Fur Rage stacks. At 4★, the number of Fur Rage stacks you have at the end of each turn increases. At 5★, stack gain becomes even easier, and your Trait Skill receives a major enhancement.
Shard Farming Priority GuideBest Builds for Rico
Critical Attacker Build
| Basic Attack | Reaction | Ascension | |||||||||||||||||||||
|---|---|---|---|---|---|---|---|---|---|---|---|---|---|---|---|---|---|---|---|---|---|---|---|
 No Escape No Escape |  Never Give Up Never Give Up |  Valiant Vanguard Valiant Vanguard | |||||||||||||||||||||
| Skill | |||||||||||||||||||||||
 Hammer Smash Hammer Smash |  Hammer Time! Hammer Time! |  Crackling Sparks Crackling Sparks | |||||||||||||||||||||
| Weapon | Trinket | Tarot | |||||||||||||||||||||
 Hammer Dragon Rise Hammer Dragon Rise |  Shield of Justice Shield of Justice |  Verdict of Justice Verdict of Justice | |||||||||||||||||||||
This is an offensive build meant to leverage Rico's high damage potential. Because of Rico's innate affinity with criticals, Justice works extremely well as a Tarot. Just remember that you need to supplement her with characters that can provide NRG and CD reduction.
Strike Back Build
| Basic Attack | Reaction | Ascension | |||||||||||||||||||||
|---|---|---|---|---|---|---|---|---|---|---|---|---|---|---|---|---|---|---|---|---|---|---|---|
| No Escape |  First Strike First Strike | Valiant Vanguard | |||||||||||||||||||||
| Skill | |||||||||||||||||||||||
 Try to Make Me Mad Try to Make Me Mad |  Milk Power Boost Milk Power Boost |  World's My Oyster World's My Oyster | |||||||||||||||||||||
| Weapon | Trinket | Tarot | |||||||||||||||||||||
| Hammer Dragon Rise |  Crystal Burst Armor Crystal Burst Armor |  Destruction of The Tower Destruction of The Tower | |||||||||||||||||||||
This is a build specialized in countering enemies through Strike Backs and Preempts. Since you gain Fur Rage stacks when attacked, skillful positioning allows you to use your Trait Skill more frequently.
Priority Skills
| Skill | Priority and Details |
|---|---|
| Hammer Smash | ★★★★★ The main Skill for an Attacker build or when you want improved Knockbacks. Can deal extremely high damage, especially against enemies immune to Knockback or when you have the [Be Serious!] buff. It's also powerful because it can be used every turn with CD reduction/NRG supply. |
| Try to Make Me Mad | ★★★★★ The main Skill for a Strike Back build, allowing Rico to gain increased attack + Fur Rage stacks while also gaining effects like DMG Reduction + Strike Back. Without this Skill, Rico cannot perform Strike Backs, so prioritize equipping it. |
| No Escape | ★★★★★ An excellent Basic Attack that can Knockback targets in addition to its AoE damage. Equip this Basic Attack for situations other than single-target battles. |
| Crackling Sparks | ★★★★★ A Passive with many excellent effects like Gain Fur Rage stacks when activating a class skill, Additional damage on Collision, Increased ATK against enemies immune to Knockback, and Applies PDEF/MDEF DOWN debuffs before attacking. Prioritize equipping this for an Attacker build. |
| First Strike | ★★★★ Equip this Reaction for a Strike Back build if you don't need damage reduction. |
| Never Give Up | ★★★★ A Skill that reduces damage taken and grants Unyielding, while also providing many buffs upon activation. A powerful Reaction that, when used effectively, allows for consecutive uses of Trait Skills. |
| Hammer Time! | ★★★★ A Decision Skill that lets you choose between a forward-area attack or a self-centered AoE attack. An excellent Skill that can apply PDEF DOWN and ✗Healing Received debuffs in its area, and can also be used to aim for fall kills via knockbacks. Its ability to be used every turn, as long as you can recover NRG, is also a major plus. |
| World's My Oyster | ★★★★ A Leader's Aura that strengthens |
| Skill | Priority and Details |
|---|---|
| Milk Power Boost | ★★★ Provides an Instant heal, a defense buff, and Fur Rage stacks, while also granting the rare [DMG Lock] buff. An excellent Skill that allows you to reliably withstand up to two fatal blows in high-difficulty stages. |
 Change Pursuit Change Pursuit | ★★ Although Rico has [Jump], her movement options are limited, so it's worth equipping this in stages that require significant movement. |
 Critical Strike Critical Strike | ★★ This Basic Attack is a better choice against single targets. |
 Knockback Bash Knockback Bash | ★ Rico already has many ways to Knockback, including her Basic Attacks, so this has a low priority. |
 Warrior of Frost Warrior of Frost | ★ Equip this in stages where [Frosty] panels are a nuisance. |
Recommended Gear, Tarots, & Engravings
Recommended Weapons for Rico
| Hammer Dragon Rise |  Hollow Axe Hollow Axe |  Denial Hammer Denial Hammer |
The Hammer Dragon Rise is the top recommendation, since it boosts Area Attacks, Preempt, and Strike Back. Rico also pairs well with many weapons that enhance damage output. However, if you’re aiming for knockbacks and fall kills, the Denial Hammer is also a solid choice.
Recommended Trinkets for Rico
| Shield of Justice | Crystal Burst Armor |  Evergreen Pendent Evergreen Pendent |
The Shield of Justice is our top pick, offering a hefty stat boost along with the boost granted when having a physical shield. For counter-focused builds, shields can sometimes get broken, so in high-difficulty stages, the Crystal Burst Armor which boosts both HP and counterattack damage, is also a viable option.
Recommended Tarots for Rico
| Verdict of Justice | Destruction of The Tower |  Temptation of The Devil Temptation of The Devil |
Because Rico excels in Critical Rate & Damage, Justice is the most recommended, since it provides the "Crit DMG UP" effect to greatly increase damage dealt. For Counterattack builds, Tower which has Life Steal & Damage Dealt UP effects, is also recommended.
Recommended Engravings for Rico
| Resonance | Effect |
|---|---|
 Sword Sword Wand Wand | Before actively attacking, for each 1 tile traversed, increases ATK and DEF by 4%, up to 12%. The effect lasts until the start of the next turn, |
| Wand Wand | After using a [basic attack], [skill], [strike back], or [assisting attack], gains 1 random [Level 2 Attribute Buff]. |
Wand Cup Cup | At the end of the turn, there is a 50% chance to gain [Engraving Resonance]. Effect: When using an [active skill] next time, refunds the NRG consumed and resets the CD. The skill effect has a CD of 4 turns. (Does not trigger in real-time combat. The effect changes to increasing HP, ATK and DEF by 5%) |
The Sword+Wand combo is especially recommended for its stat boosts. Other good options include Wand+Cup, which sets CD and NRG costs to zero, and Wand+Wand, which grants a large number of buffs.
Rico Skill Unlock Priorities
Recommended Skill Set
* Tap a skill to view its details below.
Normal | RK13 | Unique |
|---|---|---|
| Crackling Sparks | RK11 | World's My Oyster |
| No Escape | RK9 | Critical Strike |
| Hammer Time! | RK7 | Try to Make Me Mad |
| First Strike | RK5 | Never Give Up |
| Hammer Smash | RK3 | Milk Power Boost |
| Change Pursuit | RK1 | Warrior of Frost |
Here’s a recommended example for a build that actively attacks using Knockback as well as single-target and AoE skills.
Skill Details
| Change Pursuit | Cost: 0 CD: 3 |
| (Physical DMG) | |
 | |
| Warrior of Frost | Cost: - CD: - |
| (Passive) When the character is on | |
| Hammer Smash | Cost: 3 CD: 2 |
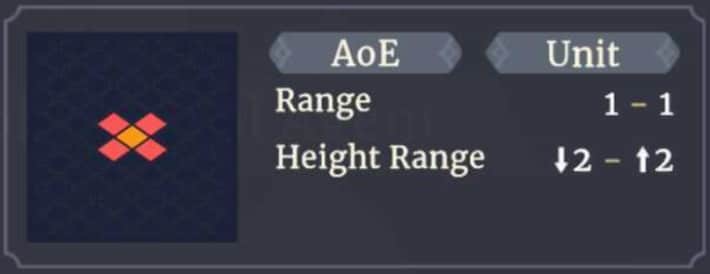
| (Physical DMG) Attacks the specified target, dealing 40% AoE DMG, knocking them back by 4 tiles, with Skill Multiplier increased by 70% against targets with Knockback Immunity; then performs Pursuit, dealing 75% AoE DMG to all enemies in a cross-shaped range of 2 tiles of the target, and dispels 2 | |
 | |
| Milk Power Boost | Cost: 0 CD: 4 |
| (Healing) | |
 | |
| First Strike | Cost: - CD: - |
| (Reaction) Before being actively attacked from the | |
| Never Give Up | Cost: - CD: - |
| (Reaction) Reduces melee DMG taken by 15%. Gains | |
| Hammer Time! | Cost: 0 CD: 0 |
| (Decision) Select to use either | |
| |
| Try to Make Me Mad | Cost: 2 CD: 0 |
| (Support) Gains 2 stacks of | |
| |
| No Escape | Cost: - CD: - |
| (Basic Attack) Deals 70% AoE physical DMG to all enemies within a 1-tile radius of the target, then knocks back the center target by an additional 2 tiles. | |
 | |
| Critical Strike | Cost: - CD: - |
| (Basic Attack) Deals 100% physical DMG and increases Crit by 15% before attacking. | |
 | |
| Crackling Sparks | Cost: 0 CD: 0 |
| (Passive) Gains 2 stacks of | |
| World's My Oyster | Cost: 0 CD: 0 |
| (Leader's Aura) For all "Drifter" allies in battle, ATK increases by 10%, and DEF increases by 20%. When performing active attacks and Strike Back, DMG dealt increases by 5% for each 1 target hit, up to 15%; if the target is in | |
| Valiant Vanguard | Cost: - CD: - |
| (Passive) | |
Rico's Trait & Skills
Rico's Trait
| Trait | Max Effect |
|---|---|
| [Most Formidable Boss Rico] Gains |
| Stars Unlocked | Effect |
|---|---|
 | Gains |
 | Gains |
 | Gains |
 | Gains |
Rico's Base Skills
| Skill | Range |
|---|---|
 Slash Slash |  |
| [Basic Attack] Cost: - / CD: - (Basic Attack) Deals 100% Physical DMG. | |
| Knockback Bash |  |
| [Skill] Cost: 3 / CD: 0 (Physical DMG) Single-target attack. Deals 140% DMG and knock the target back by 2 tiles. | |
Skills That Can Be Learned at RK1
| Skill | Range |
|---|---|
| Change Pursuit | |
| [Skill] Cost: 0 / CD: 3 (Physical DMG) | |
| Warrior of Frost | - |
| [Skill] Cost: - / CD: - (Passive) When the character is on | |
Skills That Can Be Learned at RK3
| Skill | Range |
|---|---|
| Hammer Smash | |
| [Skill] Cost: 3 / CD: 2 (Physical DMG) Attacks the specified target, dealing 40% AoE DMG, knocking them back by 4 tiles, with Skill Multiplier increased by 70% against targets with Knockback Immunity; then performs Pursuit, dealing 75% AoE DMG to all enemies in a cross-shaped range of 2 tiles of the target, and dispels 2 | |
| Milk Power Boost | |
| [Skill] Cost: 0 / CD: 4 (Healing) | |
Skills That Can Be Learned at RK5
| Skill | Range |
|---|---|
| First Strike | - |
| [Reaction] Cost: - / CD: - (Reaction) Before being actively attacked from the | |
| Never Give Up | - |
| [Reaction] Cost: - / CD: - (Reaction) Reduces melee DMG taken by 15%. Gains | |
Skills That Can Be Learned at RK7
| Skill | Range |
|---|---|
| Hammer Time! | |
| [Skill] Cost: 0 / CD: 0 (Decision) Select to use either | |
| Try to Make Me Mad | |
| [Skill] Cost: 2 / CD: 0 (Support) Gains 2 stacks of | |
Skills That Can Be Learned at RK9
| Skill | Range |
|---|---|
| No Escape | |
| [Basic Attack] Cost: - / CD: - (Basic Attack) Deals 70% AoE physical DMG to all enemies within a 1-tile radius of the target, then knocks back the center target by an additional 2 tiles. | |
 Critical Strike Critical Strike | |
| [Basic Attack] Cost: - / CD: - (Basic Attack) Deals 100% physical DMG and increases Crit by 15% before attacking. | |
Skills That Can Be Learned at RK11
| Skill | Range |
|---|---|
| Crackling Sparks | - |
| [Skill] Cost: 0 / CD: 0 (Passive) Gains 2 stacks of | |
| World's My Oyster | - |
| [Skill] Cost: 0 / CD: 0 (Leader's Aura) For all "Drifter" allies in battle, ATK increases by 10%, and DEF increases by 20%. When performing active attacks and Strike Back, DMG dealt increases by 5% for each 1 target hit, up to 15%; if the target is in | |
Skills That Can Be Learned at RK13
| Skill | Range |
|---|---|
| Valiant Vanguard | - |
| [Ascension Skill] Cost: - / CD: - (Passive) | |
Weapons That Rico Can Equip
List of Weapons
 Brutal Axe
 Feast Axe
 Tuning Hammer
 Cornucopia Axe
 Gale Sword
 'Barbecue' Hammer
 Great Company on the Journey
 Surtr the Darkfire Axe
 Supreme Assault Blade
 Undying Flames
 Oathkeeping Star
 Formidable Axe
 Antimagic Axe
 Balanced Heavy Axe
 Battle-Hardened Axe
 Heavy Iron Axe
 Iron Axe
Rico's Voice Actor & Release Date
Rico Voice Actor
| VA | Japanese VA: Yu Serizawa |
|---|
Released on Friday, August 15
Rico was released on Friday, August 15. Since the character is added to the standard banner, they can still be obtained even after the limited-time banner ends.
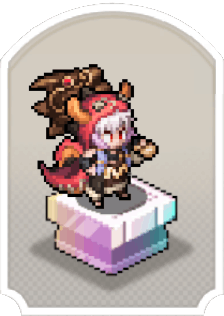
Rico's Skin
| Initial | Ascended |
|---|---|
 |  |
▲ Unlock Ascended Skin when character reaches Star Level 5.
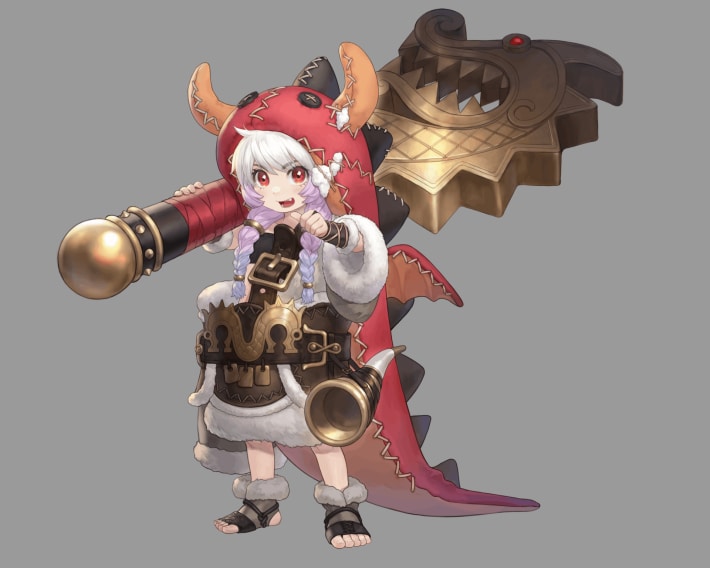
Descendant of the Twin-Headed Dragonand
Terror of the North,Rico, actually exists as nothing more than a young snowhare from the Luccia Tundra.
Rico dreamed of worlds beyond the tundra since childhood, yet faced dismissal due to her Snowhare lineage. After her rejection from the Silver Wolf Mercenary Group trials, Rico refused to surrender. She followed the group to Iria alone. Ashamed of her heritage, Rico hides her past behind false bravado, yet her heart yearns for true acceptance. She works tirelessly toward this goal. During the campaign against Darklight with the Sword of Convallaria, Rico earned recognition through her abilities and became a special agent for the Silver Wolf Mercenary Group.
The
twin-headed dragonexists only in legend. Milk, no matter how much one drinks, cannot enhance combat skills. Yet through unwavering daily effort, Rico's hammer will punish more evildoers and force everyone to view this little bunny from the tundra with newfound respect.

