 Acambe
 Afra
Afra Agata
Agata Alexei
 Auguste
 Ayishah
 Beryl
Beryl Camelot
 Caris
Caris Ciri
Ciri Clara
Clara Cocoa
Cocoa Col
Col Credenza
 Dantalion
 Edda
Edda Estra
Estra Falin
Falin Faycal
 Flavia
 Garcia
 Geralt
 Gloria
 Guzman
 Hasna
Hasna Heshan
 Iggy
Iggy Inanna
 Kianshir
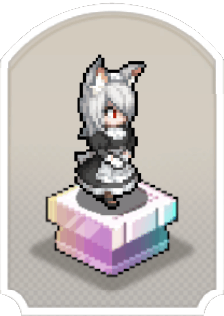 Kiya
Kiya Kvare
Kvare Layla
Layla Leonide
 LilyWill
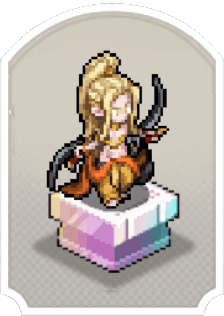 Lukamar
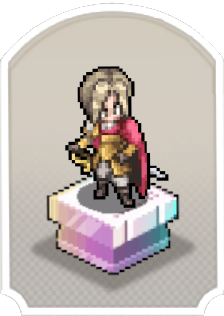 Lutfi
Lutfi Luvata
 Magnus
 Maitha
 Marcille
 Miguel
 Momo
Momo Nergal
 NonoWill
 Nungal
 Nydia
Nydia Pamina
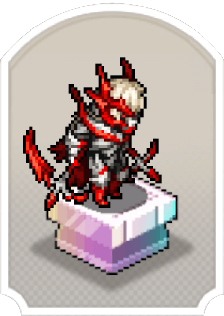 Parsifal
 Pooch Runrun
 Rawiyah
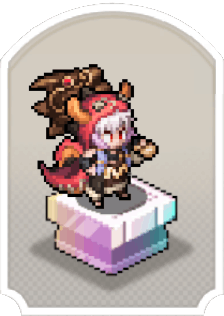 Rico
Rico Safiyyah
 Samantha
 SchackLulu
 Selina
 Senshi
 Shahnaz
 Shams
Shams Simona
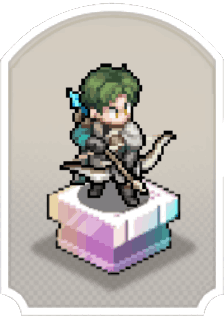 SP Faycal
 SP Inanna
 SP Maitha
 SP Nungal
 SP Rawiyah
 SP Safiyyah
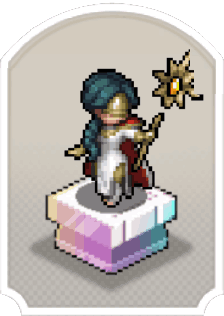 SP Samantha
 Taair
Taair Teadon
 Team Meteor
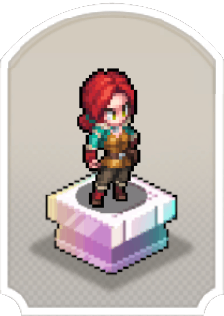 Triss
Triss Tristan
 Xavier
 Yeganeh
 Yennefer
 Yserinde
Build and skill tree guide for Homa in Sword of Convallaria (SoC). See the best gear (weapon/trinket/tarot), skin, tier, and review here!
Table of Contents
Homa's Tier & Basic Info
 | |
| Rarity |  Legendary Legendary |
|---|---|
| Role |  Breaker Breaker |
| Faction |  Drifter Drifter Aggression Aggression Elaman Elaman |
Movement Stats
| Move | Stand | High Jump | Low Jump |
|---|---|---|---|
| 3 | Normal | 2 | 2 |
Homa's Tier
| Overall Rating | Reroll Rating | ||||
|---|---|---|---|---|---|
▶ Character Tier List | ▶ Reroll Tier List | ||||
| Single-Target Rating | Multi-Target Rating | ||||
User Score
Review & How to Get
| Review | - Can greatly buff a single ally - Excellent healing and dispels - Significant damage from follow-up attacks |
|---|---|
| How to Get | - Obtain from Gacha (Summon) |
Homa Pros and Strength
Homa's Character Overview
- Support attacker hybrid
- Physical ATK Scaling Heal and Cleanse
- Follow-up attack specialist
Support Attacker Hybrid
Homa's primary role in any team is to focus on supporting a single ally by using RK 1 [Hovering Support] on your main DPS. However, because of her Trait, Homa actually makes for an effective and elusive normal attacker once you've unlocked RK 9 [Tangling Flying Knives].
| Tips! | Once you've upgraded Homa to ★5, she can generate enough NRG to consistently cast skills, which allows for more flexibility in your build since you can equip non-basic attack related skills if you want to. |
|---|
Physical Atk Scaling Heal and Cleanse
While Homa cannot compare the size of her heals to either Inanna or Samantha, Homa is unique in that she can dispel the "no healing received" debuff. This means that her heals will always be consistent and will only get stronger as you increase her P.ATK stat.
Follow-Up Attack Specialist
| Conditions for Follow-Up Attacks | |
|---|---|
| 1 | Homa makes a single active attack |
| 2 | An ally that Baloor is assisting makes a single target attack |
Similar to Saffiyah, Homa can also evoke follow up attacks by casting either RK 1 [Hovering Support] or RK 11 [Hashalaram Carnival]. These abilities allow Homa to trigger follow-up attacks for herself and a chosen ally by calling [Baloor] whenever she or her ally performs a single-target attack.
Star Level Up Priority & Recommended Stars for Homa
Aim to Reach 3★ → 5★
| Star Level Up Priority | Recommended Star Level |
|---|---|
 | 3★ → 5★ |
At 3-stars, Homa gains +1 to her movement while [Healthy], and at 5-stars, her follow-up attacks steal 2 buffs and 1 NRG from enemies. Note that Homa can steal almost any buffs, even those included in events like Voyage of Discovery. Therefore, you should aim to reach 3-stars to increase her mobility, then prioritize getting her to 5-stars as soon as possible.
Shard Farming Priority GuideBest Builds for Homa
Recovery & Support Build
| Basic Attack | Reaction | Ascension | |||||||||||||||||||||
|---|---|---|---|---|---|---|---|---|---|---|---|---|---|---|---|---|---|---|---|---|---|---|---|
 Tangling Flying Knives Tangling Flying Knives |  Evasive Mirage Evasive Mirage | 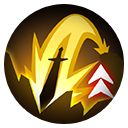 Path of High Ground Path of High Ground | |||||||||||||||||||||
| Skill | |||||||||||||||||||||||
 Hovering Support Hovering Support |  Tacit Choice Tacit Choice |  Harmony Harmony | |||||||||||||||||||||
| Weapon | Trinket | Tarot | |||||||||||||||||||||
 Longbow of Martyrs Longbow of Martyrs |  Flying Blade Armguard Flying Blade Armguard |  Mercy of The High Priestess Mercy of The High Priestess | |||||||||||||||||||||
This is a build focused on ally support and healing. With Tarot and Engravings, you can increase the amount of healing by raising P.ATK, so keep that in mind. If you want to focus on offense, it's recommended to swap [Harmony] with an attack Skill, and the Priestess Tarot to a Tarot that increases damage such as Magician or Devil.
Priority Skills
| Skill | Priority and Details |
|---|---|
| Hovering Support | ★★★★★ Greatly boosts one ally and grants Homa a special buff, making this a must-have skill for your party. The 1.5x skill effect and the added follow-ups are incredibly strong. It's best used on a powerful attacker who can trigger [Act Again] to fully capitalize on the benefits. |
| Tacit Choice | ★★★★★ A Choice Skill between [Barul Attack], which deals high total damage and inflicts a strong physical defense debuff, and [Cool Breeze], which heals and removes debuffs. Both cost 2 NRG, have no cooldown, and are easy to use yet highly effective—making this skill a strong addition to your build. |
| Evasive Mirage | ★★★★★ A powerful Reaction that inflicts [Blind] and allows Homa to [Dodge] and [Strike Back] with an 80% chance against enemies it can be applied to. However, it's less effective against enemies immune to [Blind], and Homa may occasionally position herself dangerously. |
| Tangling Flying Knives | ★★★★★ The effect of being able to move again after attacking is easy to use and powerful. After a Basic Attack, it becomes possible to retreat outside the enemy's attack range or towards allies. |
| Harmony | ★★★★ At the end of the turn after using a Basic Attack or Skill, heals and removes debuffs from allies within 2 tiles. When combined with [Cool Breeze], it becomes an excellent support Skill—perfect when leaning towards healing. |
 Hashalaram Carnival Hashalaram Carnival | ★★★★ Grants [Disturbance] (1 Dodge) and triggers an area attack. It's a valuable Skill that can also grant Baloor, making it ideal if you want to strike and apply Baloor at the same time. The debuffs it can inflict are especially effective against enemies that don’t have debuff immunity. |
| Skill | Priority and Details |
|---|---|
 Fleeing Hare Fleeing Hare | ★★★ Unlike [Evasive Mirage], it can reduce damage, so against enemies you can't apply [Blind] to, this Reaction is more useful. |
 Heart Piercing Heart Piercing | ★★★ This is Homa's highest-damage Skill. With a high cost of 3 NRG and a 3 turn CD, it's especially effective in party setups that can support NRG recovery or cooldown reduction. If you're prioritizing offense, this skill is recommended. |
 Knock-Back Shot Knock-Back Shot | ★★ Compared to [Barul Attack] used within a 2-tile range, the damage is not much different, so only include it in stages where knock-back is needed. |
 Rampage Archer Rampage Archer | ★★ The effect of attacking adjacent enemies is not very useful, but the offensive buffs received when near an enemy is potent. In stages with low NRG supply, it's viable to include it over other attack Skills. |
 Ice Attack Ice Attack | ★★ Generally, [Tangling Flying Knives] is easier to use, but this one has a 1-tile longer Range, which allows Homa to attack from relative safety. |
 Shield Break - Enhanced Shield Break - Enhanced | ★ While the effect itself is powerful, it has no effect on enemies without Shields. So only prioritize it when you absolutely need to deal damage to enemies with Shields. |
 Scatter Scatter | ★ Useful only when you want to perform Ranged attacks, so its party priority is low. |
Recommended Gear, Tarots, & Engravings
Recommended Weapons for Homa
 Drifting Feathers Drifting Feathers | Longbow of Martyrs |  Cornucopia Longbow Cornucopia Longbow |
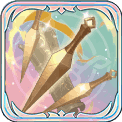
For Homa, increasing physical attack boosts both damage dealt and healing amount. For this reason, the [Longbow of Martyrs], which provides the highest physical attack increase, is especially recommended. The [Irian Combat Bow], which boosts physical attack and follow-up damage when an ally attacks, is also a great match. For Homa below 5 stars, the [Cornucopia Longbow], known for excellent NRG supply, is another solid option.
Recommended Trinkets for Homa
| Flying Blade Armguard |  Old Scrolls of Auguste Old Scrolls of Auguste |  Shield of Justice Shield of Justice |
For Homa, a variety of Trinkets work really well. The [Flying Blade Armguard] is great for triggering follow-ups, while support items like [Old Scrolls of Auguste] and [Disaster Bottle] help keep support the team. To boost healing and damage, the [True Lens] and [Origin Hourglass] are solid choices. Furthermore, the [Evergreen Pendent] is great for adding buffs. Switch up your Trinkets depending on your Skill setup and what role Homa is playing in the party.
Recommended Tarots for Homa
| Mercy of The High Priestess |  Dream of The Magician Dream of The Magician |  Temptation of The Devil Temptation of The Devil |
For healing-focused builds, [High Priestess] is the top choice. For offense, go with [Magician] or [Hierophant] to boost her damage output. If you're under 5 stars and struggling with NRG, or want to focus more on supporting allies, [Fate] and [World] are also great options.
Recommended Engravings for Homa
| Resonance | Effect |
|---|---|
 Wand Wand Wand Wand | After using a [basic attack], [skill], [strike back], or [assisting attack], gains 1 random [Level 2 Attribute Buff]. |
 Cup Cup Cup Cup | Increases Healing Effect by 10% and Healing Received by 10%. |
 Sword Sword Pentacle Pentacle | When [unharmed], increases ATK and DEF by 12%. |
While Homa is under 5-stars, [Wand + Cup], which eliminates cost and cooldown, is recommended. Once Homa reaches 5-stars, consider [Wand + Wand] to gain buffs with follow-ups, [Cup + Cup] to boost healing effectiveness, or [Sword + Pentacle] for increased damage dealt. Additionally, [Sword + Sword], with the highest cap for P.ATK rolls, is also a strong option.
Homa Skill Unlock Priorities
Recommended Skill Set
* Tap a skill to view its details below.
Normal | RK13 | Unique |
|---|---|---|
| Heart Piercing | RK11 | Hashalaram Carnival |
| Tangling Flying Knives | RK9 | Ice Attack |
| Scatter | RK7 | Rampage Archer |
| Evasive Mirage | RK5 | Fleeing Hare |
| Shield Break - Enhanced | RK3 | Harmony |
| Hovering Support | RK1 | Tacit Choice |
Prioritize taking both RK 1 skills since they are powerful. Also, unlocking RK 5 and RK 11 will increase Homa's potency. This ATK increase equates to an increase in both damage dealt and HP recovered, so take these skills if you have the extra Castalia.
Skill Details
| Hovering Support | Cost: 1 CD: 3 |
| (Support) | |
 | |
| Tacit Choice | Cost: 0 CD: 0 |
| (Decision) Homa can select to use | |
 | |
| Shield Break - Enhanced | Cost: - CD: - |
| (Passive) Increases ATK by 30% and ignores 40% of the target's DEF when attacking enemies with a | |
| Harmony | Cost: 0 CD: 0 |
| (Passive) At the end of the turn, if | |
| Evasive Mirage | Cost: - CD: - |
| (Reaction) Before being hit by an enemy's | |
| Fleeing Hare | Cost: - CD: - |
| (Reaction) When hit by an active attack, the DMG taken is decreased by 8%. After being attacked, the character gains | |
| Scatter | Cost: 2 CD: 0 |
| (Physical DMG) Deals 70% | |
 | |
| Rampage Archer | Cost: 0 CD: 0 |
| (Passive) The character can attack an adjacent enemy when performing | |
| Tangling Flying Knives | Cost: - CD: - |
| (Basic Attack) Single-target attack. Deals 100% Physical DMG. After attacking, the character can Move Again, with the distance being the remaining Movement plus 1. | |
 | |
| Ice Attack | Cost: - CD: - |
| (Basic Attack) Deals 100% physical DMG and inflicts | |
 | |
| Heart Piercing | Cost: 3 CD: 3 |
| (Physical DMG) Single-target attack. Deals 150% DMG. When the target is | |
 | |
| Hashalaram Carnival | Cost: 3 CD: 4 |
| (Support) Homa grants | |
 | |
| Path of High Ground | Cost: - CD: - |
| (Passive) | |
| Grand Bazaar's Clear Sky | Cost: - CD: - |
| (Passive) ✦ Increases healing effect by 30%; additionally increases by 30% for targets where ✦ When having 10 or more stacks of ✦ The skill | |
Homa's Trait & Skills
Homa's Trait
| Trait | Max Effect |
|---|---|
| [Best Partner] Homa ignores |
| Stars Unlocked | Effect |
|---|---|
 | Homa ignores |
 | Homa ignores |
 | Homa ignores |
 | Homa ignores |
Homa's Base Skills
| Skill | Range |
|---|---|
 Straight Shot Straight Shot |  |
| [Basic Attack] Cost: - / CD: - (Basic Attack) Deals 100% Physical DMG. | |
| Knock-Back Shot |  |
| [Skill] Cost: 2 / CD: 0 (Physical DMG) Deals 135% DMG to 1 enemy within a cross-shaped range around the character and knocks them back by 2 tiles. | |
Skills That Can Be Learned at RK1
| Skill | Range |
|---|---|
| Hovering Support | |
| [Skill] Cost: 1 / CD: 3 (Support) | |
| Tacit Choice | |
| [Skill] Cost: 0 / CD: 0 (Decision) Homa can select to use | |
Skills That Can Be Learned at RK3
| Skill | Range |
|---|---|
| Shield Break - Enhanced | - |
| [Skill] Cost: - / CD: - (Passive) Increases ATK by 30% and ignores 40% of the target's DEF when attacking enemies with a | |
| Harmony | - |
| [Skill] Cost: 0 / CD: 0 (Passive) At the end of the turn, if | |
Skills That Can Be Learned at RK5
| Skill | Range |
|---|---|
| Evasive Mirage | - |
| [Reaction] Cost: - / CD: - (Reaction) Before being hit by an enemy's | |
| Fleeing Hare | - |
| [Reaction] Cost: - / CD: - (Reaction) When hit by an active attack, the DMG taken is decreased by 8%. After being attacked, the character gains | |
Skills That Can Be Learned at RK7
| Skill | Range |
|---|---|
| Scatter | |
| [Skill] Cost: 2 / CD: 0 (Physical DMG) Deals 70% | |
| Rampage Archer | - |
| [Skill] Cost: 0 / CD: 0 (Passive) The character can attack an adjacent enemy when performing | |
Skills That Can Be Learned at RK9
| Skill | Range |
|---|---|
| Tangling Flying Knives | |
| [Basic Attack] Cost: - / CD: - (Basic Attack) Single-target attack. Deals 100% Physical DMG. After attacking, the character can Move Again, with the distance being the remaining Movement plus 1. | |
 Ice Attack Ice Attack | |
| [Basic Attack] Cost: - / CD: - (Basic Attack) Deals 100% physical DMG and inflicts | |
Skills That Can Be Learned at RK11
| Skill | Range |
|---|---|
| Heart Piercing | |
| [Skill] Cost: 3 / CD: 3 (Physical DMG) Single-target attack. Deals 150% DMG. When the target is | |
| Hashalaram Carnival | |
| [Skill] Cost: 3 / CD: 4 (Support) Homa grants | |
Skills That Can Be Learned at RK13
| Skill | Range |
|---|---|
| Path of High Ground | - |
| [Ascension Skill] Cost: - / CD: - (Passive) | |
 Grand Bazaar's Clear Sky Grand Bazaar's Clear Sky | - |
| [Ascension Skill] Cost: - / CD: - (Passive) ✦ Increases healing effect by 30%; additionally increases by 30% for targets where ✦ When having 10 or more stacks of ✦ The skill | |
Weapons That Homa Can Equip
List of Weapons
 Meteor Line
 Whale Hunter
 Irian Combat Bow
 Star-Raid Crossbow
 Melee Mega Crossbow
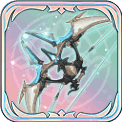 Protect the Rebirth
 VIderian Longbow
 Steel Crossbow
 Hunting Bow
 Exquisite Wood Bow
 Accurate Bow
 Wood Bow
Homa's Voice Actor & Release Date
Homa Voice Actor
| VA | Japanese VA: Shiraishi Ryoko Chinese VA: TBD |
|---|
Released on Friday, November 22
Homa was released on Friday, November 22. Since the character is added to the standard banner, they can still be obtained even after the limited-time banner ends.
Homa's Skin
| Initial | Ascended |
|---|---|
 |  |
▲ Unlock Ascended Skin when character reaches Star Level 5.
Homa ostensibly engages in mundane goods trade between Elaman and Iria, but beneath the surface, she's involved in risky underground trading for reasons undisclosed. The backbone of her operations appears to be a well-established network of relationships she has cultivated.
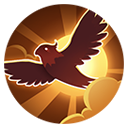
She claims to share a symbiotic partnership with her parrots, a relationship that hints at an interesting backstory.

