 Acambe
 Afra
Afra Agata
Agata Alexei
 Auguste
 Ayishah
 Beryl
Beryl Camelot
 Caris
Caris Ciri
Ciri Clara
Clara Cocoa
Cocoa Col
Col Credenza
 Dantalion
 Edda
Edda Estra
Estra Falin
Falin Faycal
 Flavia
 Garcia
 Geralt
 Gloria
 Guzman
 Hasna
Hasna Heshan
 Homa
Homa Iggy
Iggy Inanna
 Kianshir
 Kiya
Kiya Kvare
Kvare Layla
Layla Leonide
 LilyWill
 Lukamar
 Lutfi
Lutfi Luvata
 Magnus
 Maitha
 Marcille
 Miguel
 Nergal
 NonoWill
 Nungal
 Nydia
Nydia Pamina
 Parsifal
 Pooch Runrun
 Rawiyah
 Rico
Rico Safiyyah
 Samantha
 SchackLulu
 Selina
 Senshi
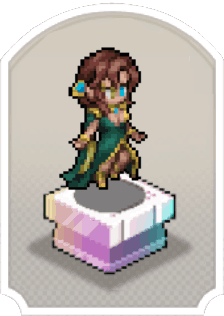 Shahnaz
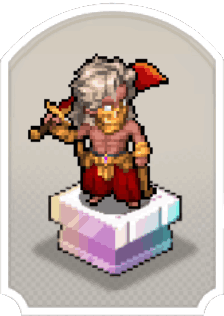 Shams
Shams Simona
 SP Faycal
 SP Inanna
 SP Maitha
 SP Nungal
 SP Rawiyah
 SP Safiyyah
 SP Samantha
 Taair
Taair Teadon
 Team Meteor
 Triss
Triss Tristan
 Xavier
 Yeganeh
 Yennefer
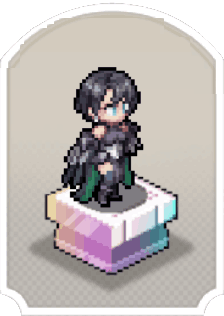 Yserinde
Build and skill tree guide for Momo in Sword of Convallaria (SoC). See the best gear (weapon/trinket/tarot), skin, tier, and review here!
Table of Contents
Momo's Tier & Basic Info
 | |
| Rarity |  Legendary Legendary |
|---|---|
| Role |  Destroyer Destroyer |
| Faction |  Vltar Vltar Sword of Convallaria Sword of Convallaria Fortitude Fortitude |
Movement Stats
| Move | Stand | High Jump | Low Jump |
|---|---|---|---|
| 3 | Normal | 2 | 2 |
Momo's Tier
| Overall Rating | Reroll Rating | ||||
|---|---|---|---|---|---|
▶ Character Tier List | ▶ Reroll Tier List | ||||
| Single-Target Rating | Multi-Target Rating | ||||
User Score
Review & How to Get
| Review | - Useful in multiple battles - Continuous damage UP & physical damage reduction Trait - Life Steal & Alert Skill is powerful - Select and Activate pull and knockback |
|---|---|
| How to Get | - Obtain from Gacha (Summon) |
Momo Pros and Strength
Momo's Character Overview
- Mobile AoE Alert
- Risk-free push or pull
Mobile AoE Alert
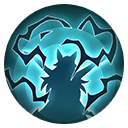
Momo can unlock the ability [Doom Waken] at RK 11. This skill creates an Alert zone around Momo that triggers a devastating single target whenever enemies walk into the zone. This is the only Alert-based ability that lasts for more than one turn and also allows the user to move while it is active.
Compatible with Hunter's Intuition Trinket
The Hunter's Intuition is a trinket that tweaks the effects of Alert skills, triggering any Alert reactions when an enemy performs an action inside the Alert zone. Because [Doom Waken] is treated as an Alert skill, this trinket tweaks the triggering conditions of Doom Waken. Essentially, Momo will attack enemies who move inside her Alert zone, as well as any enemies who try to take actions inside her Alert zone. Any character that performs a buff, a heal, or an attack will be punished with a powerful single target magic attack.
Risk-free Push or Pull
| Repulsion Application Skills | Effects |
|---|---|
| Repulsion Purging | Pushes a column of 3 enemies away from Momo. |
| Reverse Repulsion | Pulls a column of 3 enemies towards Momo. |
[Repulsion Application] is a skill that Momo can unlock at RK 3. Because this skill is ranged, Momo can choose to push enemies over cliffs, or pull enemies towards her team from a relatively safe distance.
Star Level Up Priority & Recommended Stars for Momo
Aim to Reach 3★ → 5★
| Star Level Up Priority | Recommended Star Level |
|---|---|
 | 3★ → 5★ |
At 3-stars, Momo gains the ability to generate [Repulsion Barrier] every turn, which greatly improves her survivability. At 5-stars, the area affected by her increased damage-over-time effect expands. If you’re not prioritizing Memory Shards for other characters, upgrading her to 5-stars is a solid option.
Shard Farming Priority GuideBest Builds for Momo
Alert Build
| Basic Attack | Reaction | Ascension | |||||||||||||||||||||
|---|---|---|---|---|---|---|---|---|---|---|---|---|---|---|---|---|---|---|---|---|---|---|---|
 Invigorating Strike Invigorating Strike |  Erosive Force Field Erosive Force Field | 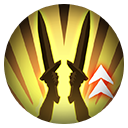 Path of Swift Support Path of Swift Support | |||||||||||||||||||||
| Skill | |||||||||||||||||||||||
 Misfortune Erosion Misfortune Erosion |  Doom Waken Doom Waken |  Erosive Power Erosive Power | |||||||||||||||||||||
| Weapon | Trinket | Tarot | |||||||||||||||||||||
 Starry Sky Heritage Starry Sky Heritage |  Hunter's Intuition Hunter's Intuition |  Destruction of The Tower Destruction of The Tower | |||||||||||||||||||||
This build emphasizes Momo's [Alert]. In stages where there are only a few Watchers or magical attacks, Momo can easily eliminate enemies on her own with due to her DMG mitigation and [Life Steal].
Priority Skills
| Skill | Build Priority and Details |
|---|---|
| Misfortune Erosion | ★★★★★ Easy-to-use AoE attack + Infection-applying Skill. With CD 0, it can be used every turn by replenishing NRG. The AoE attack's damage is low, but considering the damage from instant [Infection], the overall damage is high. |
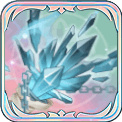
| Erosive Force Field | ★★★★★ A powerful Reaction that allows unlimited [Strike Back] if you have [Repulsion Barrier] stacks. It also activates the Life Steal effect of [Doom Waken] and the Tarot "The Tower", so you might heal even more than the damage taken. |
| Invigorating Strike | ★★★★★ A Basic Attack that can restore NRG. Since [Misfortune Erosion] consumes a lot of NRG, this Basic Attack is recommended. |
| Doom Waken | ★★★★★ A Skill that grants All-round [Alert] and powerful buffs. This Skill is fundamental to Momo's strength, so prioritize slotting it. |
| Erosive Power | ★★★★ A powerful passive that unconditionally increases damage and applies Infection when attacking. Essentially, equipping this is recommended over [Repulsion Application]. |
 Repulsion Application Repulsion Application | ★★★★ A choice Skill offering Knockback [Repulsion Purging] and 'Pull-in' [Reverse Repulsion]. It has long range and is very powerful on stages where you can aim for 'fall kills`. |
| Skill | Build Priority and Details |
|---|---|
 Field Field | ★★★ An `Aura` that reduces AoE damage. Not always necessary, but viable in high-difficulty stages if you want to withstand enemy AoE attacks. |
 Dark Ripple Dark Ripple | ★★★ An AoE attack that nullifies Passives and Reactions. Many enemies nullify it, but there are some situations where it can be effective. |
 Energy Ray Energy Ray | ★★ An easy-to-use single-target attack Skill with no NRG consumption. Viable in single-target battle stages. |
 Defense (Ranged Attack) Defense (Ranged Attack) | ★ Can reduce damage taken from magic or arrows, which are common from Watchers, which Momo is weak to. However, since [Erosive Force Field] is very powerful, you'd only want to equip this when tackling stages with many Ranged attackers. |
 Hypnotic Attack Hypnotic Attack | ★ [Sleep] itself is powerful, but due to the low 30% chance, [Invigorating Strike] is preferable. |
Recommended Gear, Tarots, & Engravings
Recommended Weapons for Momo
 Paradox Crystal Chain Paradox Crystal Chain |  Focus Wand Focus Wand |  Cornucopia Staff Cornucopia Staff |
We highly recommend the [Starry Sky Heritage], which greatly boosts both HP and magic attack, or the [Focus Wand], which extends the range of Momo's [Alert] Skill by 1 tile. While she does have [Life Steal], keep in mind that the effect of the [Focus Wand] only activates while the user is [Unharmed].
Recommended Trinkets for Momo
| Hunter's Intuition |  Maverick's Cloak Maverick's Cloak |  Crystal Burst Armor Crystal Burst Armor |
[Hunter's Intuition] is highly recommended, since it boosts the number of uses for her [Alert] Skill. For a more aggressive approach, [Maverick's Cloak] can be viable as Momo tends to position aggressively. If you're looking to make her tougher, [Crystal Burst Armor] is a viable pick for the HP bonus.
Recommended Tarots for Momo
| Destruction of The Tower |  Silence of The Hermit Silence of The Hermit |  Temptation of The Devil Temptation of The Devil |
[The Tower] is highly recommended for significantly boosting Alert Skills. If you're prioritizing survivability, equip Tarots like [The Hermit] or [The Devil].
Recommended Engravings for Momo
| Resonance | Effect |
|---|---|
 Wand Wand Wand Wand | After using a [basic attack], [skill], [strike back], or [assisting attack], gains 1 random [Level 2 Attribute Buff]. |
 Sword Wand Sword Wand | Before actively attacking, for each 1 tile traversed, increases ATK and DEF by 4%, up to 12%. The effect lasts until the start of the next turn, |
Wand Cup Cup | At the end of the turn, there is a 50% chance to gain [Engraving Resonance]. Effect: When using an [active skill] next time, refunds the NRG consumed and resets the CD. The skill effect has a CD of 4 turns. (Does not trigger in real-time combat. The effect changes to increasing HP, ATK and DEF by 5%) |
Since Momo can perform multiple actions throughout a single turn, she can trigger multiple instances of the [Wand + Wand] buffs. You could optionally engrave [Sword + Cup] if you are looking for a more general engraving resonance.
Momo Skill Unlock Priorities
Recommended Skill Set
* Tap a skill to view its details below.
Normal | RK13 | Unique |
|---|---|---|
| Doom Waken | RK11 | Life Devourer |
| Invigorating Strike | RK9 | Hypnotic Attack |
| Dark Ripple | RK7 | Toughness |
| Erosive Force Field | RK5 | Defense (Ranged Attack) |
| Erosive Power | RK3 | Repulsion Application |
| Energy Ray | RK1 | Field |
Both RK3 Skills are useful, so prioritize unlocking the Skill on the right. If you have the Catalia to spare, unlock the Skill on the left as well.
Skill Details
| Energy Ray | Cost: 0 CD: 3 |
| (Magical DMG) Single-target attack. Deals 140% DMG. Before attacking, the characters gains | |
 | |
| Field | Cost: - CD: - |
| (Aura) Decreases | |
| Erosive Power | Cost: - CD: - |
| (Passive) DMG increases by 10%. After dealing DMG, inflicts 1 stack of | |
| Repulsion Application | Cost: - CD: - |
| (Decision) Momo selects to use | |
 | |
| Erosive Force Field | Cost: - CD: - |
| (Reaction) When | |
| Defense (Ranged Attack) | Cost: - CD: - |
| (Reaction) When hit by a ranged attack, the DMG taken is decreased by 25%. | |
| Dark Ripple | Cost: 3 CD: 0 |
| (Magical DMG) Deals 70% | |
 | |
| Toughness | Cost: - CD: - |
| (Passive) Gains immunity to the effect of | |
| Invigorating Strike | Cost: - CD: - |
| (Basic Attack) Deals 100% physical DMG and additionally recovers 1 NRG. | |
 | |
| Hypnotic Attack | Cost: - CD: - |
| (Basic Attack) Deals 80% magical DMG and grants a 30% chance to inflict | |
 | |
| Doom Waken | Cost: 1 CD: 5 |
| (Support) | |
 | |
| Life Devourer | Cost: 3 CD: 0 |
| (Magical DMG) Single-target attack. Deals 150% DMG. After attacking, gains 45% | |
 | |
| Path of Swift Support | Cost: - CD: - |
| (Passive) | |
| Devouring Resonance | Cost: - CD: - |
| (Passive) ✦ Gains ✦ When | |
Momo's Trait & Skills
Momo's Trait
| Trait | Max Effect |
|---|---|
| [Doom Resonance] All enemies within 4 tiles of Momo take 35% more |
| Stars Unlocked | Effect |
|---|---|
 | All enemies within 3 tiles of Momo take 25% more |
 | All enemies within 3 tiles of Momo take 20% more |
 | All enemies within 3 tiles of Momo take 20% more |
 | All enemies within 3 tiles of Momo take 15% more |
Momo's Base Skills
| Skill | Range |
|---|---|
 Energy Wave Energy Wave |  |
| [Basic Attack] Cost: - / CD: - (Basic Attack) Deal 80% Magical DMG. | |
| Misfortune Erosion |  |
| [Skill] Cost: 3 / CD: 0 (Magical DMG) Momo deals 65% AoE DMG to all enemies within a 3×4 area in the target direction and inflicts 2 stacks of | |
Skills That Can Be Learned at RK1
| Skill | Range |
|---|---|
| Energy Ray | |
| [Skill] Cost: 0 / CD: 3 (Magical DMG) Single-target attack. Deals 140% DMG. Before attacking, the characters gains | |
| Field | - |
| [Skill] Cost: - / CD: - (Aura) Decreases | |
Skills That Can Be Learned at RK3
| Skill | Range |
|---|---|
| Erosive Power | - |
| [Skill] Cost: - / CD: - (Passive) DMG increases by 10%. After dealing DMG, inflicts 1 stack of | |
| Repulsion Application | |
| [Skill] Cost: - / CD: - (Decision) Momo selects to use | |
Skills That Can Be Learned at RK5
| Skill | Range |
|---|---|
| Erosive Force Field | - |
| [Reaction] Cost: - / CD: - (Reaction) When | |
| Defense (Ranged Attack) | - |
| [Reaction] Cost: - / CD: - (Reaction) When hit by a ranged attack, the DMG taken is decreased by 25%. | |
Skills That Can Be Learned at RK7
| Skill | Range |
|---|---|
| Dark Ripple | |
| [Skill] Cost: 3 / CD: 0 (Magical DMG) Deals 70% | |
 Toughness Toughness | - |
| [Skill] Cost: - / CD: - (Passive) Gains immunity to the effect of | |
Skills That Can Be Learned at RK9
| Skill | Range |
|---|---|
 Invigorating Strike Invigorating Strike | |
| [Basic Attack] Cost: - / CD: - (Basic Attack) Deals 100% physical DMG and additionally recovers 1 NRG. | |
| Hypnotic Attack | |
| [Basic Attack] Cost: - / CD: - (Basic Attack) Deals 80% magical DMG and grants a 30% chance to inflict | |
Skills That Can Be Learned at RK11
| Skill | Range |
|---|---|
| Doom Waken | |
| [Skill] Cost: 1 / CD: 5 (Support) | |
 Life Devourer Life Devourer | |
| [Skill] Cost: 3 / CD: 0 (Magical DMG) Single-target attack. Deals 150% DMG. After attacking, gains 45% | |
Skills That Can Be Learned at RK13
| Skill | Range |
|---|---|
| Path of Swift Support | - |
| [Ascension Skill] Cost: - / CD: - (Passive) | |
 Devouring Resonance Devouring Resonance | - |
| [Ascension Skill] Cost: - / CD: - (Passive) ✦ Gains ✦ When | |
Weapons That Momo Can Equip
List of Weapons
 Reorganized Cube
 Skeleton Staff
 Resentment Broom
 Diffusing Prism
 Nightmare Puppet
 Nirvana
 Life Fondness
 Dream Turbidity
 Magic Ladle
 Light to Purge All Evil
 Obsidian Star
 Flames of the Fearless
 Light Oracle of Judgement
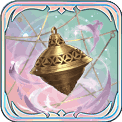 Threads of Fragrance
 Notes of A Genius
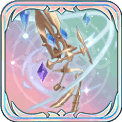 Iceamber Talons
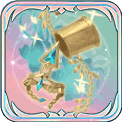 Destiny's Grip
 Gazing Orb
 Explosive Crystal
 Ink Totem
 Solid Wand
 Astral Rod
 Apprentice Wand
Momo's Voice Actor
Momo Voice Actor
| VA | Japanese VA: Kito Akari Chinese VA: Duoduo Poi |
|---|
Momo's Skin
| Initial | Ascended |
|---|---|
 |  |
▲ Unlock Ascended Skin when character reaches Star Level 5.
The inhumane experiments left horrible scars on her body. After escaping from the Darklight, the frail Momo started wandering the streets in rags, seemingly oblivious to her past or current circumstances. She is often slow in response, wearing a dazed expression. Whether due to side effects from the experiment or some other reason, Momo seems to exude an unusual sense of detachment. The truth is, she is quite content with her present life. She roams freely, exploring the world with a newfound friend — that darkness residing in her heart.

