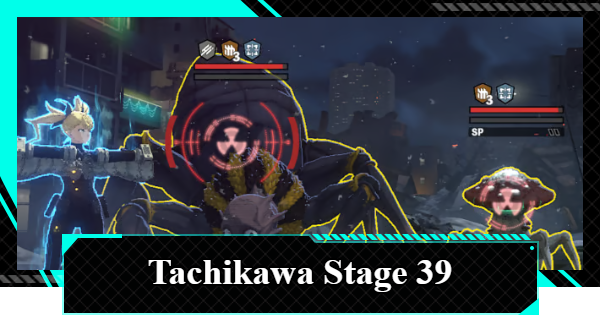
Fierce Battle Area (Tachikawa) Stage 39 Guide for Kaiju No. 8 The Game. See Tachikawa Stage 39 recommended teams, strategy, and tips for both halves, and stage info in K8 The Game.
Table of Contents
Tachikawa Stage 39 Recommended Teams
Best Team for the First Half
| Attacker | Attacker | Support | Defender |
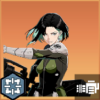
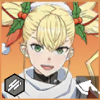
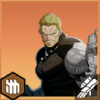
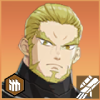
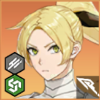
  Mina Ashiro Mina Ashiro |  Reno Ichikawa Reno Ichikawa |  Mina Ashiro Mina Ashiro | 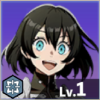 Akari Minase Akari Minase |
For the first half, create a team with Shot and Ice characters. There are many enemies with Shot Plates, so we recommend focusing on Shot characters.
Alternative Characters
| Character | Reason |
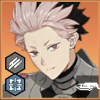
 Chester Lochburn Chester Lochburn | - Supports allies with multiple damage buffs - Grants allies additional damage effects - Can also speed up allies' Action Order |
 Gen Narumi Gen Narumi | - An Attacker who can damage Ice Plates - Combat Skill costs 2 SP but is a high-Multiplier Blast Attack - Ultimate provides a self-buff, immediate action, and 2 SP Recovery |
 Gen Narumi Gen Narumi | - An Attacker who can damage Shot Plates with Blast Attacks - Specializes against Core Exposed Kaiju - Grants self DMG dealt or SPD buffs depending on the amount of the Ultimate Gauge |
 Rin Shinonome Rin Shinonome | - A Shot AoE Attacker - DMG dealt increases each time she attacks a Kaiju - Her Ultimate Gauge recharges when she defeats a Kaiju |
 Gen Narumi Gen Narumi | - His Ultimate's Seen Through state can also randomly break Plates - Attacking an enemy in the Seen Through state can also increase allies' damage - Recovers SP with his Combat Skill against Core Exposed enemies |
 Kikoru Shinomiya Kikoru Shinomiya | - A Defender with Recovery & buffs - Increases allies' DMG dealt and Ultimate Gauge Charge Rate - Can also heal & increase ATK with the Engrossed buff - Can also revive an ally once per battle |
 Soshiro Hoshina Soshiro Hoshina | - A Support with debuffs and buffs related to Additional Damage - Contributes to ally damage by increasing allies' damage dealt & increasing damage taken via his Ultimate - Can also apply Additional Damage through Fear and increase damage taken from Additional Damage |
 Isao Shinomiya Isao Shinomiya | - A Defender who can protect allies with Shields, etc. - Provides damage support with an AoE DMG dealt buff for all allies |
 Soshiro Hoshina Soshiro Hoshina | - Excellent Critical Hit buff - A Support specializing in buffing his Battle Buddy |
 Ryo Ikaruga Ryo Ikaruga | - Just having him in the team increases allies' ATK - Grants DMG dealt and Speed buffs |
 Kafka Hibino Kafka Hibino | - A Support who can recover allies' SP and increase their damage - Recovers 2 SP with the Gift buff - Can also increase a single ally's DMG dealt and ATK |
Best Team for the Second Half
| Attacker | Attacker | Support | Defender |
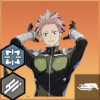
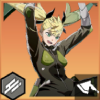
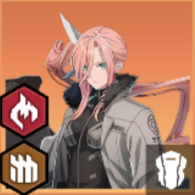
| Gen Narumi | 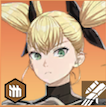 Kikoru Shinomiya Kikoru Shinomiya | Chester Lochburn | Kikoru Shinomiya |
In the second half, enemies have Slash, Blunt, and Shot Plates. Characters who can damage Blunt Plates with multiple attacks, like Kikoru (The Inherited Will), are highly suitable.
Alternative Characters
| Character | Reason |
 Kaiju No. 8 Kaiju No. 8 | - An Attacker who can break Blunt Plates - Has plenty of buffs to increase damage - Can Taunt with his Normal Attack, but be careful with the timing |
 Isao Shinomiya Isao Shinomiya | - An Attacker who can damage Blunt Plates with an AoE Attack - Can increase his own damage - Deals additional Blunt Element damage at max Valor buff stacks |
 Soshiro Hoshina Soshiro Hoshina | - His skills and Passive Skill effects change based on his Resonance state - In Resonance state, his damage is increased, and he deals high damage to a single target - In non-Resonance state, he has a Blast Attack + speeds up Action Order & increases the Ultimate Gauge |
 Hikari Shinomiya Hikari Shinomiya | - A Slash Attacker - Acceleration increases her DMG dealt & SPD, increasing her number of actions - During Acceleration, using a Combat Skill on a Core Exposed enemy recovers SP |
| Gen Narumi | - An Attacker who can damage Slash Plates - Combat Skill costs 2 SP but is a high-Multiplier Blast Attack - Ultimate provides a self-buff, immediate action, and 2 SP Recovery |
| Gen Narumi | - An Attacker who can damage Shot & Slash Plates - Specializes against Core Exposed Kaiju - Grants self DMG dealt or SPD buffs depending on the amount of the Ultimate Gauge |
 Kikoru Shinomiya Kikoru Shinomiya | - An Attacker who can damage Slash Plates - Increases damage with ATK and CRIT DMG buffs that stack up to 3 layers - Contributes to ally damage with the Defense debuff from her Ultimate |
| Soshiro Hoshina | - A Support with debuffs and buffs related to Additional Damage - Contributes to ally damage by increasing allies' damage dealt & increasing damage taken via his Ultimate - Can also apply Additional Damage through Fear and increase damage taken from Additional Damage |
 Sagan Shinomiya Sagan Shinomiya | - A Defender who can damage Blunt Plates - Protects allies by Taunting & increasing her own durability - Can counterattack with her Passive Skill - Can also grant an ATK buff to allies with her Ultimate |
| Isao Shinomiya | - A Defender who can break Blunt Plates - Can protect allies with Shields, etc. - Provides damage support with an AoE DMG dealt buff for all allies |
| Soshiro Hoshina | - Excellent Critical Hit buff - A Support specializing in buffing his Battle Buddy |
| Ryo Ikaruga | - Just having him in the team increases allies' ATK - Grants DMG dealt and Speed buffs |
| Mina Ashiro | - A Support who can greatly increase allies' damage - Can also deal damage with her Ultimate |
| Kafka Hibino | - A Support who can recover allies' SP and increase their damage - Recovers 2 SP with the Gift buff - Can also increase a single ally's DMG dealt and ATK |
| Akari Minase | - A rare character who can heal allies - Increases healing power on allies with low HP - Can also grant an Ultimate Gauge Charge Rate increase |
Tachikawa First Half Stage 39 Tips
Tips for the First Half

- Use AoE Shot and Ice Characters
- Wave 1: Neutralize Camponotus Simultaneously
- Wave 1: Block Midsized Enemy Ultimate
- Wave 2: Trigger Early Core Exposed
Use AoE Shot and Ice Characters
In the first half of Stage 39, the enemies' Plates are Shot and Ice. Enemies appear in groups of 3 (2 miniature and 1 midsized) per Wave, so you should build a team with characters who have AoE attacks that can reduce the relevant Plates.
Element Effects and Plate Mechanics
Wave 1: Neutralize Camponotus Simultaneously

The "Camponotus" that appear in Wave 1, both miniature and midsized, summon enemy Yoju, so be careful. In Wave 1, it's recommended to lower the HP of all three Camponotus to similar levels and aim to neutralize them at the same time.
Pay Attention to the Enemy's Action Order
Be careful, as after Neutralization, if it's the enemy's turn to act, there's a risk that the Camponotus will summon new Yoju. You should delay their actions with Core Exposed, pay attention to the enemy's action order, and try to neutralize all three before they can summon more Yoju.
Wave 1: Block Midsized Enemy Ultimate

The midsized enemy "Camponotus Honju" that appears in the center of Wave 1 will use its Ultimate to eat miniature enemies and recover its own HP. Therefore, you should inflict Core Exposed on it to interrupt it before the midsized enemy can use its Ultimate.
Clear Miniature Enemies Before Ultimate
If you can't inflict Core Exposed or neutralize the "Camponotus Honju" before it uses its Ultimate, you may be able to prevent it from healing itself by neutralizing all the miniature enemies first. However, in that case, you should also neutralize the "Camponotus" quickly to prevent it from summoning additional Yoju.
Wave 2: Trigger Early Core Exposed

In Wave 2, the central midsized enemy "Nesodactyl" uses an AoE Attack + Burn inflicting Ultimate, and the miniature "Preondactyl" on the sides has fast-charging Ultimates, so both pose a risk of increasing the damage your allies take. Therefore, it's recommended to aim for an early Core Exposed with AoE attacks.
Tachikawa Second Half Stage 39 Tips
Tips for the Second Half

- Use Slash, Blunt, and Shot Characters
- Wave 1: Target the Phaneroplasmodium Yoju: Type 1225
- Wave 2: Aim for an Early Core Exposed
Use Slash, Blunt, and Shot Characters
In the second half of Stage 39, enemies have Plates for Slash, Blunt, and Shot. One miniature and one midsized enemy appear in Wave 1, and one midsized in Wave 2, so put together a team with characters who have AoE attacks to break their Plates efficiently.
Wave 1: Target the Phaneroplasmodium Yoju: Type 1225

The "Phaneroplasmodium Yoju: Type 1225" on the right in Wave 1 steals your SP, so watch out. You get the SP back when the Phaneroplasmodium Yoju: Type 1225 is Core Exposed or taken down. Focus on inflicting Core Exposed and neutralizing the Phaneroplasmodium Yoju: Type 1225 first.
Wave 2: Aim for an Early Core Exposed

In Wave 2, a midsized "Phaneroplasmodium Honju: Type-1225" appears. It has more Plates and HP than the miniature one in Wave 1, and it can steal SP twice if it gets an extra turn. In Wave 2, manage your SP carefully and aim for an early Core Exposed.
Tachikawa Stage 39 Strategy Tips
Break Plates Efficiently
The enemies in Fierce Battle 40 possess Shot and Ice Plates in the first half, and Slash, Blunt, and Shot Plates in the second half. Efficiently break these Plates to trigger a Core Exposed state, which delays their actions and increases damage taken, then unleash your Ultimates.
Raise Characters to Level 100
If your character level is lower than the enemy's, you will take increased damage, making it harder to secure the "Win with 0 incapacitated units" objective. The enemies in Fierce Battle 40 are Level 100, so ensure your characters are raised to Lv. 100 before challenging them.
Basic Stage Information
Enemy Information
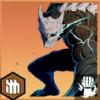
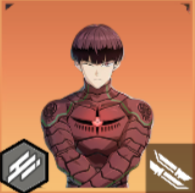
First Half Enemies

Second Half Enemies

Objectives
| Objectives |
| - Win with 0 incapacitated - Win within a total of 14 rounds - Win within a total of 20 rounds |
Kaiju 8 The Game Related Guides

Recommended Guides
| Popular Articles | ||
|---|---|---|
| Reroll Tier List | Best Characters | Best Squads |
| Early Game Guide | Daily to Do | Paid Packs |
| Character List | Weapon List | Uniparts List |
Other Articles
 How to Reroll
 Best Free 5 Star
 Best 4-Stars
 Best Banner
 Gacha Animation
 Pulls Until Guaranteed?
 Enhance Priority
 Squad Setup
 Web Store
 Redeem Codes
 Latest Updates
 Controller Support
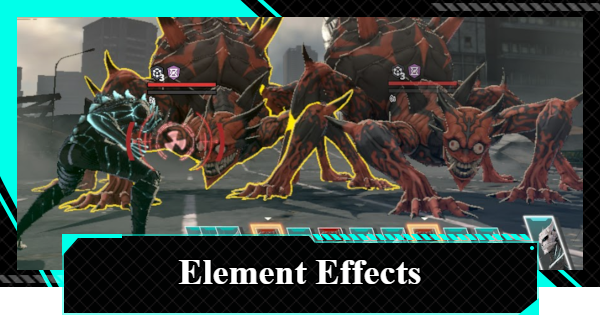 Element Effects and Plate Mechanics
 Best Store Purchases
 Action Order
 How to Disassemble Weapons
 Weapon Exchange Shop
 Uniparts Farming Guide
 Weapon Ascension
 Emblem of Defense
 Identified Kaiju Neutralization
 Kaiju Core Material
Must Reads Before Playing
| Useful Info | ||
|---|---|---|
| Pre-Registration | Required Specs | Steam Release |
| Link Data | Data Transfer | Best Settings |
| How to Fix Lagging | PS5 ver? | Voice Actors |

