Intermediate Captain Promotion Mission walkthrough guide in Chaos Zero Nightmare (CZN). Includes Chapter 2 team build, Bercula boss enemy, card skill effects counters, and rewards.
Table of Contents
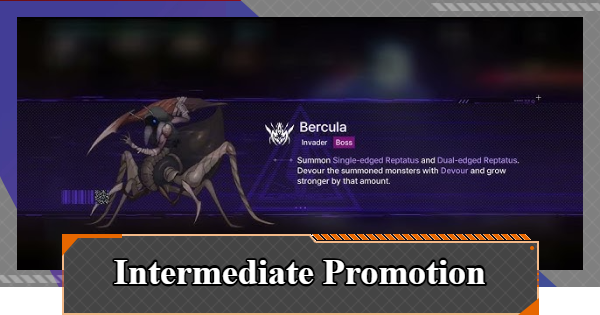
Intermediate Captain Promotion
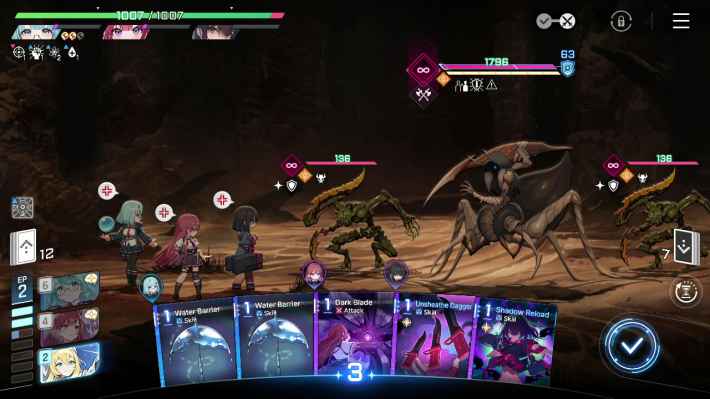
Intermediate Captain Promotion Mission Details

| Name | Bercula |
| Difficulty | S |
| Boss HP | 1,796 |
| Weak Attributes |  |
| Required Captain Level | 20 |
| Number of Stages | 2 |
| Clear Rewards |       Coordinates of Record 500 (EXP)20 Crystals10 Advanced Battle Memories7 Premium Support Data 48,000 Units Coordinates of Record 500 (EXP)20 Crystals10 Advanced Battle Memories7 Premium Support Data 48,000 Units |
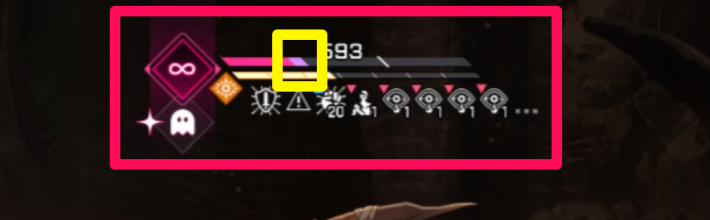
Boss Bercula Effects
| Gimmick | Effect |
 Predator Predator | Changes its action pattern when its HP drops below 65% |
 Satiety Satiety | Gains 2 Reckless when it defeats another monster. |
 Recklessness Recklessness | Damage dealt +80% |
 | Can only target this monster |
Boss Bercula Skills
| Skill | Effect |
 Slaughter Slaughter | - Deals damage |
 Single-edged Slash Single-edged Slash | - Deals damage - Defeats other monsters |
 Intimidating Restoration Intimidating Restoration | - Gains a Shield - Summons 2 Razor Reptatus |
 Instant Execution Instant Execution | - Deals heavy damage - Defeats another monster |
 Charge Charge | - Gains a Shield - Summons 2 One-edged Reptatus - Summons 2 Dual-edged Reptatus |
Recommended Deck Builds
This deck consists only of Combatants you get after completing the tutorial.
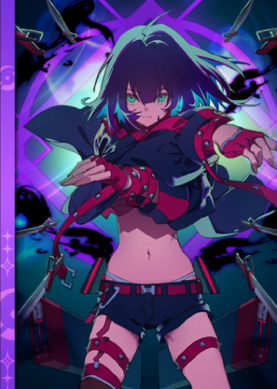
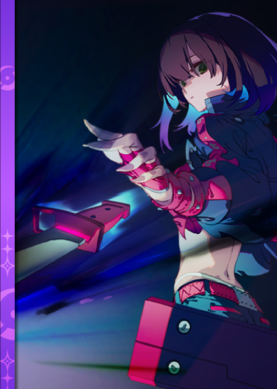
Tressa Build
 |  |  |
This build features Tressa as the main Attacker, supported by Rei and Mika. The strategy is to defeat the enemy by consistently inflicting Agony.
Swapping Rei with Owen is also an option
You can also swap Rei with Owen. He inflicts Vulnerable on enemies, which allows your team to deal even more damage.
| Vulnerable | Damage taken +50% |
Characters with high single-target damage are recommended
If you have other Combatants with high single-target damage, such as Haru, Mei Lin, or Rin, consider using them as your main Attacker instead of Tressa.
Role and Strategy for Each Combatant
| [Role] Main Attacker [Strategy] - Inflict Agony for damage over time |
| [Role] Buffer/Sub-Attacker [Strategy] - Upgrade Tressa's Cards with Resonating Darkness or Dark Condensation - Avoid a bad opening hand with "Snack Time" |
| [Role] Healer/Support [Strategy] - Restore AP with "Source of Water" or her Ego Skill - Restore HP |
 | [Role] Debuffer/Sub-Attacker [Strategy] - Debuff enemies by inflicting Vulnerable - Support with AoE Attacks for extra damage |
Recommended Cards for Epiphanies
Divine Epiphanies are not required, so this is based on regular Epiphanies.
Recommended Epiphany Effects for Tressa
| Card | Cost/Effect |
 Unsheathe Dagger | Cost 1 Create 2 Shadow Dagger Cards Increases the Agony effect of created Shadow Dagger Cards by 3 |
 Shadow Reload | Cost 1 Heal 100% Create 2 Advanced Shadow Dagger Cards |
 Vital Attack | Cost 2 Damage 80%x3 For 1 turn, increases Agony damage dealt by 50% |
Recommended Epiphany Effects for Rei
| Card | Cost/Effect |
 Dark Condensation Dark Condensation | Cost 1 Choose 1 Attack Card in your hand. For 1 turn, its damage is increased by 100% |
 Resonating Darkness Resonating Darkness | Cost 1 [Unique] Increases Void Card damage by 40% |
 Snack Time Snack Time | Cost 0 [Retain/Exhaust] Heal 150% Draw 2 |
Recommended Epiphany Effects for Mika
| Card | Cost/Effect |
 Source of Water Source of Water | Cost 0 [Retain] Heal 150% Gain 1 AP Increases the next Card's healing amount by 50% |
 Blessing of Waves Blessing of Waves | Cost 1 [Retain] Heal 150% Healing amount is increased by 30% based on your current AP Gain a Shield equal to the overheal amount |
 Tactical Analysis Tactical Analysis | Cost 0 Wave 2 For 1 turn, increases healing amount by 50% |
Recommended Epiphany Effects for Owen
The next Attack Card you use gains +1 Hit Count
Inflicts Vulnerable 2
The next Attack Card you use gains +1 Hit Count
| Card | Cost/Effect |
 Wind Charge | Cost 1 [Retrieve] The next Attack Card you use gains 1 additional Hit Count |
 Break Armor | Cost 0 Damage 100% Vulnerable 2 |
 Wind Riding Wind Riding | Cost 1 Shield 150% The next Attack Card you use gains 1 additional Hit Count |
Intermediate Captain Promotion Tips
Defeat Enemies One by One in Stage 1
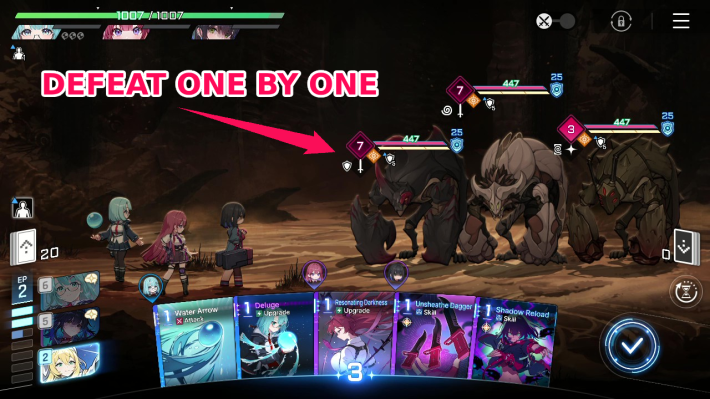
In Stage 1, three types of Shell Bugs will appear, each with different abilities. Be sure to focus on taking them out one by one.
Shell Bug Types and Features
| Name | Features |
 Rock Shell Bug Rock Shell Bug | Deals damage and gains a Shield |
 Flying Shell Bug Flying Shell Bug | Deals damage and inflicts Impair |
 Shell Bug Shell Bug | Deals damage and inflicts Vulnerable |
Watch Out for Powerful Moves
Bercula will periodically unleash the powerful move Instant Execution. Counter it with Shields and Mika's healing.
Beware the Charge → Instant Execution Combo
The combo where Bercula uses Charge to apply a Shield and summon minions, then uses Instant Execution to defeat them and gain Reckless, is extremely powerful. Try to defeat Bercula before it can execute this combo.
| Note | If you have an AoE attack, it's recommended to prioritize clearing out the surrounding minions. |
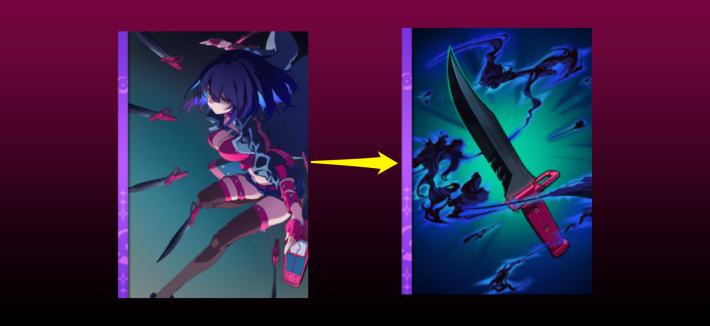
Inflict a Large Amount of Agony with Shadow Dagger
In the boss battle, a good strategy is to use Tressa's main damage source, the 0-cost Shadow Dagger, to inflict a large amount of Agony and rack up damage.
Debuff the Enemy with Cursed Gouge
You can deal damage more efficiently by using Tressa's Cursed Gouge → Shadow Dagger (0-cost) combo.
| Note | Using Vital Attack after inflicting Agony is also very powerful. |
Use Heal Cards After Tactical Analysis
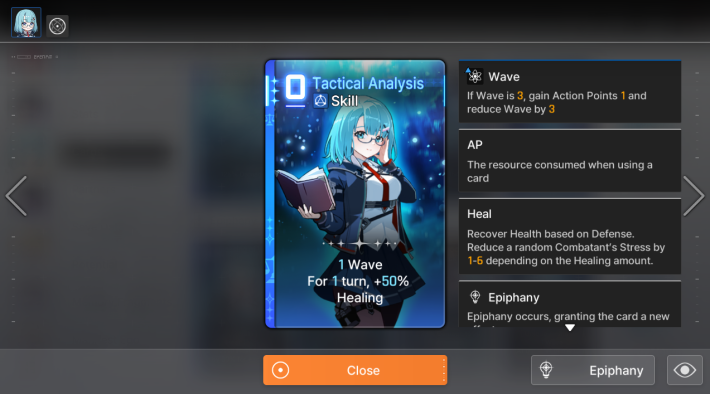
During battle, if your HP gets low, use Mika's Heal Cards. Using Tactical Analysis increases the amount of healing for one turn, so use it before your other Heal Cards to maximize the effect.
| Note | Heal for a large amount by using the Tactical Analysis → Blessing of Waves combo. |
Recommended Common Cards
| Card Name | Effect Recommendation |
 | [Exhaust/Combo] Draw 2 Helps prevent a bad opening hand |
 | [Exhaust] Shield 100% Gain 1 AP Provides extra AP, allowing for more actions in a turn |
 | [Initiation/Exhaust] Deals 200% damage to all enemies Strong for clearing mobs |
 | [Lead] Inflicts Vulnerable 1 on all enemies For 1 turn, a random Attack Card in your hand has its Cost reduced by 1 Increases the team's overall damage by inflicting Vulnerable. Reduces the cost of an Attack Card, helping to conserve AP. |
If You Still Can't Win
If you're still having trouble winning, make sure you've completed all of the following
- Combatants at level 20
- Partner at level 20
- Advance their Potential
- Advance their Manifest Ego if possible
- Create a Save Data of at least 25,000 TB (a lower TB is viable with strong Card synergy, but aim for this as a benchmark)
Character Enhancement Guide and Upgrade Priority
Creating Tressa's Save Data is Crucial
Since Tressa is the main attacker in this build, creating a solid Save Data for her is crucial. Adjust her Epiphanies and equipment to maximize her damage output.
Chaos Zero Nightmare Related Guides


 Galactic Disaster
  The Great Rift
 Nebula Distortion
 Memory Encroachment
 Early Game Guide
 Daily Tasks
 Recommended Gacha Banner
 Ark City Guide
 Card Epiphany Activation
 How to Use Ego Skill
 Stress Management
 Weakness Attribute Guide
 Safe Zone Guide
 How to Restore Aether
 How to Raise Captain Grade
 ID Card Settings
 Battle Pass (Arkhianon Supply) Guide & Should You Buy?
 Simulation Guide
 Twin Star's Shadow Guide
 How to Download & Sync Data
 Deep Trauma Guide
 Latest Updates
  Unigram Guide
 Judas Boss Guide
 Character Enhancement Guide
 How to Set and Upgrade Partner
 How to Upgrade Potential
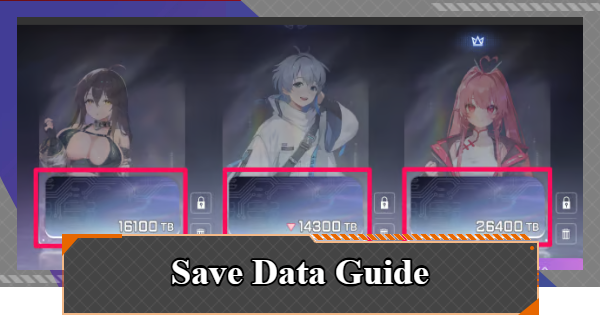 How to Use Save Data
 How to Upgrade Manifest Ego
 Memory Fragments
  Prism Modules
 Daily Reset Time
 Zero System
 Counseling Guide
 Omega Codes
 Redeem Codes
 Zero System Guide
 Basin of Hyperspace Guide
 Affinity Guide
 Environment Variables
