
Best team comps in Chaos Zero Nightmare (CZN). See how to build a good team, best team composition, character team building, team replacements, Diana teams and Diana builds in CZN.
Contents
CZN Team Composition Basics
Add 2 Attackers + 1 Support to Team


The most stable basic composition is a combination of two Attackers + one support. If you're a beginner or unsure about your composition, try aiming for this setup first.
Character GuideCards Take Priority Over Composition

While party combinations are important, the quality of the Cards retained in your Save Data greatly affects your overall power. Having powerful Cards will allow you to progress through the game more smoothly.
CZN Team Composition Tips
Select Main for Team Compositions

First, decide on one main Attacker to be the core of your party. Understanding the characteristics of that character's Unique Cards is the basis for choosing compatible allies and building an efficient composition.
Add a Compatible Support for Your Main

Choose a support character who can cover your main character's weaknesses or further enhance their strengths. Select a role that matches your main character's playstyle, such as a Shield provider to improve durability or a buffer to increase damage.
Add a Complementary Third Character

For the last slot, add a character that can fill in any missing elements from the two you've already chosen. Keep the basic two Attackers + one support in mind, and balance the overall party to complete your composition.
CZN Best Team Builds by Character
Diana


Focus on Discard and Extra Attack
This composition focuses on Diana’s ability to generate and Discard Bullet cards to trigger powerful Extra Attacks. Renoa enhances this by creating additional Bullet cards and enabling more Discard opportunities, helping Diana build Flutter stacks and deal consistent follow-up damage.
Continuous Card Cycling
Frequent card creation and Discards from Diana and Renoa keep the card cycle flowing and damage consistent, while Nia provides healing and buff support.
Other Character Replacements
| Character | Why they're recommended |
|---|---|
| Lucas | Swap with Renoa - A damage character that can be used to its full potential with AP supply - Requires Futility's Exhaust, but can deal high damage |
| Swap with Nia - Focuses on AP supply rather than draw - A candidate for swapping in when you're short on Cost |
Tiphera


Boosts Hew’s DMG with Card Buffs
This is a team that uses buffs from Tiphera and Orlea to upgrade Nine's Hew and defeat enemies in a single Strike. It's mainly a team for boss battles, but you can use it in various situations by changing Hew's Epiphany.
Not Enough Draw
Tiphera's Cards can draw Created Cards, but cannot draw other Cards. If you don't have a draw skill, you won't get the necessary Cards in your hand, making this a difficult team to build.
Other Character Replacements
| Character | Why they're recommended |
|---|---|
| Kayron | Swap with Nine - A damage character that can be used to its full potential with AP supply - Requires Futility's Exhaust, but can deal high damage |
| Veronica | Swap with Orlea - A character to compensate for the lack of draw - Be careful not to use buffs with Ballista |
Nine


Team for Defense-Scaling Damage
This composition utilizes Narja's defense-scaling buff to take advantage of Nine's high potential as an Attacker. Since it focuses on Single-Target Attacks and can lack defense, Khalipe is included to reinforce the team with her
Tends to Be High-Cost
Both Nine and Khalipe have many high-Cost Cards, so AP tends to run short. This can be somewhat mitigated by copying Bottomless Hunger and splitting it between defense-scaling and Cost-reducing Epiphanies.
Other Character Replacements
| Character | Recommendation |
|---|---|
| Orlea | Swap with Khalipe - Can be used in a Hew Strike specialized build with multiplier buffs - Mitigates Cost issues as she focuses on retain effects |
| Swap with Khalipe - A low-rarity character with a - Can be a main damage dealer depending on Narja's Epiphany |
Narja


Defense-Scaling Damage Attacker Build
A composition that uses Narja's Cards to boost defense-scaling damage, with Magna and Narja herself as the Attackers. The main Cards are 1-cost, making it easy to apply Rei's buffs. This composition is especially powerful in the Spiral Tower Of Screams.
Deckbuilding is Very Difficult
There are many Cards you'll want to copy, such as Bottomless Hunger and Shackles of Hunger, so building your Save Data is quite difficult. Think carefully about which Cards to prioritize when building your deck.
Other Character Replacements
| Character | Recommendation |
|---|---|
| Swap with Magna and Rei - Uses Narja as a buffer - Supplements the damage and draw that Narja lacks - A different derivative of Bottomless Hunger is recommended |
Sereniel


Use Homing Laser With Ravage
Use Afterglow to Ravage enemies and Retrieve your lasers. By resetting the Ravage gauge with Selena's Skill, you can repeatedly Ravage enemies and spam lasers, allowing you to defeat them in one go.
Support With Devour and Predation
By using the Lead derivative of Bottomless Hunger or the Upgraded derivative of Voluntary Control, you can consistently supply Devour and Predation. This allows you to form a party with Sereniel, who has many actions, without any issues.
Other Character Replacements
| Character | Recommendation |
|---|---|
| Swap with Narja - Boosts damage with - Attacks from | |
| Kayron | Swap with Narja - Ravage alleviates AP supply issues - The Exhaust from Homing Laser L upgrades Brand of Annihilation |
Chizuru


Moonslash Focused Build
This is a composition that focuses on upgrading Moonslash with buffs from Narja and Rei that affect basic Attacks. Narja has Cards with an effect that grants Voracity on every hit, allowing you to further increase your damage while attacking.
Be Careful of a Lack of Draw Cards
This composition focuses on buffs, so it can easily lack card draw. Supplement your card draw with Divine Epiphanies and Common Cards, and adjust your Save Data so your deck cycles smoothly.
Other Character Replacements
| Character | Recommendation |
|---|---|
| Sereniel | Swap with Rei - Can supplement AP with Sereniel's Ravage - Easy to use Cards even while restrained |
| Swap with Rei - Reduces buffs to Upgrade the draw aspect - Supports the hand cycling that tends to be lacking |
Yuki


Attack Build for Drawing and Discarding
This is a [synergy-focused composition] that aims to trigger Yuki's
Difficult to Balance the Build
The [balance of the number of draw and Created Cards is difficult, making building your Save Data a challenge]. It's important to decide on the priority of your Cards beforehand and proceed with the build systematically.
Other Character Replacements
| Character | Recommendation |
|---|---|
| Veronica | Swap with Renoa - Provides both draw and damage support - Allows for stable deck cycling |
| Swap with Renoa - Supports with buffs and Snack Time - Can remove unwanted Cards |
Haru


Anchor Shot’s DMG Scales Individually
A composition that supports Haru's Anchor Shot with Mika's AP recovery and compensates for a lack of actions with Khalipe's
Anchor Shot Damage Scales Per Card
Be aware that the damage increase count is individual for each Card. It's important to build according to your playstyle, whether that means copying the continuous effect or increasing Search Cards to raise damage efficiently.
Other Character Replacements
| Character | Recommendation |
|---|---|
| Narja | Swap with Khalipe - Cost-reducing Cards supplement Haru's high AP consumption weakness - Can also provide damage support with buffs |
| Beryl | Swap with Khalipe - Can provide support without consuming AP via retain effects - draw support can increase the number of times Anchor Shot is used |
Kayron


Use Nia to Generate Futility
Kayron's AP consumption is high, so this build uses a 0-cost Epiphany. On top of that, you can efficiently handle Futility by securing AP and drawing with the loop of Eternal Hunger and Adagio added to Nia.
Support AP Recovery with Mika
Mainly using Source of Water along with the unique buff
Other Character Replacements
| Character | Recommendation |
|---|---|
| Veronica | Swap with Mika or Nia - Assists with Attacks while providing draw support - Loses a means of AP recovery |
| Swap with Mika or Nia - Excellent damage buff - Loses a means of AP recovery |
Hugo


Buff Single-Target Cards With Extra ATK
This is a composition that uses Hugo's buff to generate an Extra Attack along with an ally's Single-Target Attack. When paired with a character who has many actions, the Extra Attack will trigger multiple times, which is useful for chipping away at single enemies like bosses.
Maintain Buffs to Deal Damage
Other Character Replacements
| Character | Recommendation |
|---|---|
| Swap with Sereniel - Used in the same way as Sereniel - Balancing bullet creation and buffs is important | |
| Swap with Nia - Focuses on AP supply rather than draw - A candidate for swapping in when you're short on Cost |
Renoa


Use Dirge Bullets for Extra Attacks
A composition that aims to land Extra Attacks by creating bullets and discarding them as a Cost. It turns the normally disadvantageous discard into an advantage, allowing you to Overwhelm enemies with a high number of actions. This is the strength of this composition.
Save Bullets and End With an Ego Skill
If you use Nia's Ego Skill with enough bullets in your deck, an Extra Attack will occur for each bullet. It takes some effort to set up the conditions, but if you pull it off, it's a powerful option that can deal massive damage.
Other Character Replacements
| Character | Recommendation |
|---|---|
| Beryl | Swap with Rei - Fills in until you have enough bullets - Supports with the retain Extra Attack from the Opening Found derivative |
| Lucas | Swap with Rei - Main focus is on bullet Upgrade and Annihilation Follow-up - Increases damage by increasing the number of Attacks |
Veronica


Boost Damage Along Draw Support
By using Spirit of the Aromata beforehand and then using Veronica's Repose, you can increase your damage while drawing. Depending on the Epiphany for Rising Dragon Spire, it's also possible to increase the Hit Count.
Boost Damage With Rei's Buffs
Both Mei Lin's and Veronica's Attack Cards have low multipliers, so they synergize well with Rei's additive buffs, efficiently increasing their damage output. Rei is also a good match in that she can provide draw support.
Other Character Replacements
| Character | Recommendation |
|---|---|
| Narja | Swap with Rei - Buff amount decreases, but healing becomes stable - Loses draw support capability |
| Selena | Swap with Rei - An option to specialize in the Passion attribute - Can also support damage with Mark and Tenacity Damage |
Mei Lin


Balanced Mei Lin Basic-Attack Team
This is a stable composition centered on Mei Lin that chips away at enemies by upgrading her basic Attacks. Since she is a character designed to fight with basic Attacks from the start, it's easy to fight while maintaining high damage just by applying buffs from Narja and Rei.
Draw Build Focused on Narja's Epiphany
Voluntary Control has another Upgraded derivative with an effect that grants Predation when the chosen Card moves to your hand. Copy the Card before its Epiphany derivation and include both in your deck to further boost your damage.
Other Character Replacements
| Character | Recommendation |
|---|---|
| Veronica | Swap with Narja or Rei - Complements Mei Lin's AoE Attacks - Supports her lack of enemy-clearing power |
| Sereniel | Swap with Narja or Rei - - Greatly increases damage during Ravage |
| Lucas | Swap with Narja or Rei - A low-rarity option for when you want an AoE Attack - Easily provides wide-range damage |
Orlea


Utilize the Contaminated Spore Debuff
This composition uses Spore Harvester on Orlea and Beryl. Use Cards that activate retain effects to stack the Contaminated Spore debuff and Beryl's increasing buff, then finish them off with Hew. Although its use is limited, it is a powerful composition.
Guilty Pleasure Limited on Beryl's Cards
Orlea's Will of Light targets all Cards in your hand, but Beryl's Guilty Pleasure only targets her own Cards, so be careful. Be mindful of when you use it.
Other Character Replacements
| Character | Recommendation |
|---|---|
| Chizuru | Swap with Nine - Synergizes well with the Contaminated Spore debuff - Also has good synergy with the retain composition that doesn't use AP |
| Swap with Nine - Can increase the power of Beryl's Charged Shot - Difficult to manage the Contaminated Spore debuff due to having many Attack Cards |
Rin


Utilize Rin's Cost-Reduced Cards
A composition that deals damage by using Dark Mist Secret Art: Destruction, which can Search from the deck and Graveyard, to reduce the Cost of the Retrieved Card and use it repeatedly. Using Spore Harvester on accompanying characters allows you to increase the Hit Count of Dark Mist Secret Art: Black Dance.
Copy Resonating Darkness Repeatedly
Rei's Resonating Darkness has the Unique attribute, so it normally can't be copied. However, by using Meditation to separate the Epiphany types, like Void Card Upgrade and Cost 1 or less Upgrade, you can include multiple copies.
Other Character Replacements
| Character | Recommendation |
|---|---|
| Orlea | Swap with Rei - Can provide healing and Shields in exchange for a damage buff - Contributes to increasing the Hit Count of Dark Mist Secret Art: Black Dance as it's Skill Card-based |
| Veronica | Swap with Rei - Provides stable draw support - Has few Attack Cards, so is less likely to interfere with Rin |
Magna


Apply High Stacks of Vulnerable Each Turn
By using Magna's various Upgrade Cards, you can apply Vulnerable every turn. It's a composition that simultaneously deals damage with Vulture Ejection, which has a
High AP Consumption
Both Magna and Khalipe have many high-Cost Cards, so AP tends to run short. Secure AP by utilizing Mika's Source of Water and
Other Character Replacements
| Character | Recommendation |
|---|---|
| Narja | Swap with Mika - Has Cost-reducing Cards - Also has a means to increase defense-scaling damage |
| Swap with Khalipe - Easy to activate the - The Vulnerable debuff synergizes well with Anchor Shot |
Khalipe


Deal Damage While Applying Shields
A composition that continuously applies Shields with Vulture Ejection and Hew to reduce incoming damage while dealing damage. Since Narja, who can simultaneously handle buffs and healing, is also included, it's a very stable team.
Few Sources of Counterattack
Although you can gain a large amount of Shield and reduce incoming damage, it lacks methods to gain Counterattack, so it tends to be passive. To turn this defense into offense, you need to establish a way to gain Counterattack, such as by including Magna.
Other Character Replacements
| Character | Recommendation |
|---|---|
| Magna | Swap with Narja - Easily obtains - Loses a means of HP recovery |
| Swap with Nine - A low-rarity character with a - Can also deal damage depending on Narja's Epiphany choice |
Luke


Use Bullet Cards to trigger Extra Attacks
A composition that deals damage by using the bullets created by Luke to activate
Upgrade Bullet Cards with Rei's buffs
Luke's Cards are set with low multipliers. All buffs that Rei can apply are additive, so she synergizes well with increasing the power of Luke's Cards, making her the optimal character for boosting damage.
Other Character Replacements
| Character | Recommendation |
|---|---|
| Cassius | Swap with Hugo - Can support with - Quests can only create Cards up to 3 times per turn |
| Lucas | Swap with Hugo - Can provide buffs specialized for bullets - Can fill the gap in a composition that tends to focus on Single-Target Attacks |
Chaos Zero Nightmare Related Guides

Recommended Guides
 Chaos Manifestation Guide Chaos Manifestation Guide |  Main Story Walkthrough Main Story Walkthrough |
 Trauma Code Guide Trauma Code Guide |  Battle Pass Guide Battle Pass Guide |
 Maintenance Updates Maintenance Updates |  Growth Guide Growth Guide |
 Rescue Guide Rescue Guide |  Pity System Guide Pity System Guide |
 Save Data Guide Save Data Guide |  How To Create Best Save Data How To Create Best Save Data |
Chaos Guide
 Blue Pot Blue Pot |  Twin Star's Shadow Guide Twin Star's Shadow Guide |
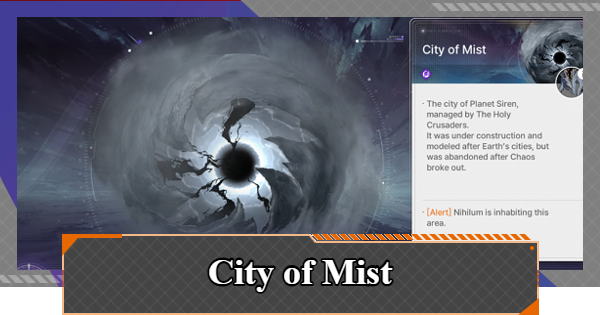 City of Mist Guide City of Mist Guide | 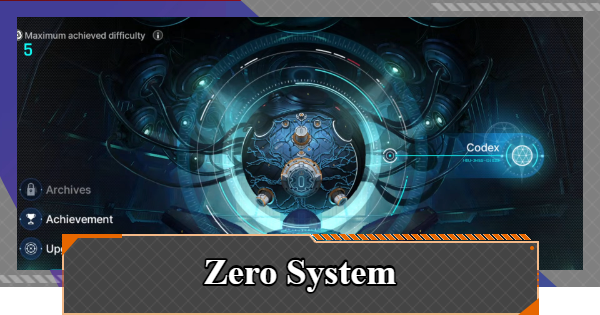 Zero System Zero System |
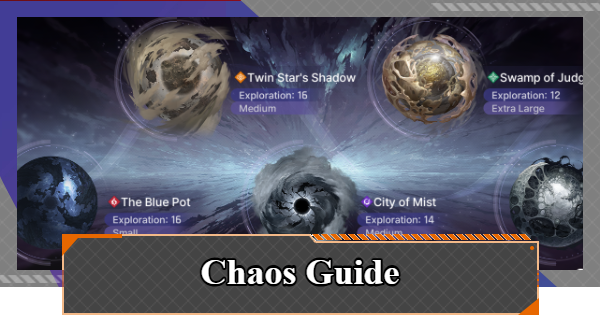 Chaos Guide Chaos Guide |  Basin of Hyperspace Guide Basin of Hyperspace Guide |
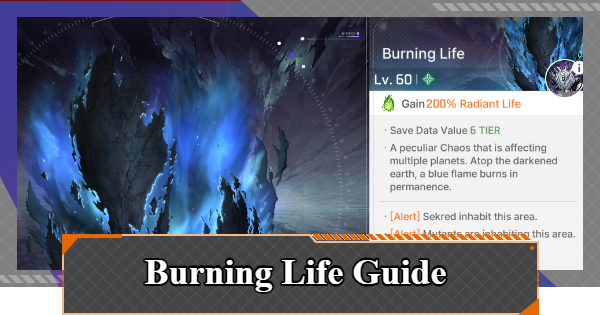 Burning Life Guide Burning Life Guide | - |
 Galactic Disaster Guide
 Galactic News Network
 S1 Forbidden Catalyst
  Equipment List
 Cards List
 Fate List
