The Great Rift Colossus guide for Chaos Zero Nightmare (CZN). See how to defeat Colossus, Vanguard & Rearguard boss fights, best teams, character save data, and battle tips in CZN.
Table of Contents
| Season 2 Related Articles | |
|---|---|
| Galactic Disaster | Season Chaos |
Vanguard Team Guide
Boss Information


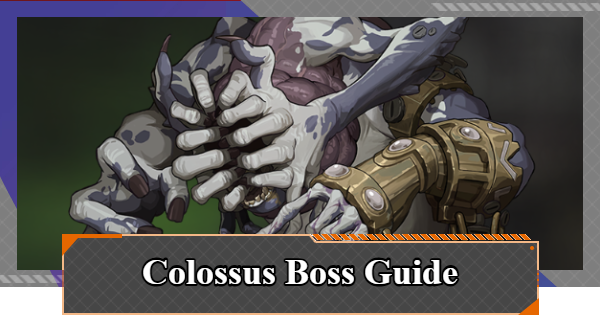
In the Vanguard Team phase, you will face the Colossus. The Colossus has two arms and a head. You can only attack its head after destroying both arms, and the number of attacks or turns you have to attack the head is limited.
Colossus (Main Body)

At the start of the turn, the Colossus's main body applies a count to both arms that decreases with each hit. It also has
Colossus's Right Arm

When the right arm is attacked, its Dark's Legacy decreases. With each decrease, the left arm gains
Colossus's Left Arm

When the left arm is attacked, its Light's Legacy decreases. With each decrease, the right arm gains
Recommended Vanguard Team Comp
This team comp is built around using Haru's Anchor Shot multiple times. Its high single-hit damage makes it a good match for the Colossus battle.
See Detailed Save DataHaru
*0 Transcendence, all Potential unlocked

Save Data
| Save Data | |||
|---|---|---|---|
 |  | | |
|  | ||
The Anchor Pointer mainly uses the Hidden Epiphany to apply Vulnerable, but even with a normal Epiphany, any option that doesn't grant Retain or Retrieve to Anchor Shot is a good choice.
Equipment
| Equipment | Skill/Refinement Effect/God's Hammer |
|---|---|
| Foggy Crystal Ball | Increases the damage of 0-Cost Attack Cards by 40%. When you draw one of your own cards with a skill, that card's damage is increased by 50% for 1 turn. When using an Attack card, there is a 5% chance to add 1 additional hit. |
| Gluttonous Tailcoat | At the start of the next turn after taking damage, gain 80% Fixed Shield. When using an Attack Card on a Vulnerable enemy, Crit chance +15%. |
| Flower of Dead Souls | Each turn, starting from the second Attack Card played, damage is increased by 20%. At the start of combat, if you have 18 or fewer Cards, the damage of Attack Cards is increased by 30%. |
This Save Data for Haru was created in the City of Mist (Codex), which has compatible equipment. Foggy Crystal Ball also applies to Anchor Shot when its Cost becomes 0 due to Narja's cards, making it a high-priority piece of equipment for this team.
Memory Fragments

For Memory Fragments, we've used Crit chance for IV, Elemental Damage for V, and ATK for VI. Prioritize Crit chance, Crit Damage, and ATK for your sub-stats.
Detailed Status

Haru has a Potential that increases Anchor Shot damage by +10% if her ATK exceeds 1000. However, the requirement is high, so focusing on Crit-related stats is also a good option.
Narja
*0 Transcendence, all Potential unlocked

Save Data
| Save Data | |||
|---|---|---|---|
 | |  |  |
 | |||
In the data above, we are copying cost-reducing cards while thinning the deck. Spore Harvester is a useful option as it increases damage and can be used as a Search resource in a pinch.
Equipment
| Equipment | Skill/Refinement Effect/God's Hammer |
|---|---|
| Pale Eternal Flame | When a card is Exhausted, increase ally damage by 10% for 1 turn (once per turn). When ending the turn with 1 or more AP, apply Vulnerable 1 to all enemies. Damage +20%, Shield Gained +20% |
| Vinelord's Mask | When drawing an Exhaust Card with an ally's skill, gain 80% Fixed Shield (twice per turn). At the start of the turn, if there is an Exhaust Card in the deck, 30% chance to draw 1 Exhaust Card. |
| Dormant Seed | When gaining Shield, gain 100% Fixed Shield (once per turn). Shield Gained +15%, Heal Amount +15% |
Since Narja's main role is Cost reduction, you can clear without extensive min-maxing, but further optimization will increase consistency. Prioritize equipping items with effects that activate automatically.
Memory Fragments

For Memory Fragments, we've used HP for IV, HP for V, and DEF for VI. If you are using Spore Harvester, it is recommended to equip the Glory's Reign to boost damage.
Detailed Status

Nia
*6 Transcendence, Potential unlocked to 7

Save Data
| Save Data | |||
|---|---|---|---|
 |  | | |
|  | ||
Nia is built with only Search Cards, with the goal of drawing Bottomless Hunger and Anchor Pointer into your hand.
Equipment
| Equipment | Skill/Refinement Effect/God's Hammer |
|---|---|
| Tentacles of Chaos | Ally ATK +8% On kill, reduce Stress of the Combatant with the highest Stress by 2. When ending the turn with 1 or more AP, apply Vulnerable 1 to all enemies. When taking damage, apply Agony 4 to the attacker. |
| Psionic Combat Armor | When a Card is Exhausted, gain 30% Fixed Shield (5 times per turn). At the start of the turn, if there is an Exhaust Card in the deck, 30% chance to draw 1 Exhaust Card. |
| Nature's Gift | At the end of the turn, Heal for 40%. |
This build equips a weapon that drops from Senectus to indirectly support Haru. Min-maxing other equipment slots will make the run even easier.
Memory Fragments

For Memory Fragments, we've used HP for IV, HP for V, and DEF for VI.
Detailed Status

Strategy
- If you are using Priscilla, check if her Ego Skill is in your opening hand, and use it as soon as it becomes available.
- Use various Upgrade Cards to thin your deck, and destroy one of the arms in the process.
- End your turn when the remaining arm is one hit away from being destroyed to set up a perfect state.
- After destroying the arm with the cards you were dealt, attack the main body.
- Repeat steps 2-4. (Depending on critical hits, you can deplete the main body's HP in 1 or 2 cycles).
Rearguard Team Guide
Boss Information

The Colossus also appears in the second half of the fight. In this phase, the window for attacking the Colossus's main body is limited, and the arms revive after just one hit.
Colossus (Main Body)

In the second half, an effect is added that increases the Cost of the highest-Cost card by 1, and another that grants
Colossus's Right Arm

When attacked, it gains
Colossus's Left Arm

When attacked, it gains
Colossus Battle Tips
Focus on the Amplification Effect

In The Great Rift, there is an amplification effect that grants a 50% damage increase for Instinct and Order Cards, and a 20% damage increase for Exhaust Cards. If you have suitable characters, use them to clear more efficiently.
Use High Single-Hit Damage Dealers
The Colossus and both of its arms have mechanics that limit the number of hits they take from an attack. Prioritize using characters with high single-hit damage to gain an advantage in battle.
Be Aware of the Arms' Traits
The arms have a trait where attacking one will apply a buff to the other. Plan your strategy accordingly, such as defeating them simultaneously with an AoE Attack or taking out the left arm first, which creates a Contaminated Card.
Clear the Vanguard Phase in 5 Turns
Depending on the number of turns remaining in the first half, up to 5 turns will be added to the second half. To maximize your score, aim to clear the first half as quickly as possible.
How to Win Boss Fight
Play Manually
While auto-play is available in The Great Rift, it struggles to adapt to boss mechanics, leading to inefficient clears. Since maximizing your score is important in this content, it's recommended to play manually.
Create a Season Save Data

Only Save Data created in Season 2 can be used in The Great Rift. Farm Seasonal Chaos to create a Save Data that is well-suited for clearing The Great Rift.
Save Data GuideLearn from Other Players' Data

In The Great Rift, you can check other players' team comps from the Merit Ranking. Reference the leaderboards to find team comps you can build with your characters and Save Data.
What Is The Great Rift?
High-Difficulty Score Attack Content
The Great Rift is a score attack event held within the Galactic Cataclysm. The damage you deal and other factors are added to your score, and you can earn rewards based on that score.
The Great Rift GuideScore Acquisition Conditions
| Summary of Score Acquisition Conditions |
|---|
| Gained according to damage dealt (Score gained gradually decreases after a certain amount of damage) |
| Gained according to difficulty |
| Gain 300% of the amount healed (Rearguard Team only) |
| Gain 300% of the damage blocked by Shield (Rearguard Team only) |
| If damage is perfectly blocked with a Shield, the defense score increases by 110% (Rearguard Team only) |
Two Parties Are Required

To clear The Great Rift, you need two parties: a Vanguard Team and a Rearguard Team. The scoring conditions are different for the Vanguard and Rearguard teams, so you need to prepare comps suited for their respective roles.
Three Types of Rewards
In The Great Rift, there are three types of rewards: Cumulative Score Rewards, Score Achievement Rewards, and Ranking Rewards. Even beginners can earn materials and other items by repeatedly participating.
Cumulative Score Rewards

Cumulative Score Rewards reset weekly. You can earn 270 Crystals and 4,000 exchange items for the Supply Shop, so be sure to participate every week and aim for a score of 500,000.
Score Achievement Rewards

With Score Achievement Rewards, you can get rewards based on the high score you achieve in a single run. You get all rewards by reaching a score of 500,000, but the main prize is a sticker, so aim for a high score that is within your reach.
Merit Ranking Rewards

Ranking Rewards are earned based on your rank determined by your high score at the end of The Great Rift. The main reward here is also a sticker, so make sure to participate in The Great Rift to secure your rewards.
Two Types of The Great Rift Event
The Great Rift is held twice, during a first half and a second half. In the week when the period changes, you can earn cumulative rewards for both, so don't forget to participate early.
The Great Rift Past Events
Forbidden Catalyst
Forbidden CatalystVanguard Team Guide
Boss Information

In the Vanguard Team phase, you will face Beginning of Desire. Beginning of Desire creates Substitute cards in your deck every turn.
Use Characters with Many Hits

Beginning of Desire has a damage reduction buff called Mucous Membrane. This buff decreases each time it's attacked, so use characters who can deal many hits, like Tressa, to remove it.
Add Draw Support for Consistency

The Substitute cards created by Beginning of Desire become 0-cost when drawn by an effect. Creating a Save Data with Divine Epiphanies or Common Cards that can draw will make for a more stable run.
Recommended Vanguard Team Comp
This is a team comp with Mei Lin as the Attacker. While supporting her with Veronica and Nia's draw skills, you'll fight using the multiple hits from Unity of Attack and Defense.
Strategy
- Prepare Save Data for Veronica and Nia that is focused on draw.
- Chip away at Mucous Membrane while cycling Mei Lin's Unity of Attack and Defense.
- Deal massive damage with Rising Dragon Spire, which depends on the number of cards used.
Other Recommended Characters
| Character | Reason for Recommendation |
|---|---|
| Tressa | - An Attacker with a Weak Attribute advantage - Easy to deal damage with 0-cost cards. |
| - Can easily get many hits in - Has good synergy with Tressa | |
| - Can Upgrade 1-Cost or lower Cards - Also has excellent draw support | |
| - Excellent at gaining AP - You'll want to prepare a Save Data with plenty of draw. |
Rearguard Team Guide
Boss Information

Beginning of Desire also appears in the second half. The Beginning of Desire in the second half creates "Counterfeit" cards in your deck every turn. Even after its HP is depleted, it is not defeated, and you can continue to deal damage to it.
Aim for the Ravage State

The Counterfeit cards created in the second half will have their Cost reduced when the enemy is in a
Recommended Rearguard Team Comp
For the Rearguard Team, a team comp with Sereniel as the Attacker is recommended. By using Selena's Tenacity recharge, you can trigger Ravage multiple times, further leveraging Sereniel's strengths.
Strategy
- Have Selena's Tactical Maneuver with the Tenacity recharge Epiphany.
- Inflict Ravage on the enemy and deal damage with Sereniel.
- Use Selena's Tactical Maneuver to recharge Tenacity and repeat the Ravage cycle.
- Cycle your deck using Cassius's Quest: Full House and Joker.
Chaos Zero Nightmare Related Guides

Recommended Guides
 Chaos Manifestation Guide Chaos Manifestation Guide |  Main Story Walkthrough Main Story Walkthrough |
 Trauma Code Guide Trauma Code Guide |  Battle Pass Guide Battle Pass Guide |
 Maintenance Updates Maintenance Updates |  Growth Guide Growth Guide |
 Rescue Guide Rescue Guide |  Pity System Guide Pity System Guide |
 Save Data Guide Save Data Guide |  How To Create Best Save Data How To Create Best Save Data |
Chaos Guide
 Blue Pot Blue Pot |  Twin Star's Shadow Guide Twin Star's Shadow Guide |
 City of Mist Guide City of Mist Guide |  Zero System Zero System |
 Chaos Guide Chaos Guide |  Basin of Hyperspace Guide Basin of Hyperspace Guide |
 Burning Life Guide Burning Life Guide | - |
 Galactic Disaster Guide
 Galactic News Network
 S1 Forbidden Catalyst
  Equipment List
 Cards List
 Fate List
