

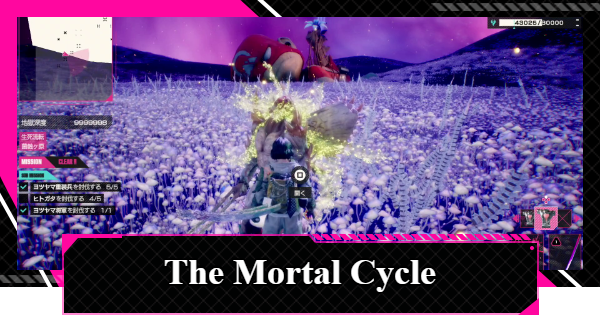
This is a guide for Stage 6: The Mortal Cycle in LET IT DIE: INFERNO. It shows the benefits of clearing difficult areas in LID, along with preparations and key strategy points.
Table of Contents
The Mortal Cycle Methods and Features
Take the Rightmost Route


The Mortal Cycle is a stage located in the deepest part of Stratum 6. After clearing the Skeletal Grove to unlock Iron Peak, you can challenge it by continuously choosing the rightmost route.
Battle the Strongest Enemy, Berserk Gomamusha

The Mortal Cycle is the hardest stage of Season 4, where you can fight the boss Berserk Gomamusha. The enemies that appear are strong, and there are tricky mechanics as well.
Berserk Gomamusha has up to a third form, making it a fitting final boss for Season 4.
Benefits of Exploring The Mortal Cycle
You Can See the Ending

If you defeat Berserk Gomamusha in The Mortal Cycle and return alive, you can watch the staff credits and a cutscene. Defeating Berserk Gomamusha is one of the goals of Season 4.
New Body Colors Will Be Unlocked

When you defeat Berserk Gomamusha, a new color for the Body you were using will be unlocked.
Body Unlock Conditions GuidePreparation and Countermeasures for The Mortal Cycle Exploration
Select a Powerful Core
| Core Name | Recommendation/Simple Evaluation |
|---|---|
| Recover Health on Counterattack Hit | [Recommendation] ★★★★★ - Can heal while attacking - Can save on healing items - Useful for both Exploration and the Berserk Gomamusha fight |
| Health Recovery Item Effect +100% | [Recommendation] ★★★★★ - Can save on healing items - Frees up Inventory Weight - Easy to recover from near-death situations |
| Dodge Count+ | [Recommendation] ★★★★★ - Makes it easier to evade enemy attacks - At least 2 dodges are mandatory for the Berserk Gomamusha fight |
| Reduce knockback when Guarding | [Recommendation] ★★★★ - Easy to aim for a Counterattack with attacks other than Guard Breaks - Powerful when combined with counter-healing - Also useful in the Berserk Gomamusha fight |
| Attack (per Body Rank) +3% | [Recommendation] ★★★★ - Makes it easier to defeat Berserk Gomamusha quickly - Effect is significant at Body Rank 6 |
| Rage Gauge+ | [Recommendation] ★★★ - Easy to use Deathblows consecutively - Useful in the Berserk Gomamusha fight |
| Health+ | [Recommendation] ★★★ - Increases survival rate during Exploration - Makes it harder to be defeated even when taking consecutive hits |
In Exploration up to Stratum 5, prioritize choosing Cores that are useful for the Berserk Gomamusha fight. The most recommended Cores are listed above.
Best Cores to Use (Early to Late Game)At Least Two Dodges are a Must
The red slashes that Berserk Gomamusha unleashes fly forward twice in a row. They are difficult to evade, so you need to have at least two dodges.
For Bodies whose dodge count cannot be increased with Mastery, acquire a Dodge Count+ Core.
How to DodgeBring Healing Items

Berserk Gomamusha's Attack is high, so be sure to prepare plenty of health recovery items. You'll also want to bring a Rage Shot so you can attack its third form all at once with a Deathblow.
How to Restore Health (HP)Use Legendary Rarity Weapons
| Weapon | Recommendation/Evaluation |
|---|---|
| Katana | [Recommendation] ★★★★★ - Fast Normal Attack startup - Deathblow has a fast startup and is easy to land - Slightly difficult to land Counterattacks on Berserk Gomamusha |
| Bat | [Recommendation] ★★★★★ - Fast Normal Attack startup - Deathblow has a fast startup and high Attack - Short Counterattack range |
| Wheel Blade | [Recommendation] ★★★★ - Fast Normal Attack startup - Easy to land Counterattacks - Difficult to use Deathblow in the Berserk Gomamusha fight |
| Arm | [Recommendation] ★★★★ - High Deathblow Attack - Easy to use among New Save Weapons - Short Counterattack range |
For the Berserk Gomamusha fight, bring Legendary Rarity Weapons. The recommended weapon types are listed above.
Also Bring Weapons for Counterattacking
If you have a Core that reduces knockback when Guarding, it will be easier to land Counterattacks. It is also recommended to bring long-range weapons.
Candidates include the Wheel Blade, Shield, and Propeller Edge.
How to Guard and CounterattackThe Mortal Cycle Walkthrough
The Mortal Cycle Map

The starting point and the entry route into the castle are partially randomized. Regardless of the entry route, aim for the boss Area in the Yotsuyama Castle Tower.
Beware of Places Where Enemies Spawn from the Ground
In places where a purple haze erupts from the ground, Yotsuyama Heavy Sentry will appear. It's recommended to back away and defeat the pursuing Yotsuyama Heavy Sentry first.
Doomed Toll Near the Castle Gate
Yotsuyama General in the Castle
A Riffwraith Appears in Yotsuyama Castle

Enter the castle from the 1st floor and proceed near the stairs, and a Riffwraith will appear. You can proceed without defeating it, but it's very troublesome as it will continue to attack from a long distance.
The Riffwraith's Attack has Unlimited Range
The Riffwraith's attack seems to have no range limit, and it will continue to attack even if you move away after it appears. Be careful, as its attacks can reach even outside of Yotsuyama Castle.
It uses two main types of attacks: a green reinforcement call and attacks that make the ground glow.
Beware of Reinforcements When It Glows Green

When the screen glows green, your position seems to be revealed to nearby enemies. If enemies start gathering, it's safer to move to a narrow passage and defeat them one by one.
Retreat When an Effect Appears on the Ground

A red effect is a sign of a Curse attack, and light blue is a time-stop attack. When they appear, retreat outside of the effect.
If the effect is the same as an Oasis, a field that only heals enemies will appear.
How to Proceed in The Mortal Cycle
Flow of The Mortal Cycle

- Defeat the Heavy Sentry and General before the Riffwraith
- Destroy the 3 Amplifier
- Defeat the Riffwraith
- Defeat Berserk Gomamusha
Yotsuyama Generals are placed on the Map, and Riffwraiths also appear inside Yotsuyama Castle. Since they can gather nearby enemies, it's safer to proceed while defeating enemies in your path.
However, the Riffwraith cannot be defeated until you destroy the three "Amplifiers". There is a proper order to defeating them.
Defeat the Heavy Sentry and General Before the Riffwraith

First, defeat the two Yotsuyama Heavy Sentries and the Yotsuyama General. Defeating them first will make it easier to destroy the third Amplifier.
Destroy the Three Amplifiers

At the end of the blue lines extending from the Riffwraith's body are the Amplifiers. If you destroy all three, the Riffwraith's Exoskeleton will break and it will fall to the ground.
First One is on the 2nd Floor of Yotsuyama Castle

The first Amplifier is on the 2nd floor, one floor up the stairs. There are often no enemies on the 2nd floor, so it's recommended to destroy this one first.
Second One is Near Berserk Humanoid

The second one is near two Berserk Humanoids, one floor up. Their Attack is high, so try to defeat the Berserk Humanoids one by one.
If you use Milene's Skill, it's also possible to ignore the Berserk Humanoid, destroy only the Amplifier, and escape.
The Third One is Near the Boss Room in the Tower

The third one is inside the Castle Tower where the boss room is. If you are spotted by a Yotsuyama General, two Heavy Sentries will appear in the passage.
It's dangerous to be cornered by all three, so if you're spotted by the Yotsuyama General, retreat downstairs for a moment.
Defeat the Riffwraith

Once you destroy the three Amplifiers, the Riffwraith will be downed. Riff Type enemies remain downed after their Exoskeleton is destroyed, so there's no need to rush your attack.
Defeat Berserk Gomamusha

Once you've collected 15,000 or more SPLithium, proceed to the boss Area. Berserk Gomamusha is a tough enemy that you fight in three forms, so you'll want to bring as many healing items as possible.
Video of Defeating Berserk Gomamusha
What to Do If You're Stuck
Acquire All Masteries

Berserk Gomamusha is the strongest enemy of Season 4. If you can't win, earn Mastery Points and challenge it after acquiring all Masteries.
If Your Cores Are Underwhelming, Take the Left Route

If the Cores you've obtained by Stratum 4 are underwhelming, you can opt to change your route to Great Scorch in Stratum 5 instead of proceeding to Blazing Trance.
Redo your preparations until you get Dodge Count+, health recovery-related Cores, or powerful Cores with three effects.
Change Your Body

If you can't win, change the Body you are using. For Exploration in Strata 1-6, Milene, Inva, and Timothy are recommended due to their powerful Skills.
If you're struggling with the third form, you can also try using Attacker Bodies like Ten or Pearl, get Cores that increase Attack, and try to overpower it.











