Early game guides for LET IT DIE: INFERNO. This include notes for efficient early game goal, game flow progression, what to know in early games, and what to do when stuck in LID.
| Related Articles | |
| Early Game Guide | Mid Game Guide |
| Late Game Guide | |
Table of Contents
Beginner Goals
Reach Body Rank 3


The goal in the early game is to survive twice in a row to reach Body Rank 3. The Hell Rift, which is explored at Body Rank 2 or lower, is relatively easy for beginners to clear, but the Demon Gate Labyrinth, explored from Body Rank 3, is significantly more difficult and requires knowledge and technique to clear.
Aim to Clear Dreamseeker as Well

The boss Dreamseeker, available at Body Rank 2, can be tough, but beginners can beat it with the right strategy and some practice. Defeating Dreamseeker reliably lets you farm Rarity Rare or higher equipment, reducing the need to buy Rare weapons with Kill Coins, especially useful since you may lose purchased gear during Demon Gate Labyrinth Explorations.
Early Game Flow and Progression
- Complete Missions while exploring
- Head to the Escape Pod after completing the Mission
- Survive to equip one Core
- Evacuate to earn various points
- Upon death, you lose items and your Body Rank returns to 1
Complete Missions While Exploring
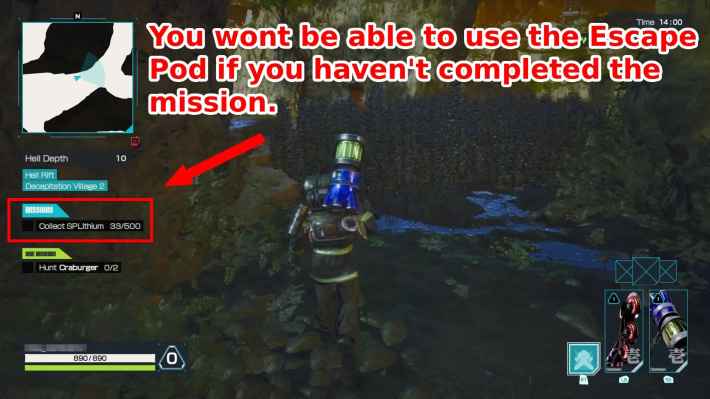
The objective of the game is to explore the Hell Gate and survive. To survive an Exploration, you must complete a Mission and then Evacuate via the Escape Pod. To complete a Mission, you need to acquire a certain amount of SPLithium or reach a specific Hell Depth (Area).
Mission Clear Conditions per Body Rank
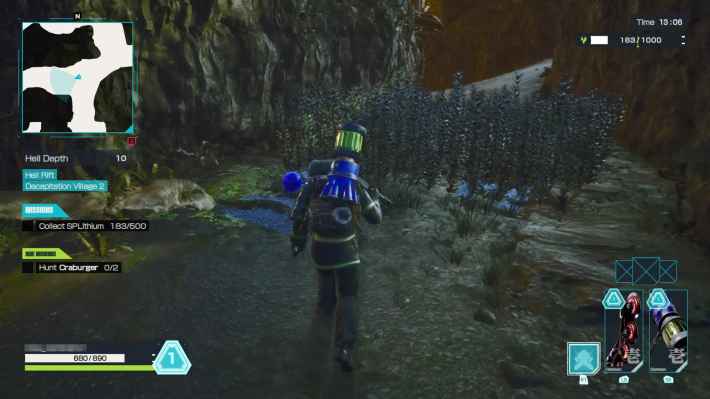
How to Get SPLithium
![]()
You can obtain SPLithium by defeating Yuckies (enemies) or approaching the floating ones. Additionally, you can get 100-300 or more SPLithium by destroying a Weeping Skull.
  Tips! Tips! | The location of a Weeping Skull will be displayed in blue on the Crouch + SP Radar when you are relatively close! |
|---|
How to Reach the Required Hell Depth

At Body Rank 2 or 4, you cannot complete the Mission unless you reach the specified Hell Depth. To reach the Hell Depth, go through the Judgment Gates to the next Area and head towards the building near the center of the Map.
| Tips! | Once you begin Exploration, it's recommended to go through the Judgment Gates early! |
|---|
Use Escape Pods After Missions

Once you've completed the Mission, find the Escape Pod and escape. The Escape Pod mostly appears somewhere in the square Areas on the Map. You'll basically be raising your Body Rank by repeating this cycle of completing a Mission and then escaping.
Locate Escape Pods with SP Radar
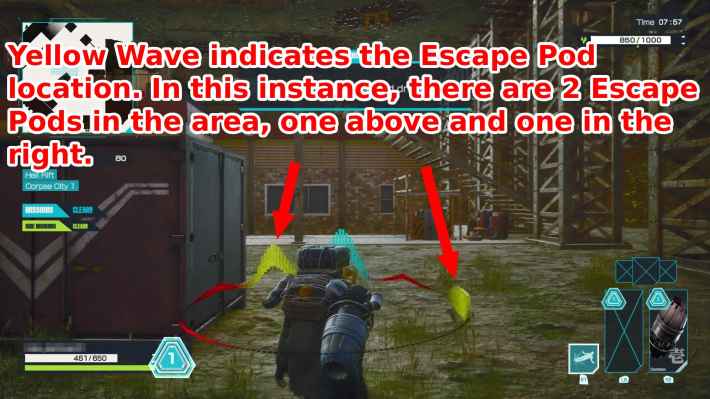
Once you reach a square Area on the Map, use Crouch + SP Radar to find the Escape Pod's location. The Escape Pod is in the direction indicated in yellow on the radar.
| Tips! | An upward wave means the Escape Pod is at a higher elevation than your current location, and a downward wave means it's at a lower one! |
|---|
The Escape Pod Flashes Yellow
The Escape Pod flashes yellow. If you think it's nearby but can't find it, try looking for the flashing light.
| This feature was added in the 12/18/2025 (PST) adjustment update. |
|---|
Survive to Equip One Core

![]()
When you survive, your Body Rank increases by 1 (up to a maximum of 6), and you can equip one Core. You will be presented with a random selection of three Cores with different abilities, and you choose one. Once a Core is equipped, it cannot be removed or changed.
Best Cores to Use (Early to Late Game)
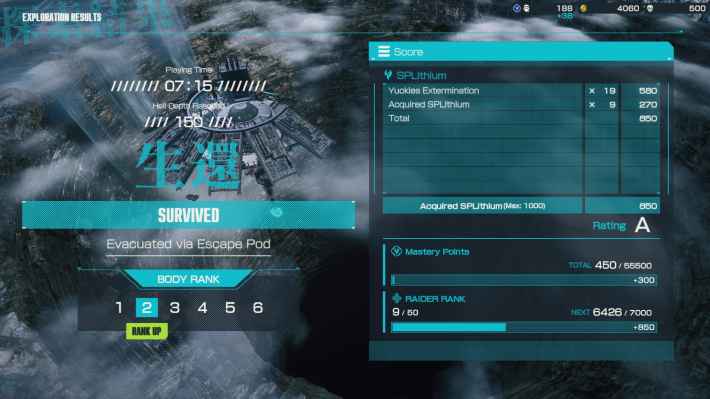
Evacuating Grants Various Points
![]()
When you Evacuate, regardless of whether you survived or died, you will receive Mastery Points and points needed to increase your Raider Rank. Mastery Points are required to unlock Masteries (ability boosts and additional abilities), and Raider Rank is needed to unlock Storage expansions, among other things.
| How to Enhance Masteries | How to Raise Raider Rank |
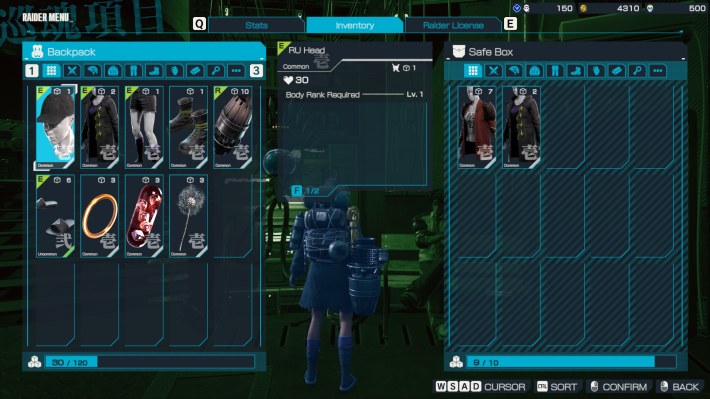
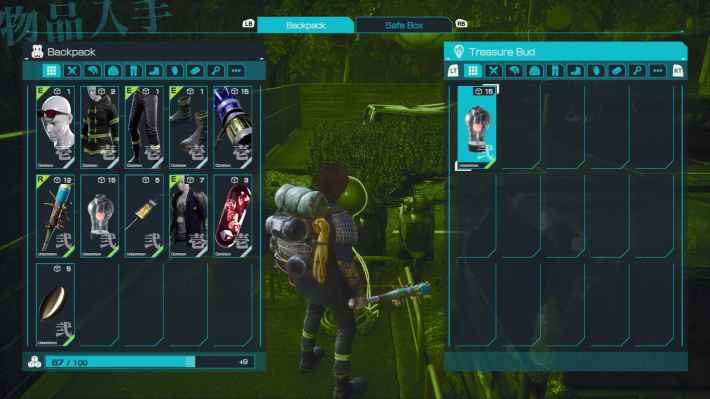
Survive to Keep Inventory
![]()
Upon survival, all items you were carrying can be brought back to the Iron Perch (base). Store any spare Weapons in your Storage.
How to Use and Upgrade Storage
Death Resets Items and Body Rank
![]()
If you die, you will lose all items you were carrying except for those in your Safe Box. Additionally, the Body you were using will revert to Rank 1, and all equipped Cores will be lost. Regroup, select the next Body you'll use, and begin your Exploration again.
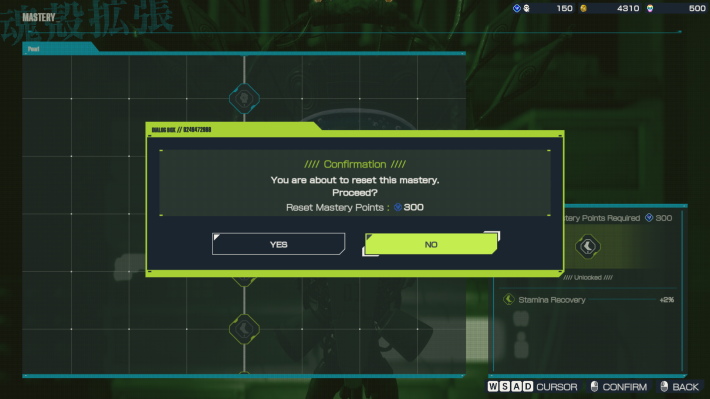
Masteries are Permanent
![]()
Masteries unlocked for each Body with Mastery Points are not reset upon death. Strengthening your Raider with Masteries makes it easier to explore deeper, so be proactive in allocating your points.
| Tips! | You can change allocated points freely with no penalty! |
|---|
Early Game Tips
Always Equip Two Weapons

![]()
Unless you bring Weapons from your Storage, the Raider begins the Exploration with only one Weapon. Guard Breaks require a weapon in both hands, so first pick up a Weapon and equip it in your free hand.
How to Get Equipment and Weapons
Recommended: Easy-to-Use Weapons

| Recommended Weapons |
    |
The recommended beginner Weapons are the Wheel Blade, Katana, Arm, and Hammer. These offer simple Normal Attacks and Deathblows. The next best options are the Bat and Odachi.
| Tips! | The Wheel Blade is highly recommended, as its attacks are easy to land. |
|---|
Shield is Recommended for Off-Hand

![]()
After equipping one of the recommended Weapons, equip a Shield in your other hand. A Shield alone increases your Guard by +30, reducing the damage taken when guarding.
How to Use Shield and Deathblow
Use Deathblows Actively

![]()
The Rage Gauge fills up when you hit enemies, so the time you can't activate a Deathblow isn't long. When your Rage Gauge is full, be sure to use Deathblows actively.
| Tips! | The Wheel Blade's Deathblow, which can attack from a distance, and the Katana's Deathblow, which can hit multiple enemies, are particularly easy to use! |
|---|
Restore Health with Skills and Items
![]()
Health is mainly restored using "Vitanon" or Timothy's Skill. Vitanon is quite heavy, with the S version having a Weight of 15 and the M version a Weight of 20, so use them freely when your Health is low. You should also use Timothy's Skill whenever it's off Cooldown if your Health is low.
Stamina Usage and Recovery Guide
Use Kill Coins to Expand Storage Limits
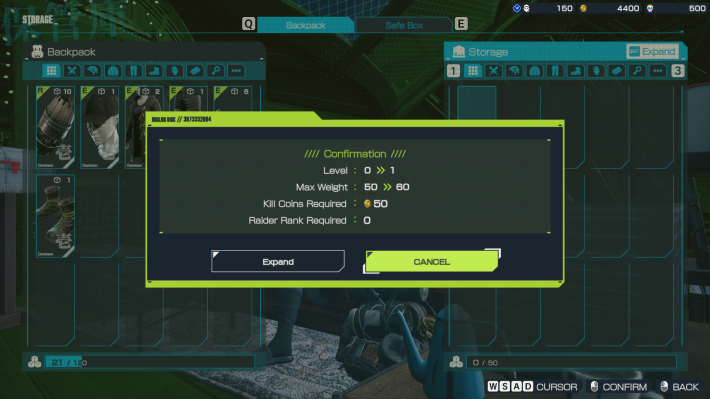
![]()
You should use Kill Coins to expand your Storage. While you can also use them to purchase equipment at the Pro Shop Kazoku or the Ant Bazaar, this is a lower priority. The basic strategy is to find Weapons during Exploration, and only consider buying from the shop if you have spare Kill Coins when you restart after dying.
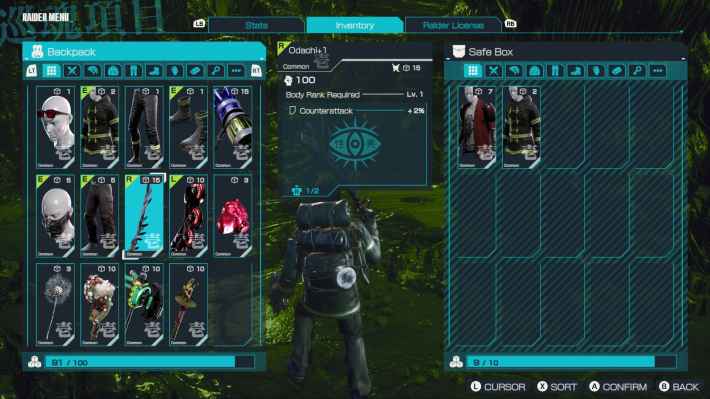
Put Keys and Blueprints in the Safe Box
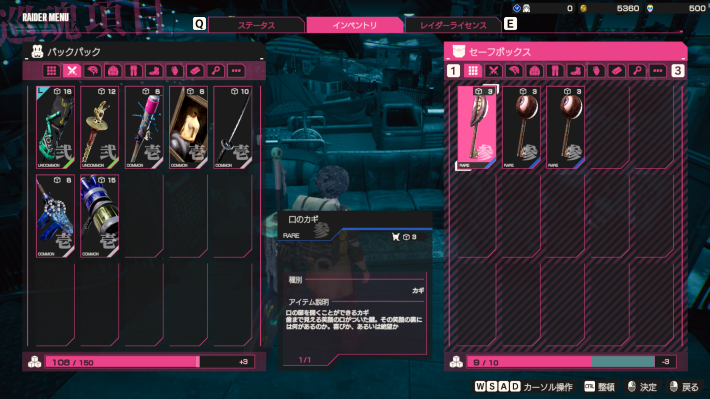
![]()
Even if you Evacuate due to death, items in the Safe Box are not lost. Prioritize putting things like Keys and Blueprints in the Safe Box, as they have low weight and are often useful later.
| Tips! | With the Deluxe Edition or Ultimate Edition, the Safe Box is expanded, so it's also a good idea to store strong Weapons in it! |
|---|
Prepare for the Demon Gate Labyrinth

Once you raise your Body Rank to 3 (by surviving twice), your starting point for the next Exploration will be the Demon Gate Labyrinth. The difficulty of Exploration spikes up, making it much easier to die. Patiently continue to level up by bringing back strong Weapons for future Explorations and unlocking Masteries to boost your stats.
What to Do When You're Stuck
Unlock Masteries
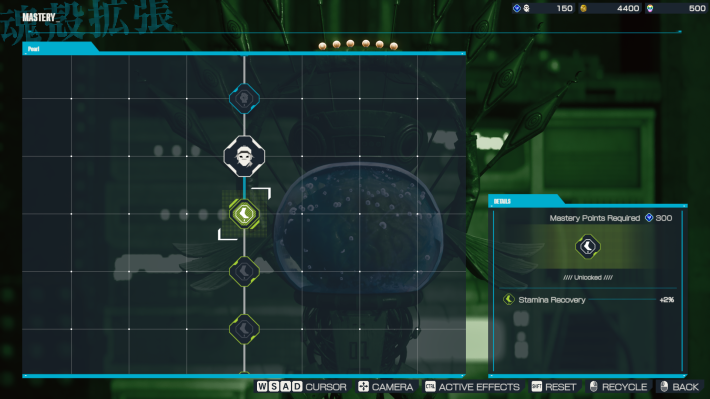
![]()
Even if you die during Exploration, you still get Mastery Points, so repeat Explorations to unlock Masteries and gradually get stronger. Steady enhancement is the shortcut to success.
Prioritize Bringing Back Weapons
![]()
If you have spare Weight in your Backpack or Safe Box, try to bring back Weapons whenever possible. Bringing Weapons with you when you deploy again after dying will make progression easier.
Purchase Healing Items

![]()
Purchasing Vitanon from the Pro Shop Kazoku and bringing it with you will give you an advantage. However, since you'll want to prioritize using Kill Coin to expand your Storage, it's not recommended to buy them every time.
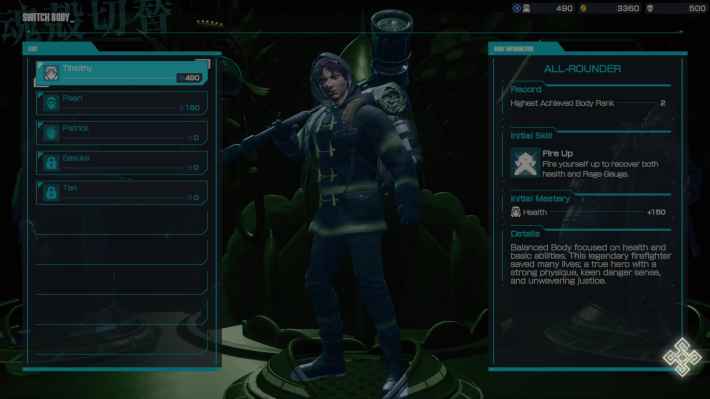
Change Your Body
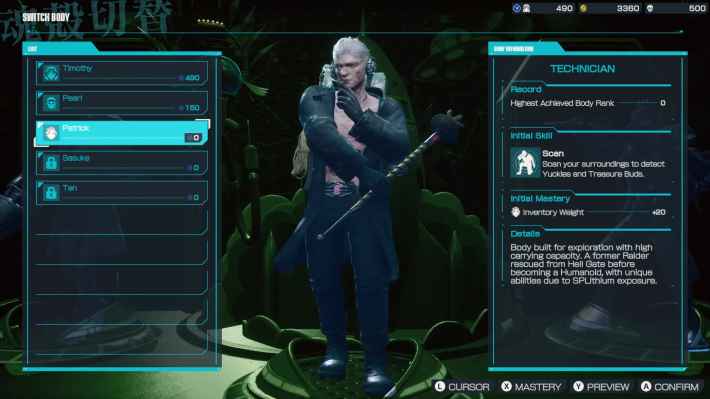
![]()
When you die, you can re-select the Body you deploy with. It's a good idea to try using a different Body. The recommended Body is Timothy, who can heal with his Skill.
| Related Articles | |
| Mid Game Guide | End Game Guide |

