This is a list of Guard Break attacks in LET IT DIE: INFERNO. Including Guard Break combos, how to guard break, a list of weapons for guard breaking, and more.
Table of Contents
Guard Break Combos and List
All Guard Breaks by Weapon Type
| Group | Weapon Type |
| 1 | Bat, Katana, Wheel Blade, Magnetic Staff, Executioner |
| 2 | Fireworks Shooter, Corrupted Fang, Evil Rod, Plasma Laser |
| 3 | Arm, Sealed Portrait, Shield |
| 4 | Hammer, Rammer, Axe, Dekotora |
| 5 | Greatsword, Propeller Edge, Odachi, Vampiric Tree, Metal Whip |
The Guard Break action is determined by the weapon-type combination you equip in both hands across the five weapon groups. There are minor variations, such as mirrored attack animations depending on which hand holds each weapon, but the actual Guard Break performance remains the same.
Guard Break Combo Chart
| Group | 1 | 2 | 3 | 4 | 5 |
| 1 | GB1 | GB2 | GB3 | GB4 | GB5 |
| 2 | GB2 | GB6 | GB7 | GB8 | GB9 |
| 3 | GB3 | GB7 | GB10 | GB11 | GB12 |
| 4 | GB4 | GB8 | GB11 | GB13 | GB14 |
| 5 | GB5 | GB9 | GB12 | GB14 | GB15 |
▲Tap the blue text to jump to that Guard Break.
Features of Each GB Combo
Guard Break Attack Combo 1
A fast three-hit combo that swings both weapons downward. You can slightly sidestep left or right during the attack. The move comes out quickly, and once the first hit connects, enemies cannot counter during the sequence, making it very easy to use.
| GB Combo 1 Weapons | ||
      | × | |
Guard Break Attack Combo 2
A spinning slash that moves you backward, followed by a short-range red projectile with a Guard Break effect. The backward movement reduces counter risk, making the move safe even if the slash does not hit.
| GB Combo 2 Weapons | ||
| | × |     |
Guard Break Attack Combo 3
After a frontal sweeping slash, your character steps forward and delivers a thrust. This move is especially effective against Humanoids that retreat while guarding, allowing you to break through their defense.
| GB Combo 3 Weapons | ||
| | × |    |
Guard Break Attack Combo 4
After a sweeping slash, your character charges briefly before unleashing a downward swing. The second hit has a slow startup, leaving you vulnerable to counter-attacks even if the first strike connects, so use it with caution.
| GB Combo 4 Weapons | ||
| | × |     |
Guard Break Attack Combo 5
Your character uses both weapons to perform two consecutive sweeping slashes. The move has high recovery if it misses, so it’s best used at close range where both hits are more likely to connect.
| GB Combo 5 Weapons | ||
| | × |      |
Guard Break Attack Combo 6
Fires a straight-line projectile from your position. The startup is slightly slow, so maintain distance to prevent enemies from counter-attacking during the launch.
| GB Combo 6 Weapons | ||
| | × | |
Guard Break Attack Combo 7
Your character takes several steps forward before firing a red projectile. You are fully vulnerable until the shot is released, so this move should only be used from long range to avoid being attacked.
| GB Combo 7 Weapons | ||
| | × | |
Guard Break Attack Combo 8
Fires a slow-moving projectile that functions as a ranged trap. Use it to bait enemies into advancing while the projectile covers their approach.
| GB Combo 8 Weapons | ||
| | × | |
Guard Break Attack Combo 9
Charge briefly, then unleash a wide horizontal slash. This move is effective against clustered Humanoids, but its slow startup and high recovery make it risky if used at close range.
| GB Combo 9 Weapons | ||
| | × | |
Guard Break Attack Combo 10
Unleash a charging attack that continues until you hit an enemy or obstacle, or you release the attack button. Its long reach makes it especially effective for closing distance against faraway Humanoids.
| GB Combo 10 Weapons | ||
| × | |
Guard Break Attack Combo 11
After charging, your character moves forward and releases an attack with a knockback effect. The startup is slow, so it’s safest to use when there is moderate distance between you and the enemy.
| GB Combo 11 Weapons | ||
| × | |
Guard Break Attack Combo 12
A charging thrust that drives your Greatsword or Odachi straight forward. Its travel distance is shorter than Combo 10, but the charge does not stop on contact and can hit up to four times, making it effective for multi-hit pressure.
| GB Combo 12 Weapons | ||
| × | |
Guard Break Attack Combo 13
Hoist a Hammer or Axe onto your shoulder, charge, then step forward to deliver a powerful strike. Despite its high damage, the startup is extremely slow and easy for enemies to evade, so use it only when you have a safe opening.
| GB Combo 13 Weapons | ||
| | × | |
Guard Break Attack Combo 14
After charging, your character unleashes a two-handed forward slash. The attack deals high damage, but its slow startup makes it difficult to land consistently, so reserve it for openings or staggered enemies.
| GB Combo 14 Weapons | ||
| | × | |
Guard Break Attack Combo 15
Swing a large weapon with both hands, attacking all surrounding areas. This combo is strong when multiple Humanoids are nearby, but its slow startup makes it easy to interrupt, so use it only when you have space to act.
| GB Combo 15 Weapons | ||
| | × | |
Recommended Combos
Best Guard Breaks: 1, 2, and 10


For Guard Breaks, Combo 1 (e.g., Katana × Katana), Combo 2 (e.g., Katana × Fireworks Shooter), and Combo 10 (e.g., Arm ×2) are recommended. These combos are fast, easy to land, and hard for enemies to counter, even when evaded.
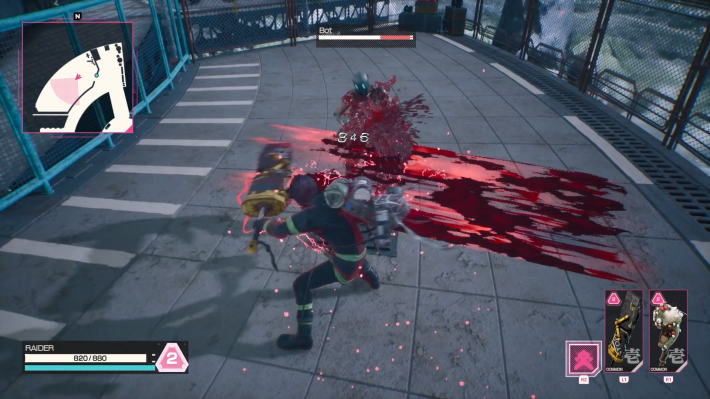
Guard Breaks 9 and 12 Are Easy to Use
![]()
Guard Breaks 9 and 12 can also be strong depending on the situation. Both combos are effective against groups of enemies, making them solid options to build around when tackling stages with multiple Humanoids.

