
Check out all the treasure chest and Lucky Emblem location found in The Caribbean for Kingdom Hearts 3 (KH3). Here we include detailed location and map for all items found here!

 All Story Guide & World Walkthrough List
Table of Contents
Lucky Emblem Location Video Walkthrough
Port Royal - Treasure Chest & Lucky Emblem
Detailed Location of the Treasure Chest

| No. | Map | Content |
|---|---|---|
| 1 |  | Hi-Ether |
| 2 |  | Mega Potion |
| 3 |  | Elixir |
| 4 |  | Port Royal Photos |
| 5 |  | Hi-Refocuser |
| 6 |  | Mickey's Prison Escape Mini Game |
| 7 |  | Hi-Ether |
| 8 |  | Tent |
| 9 |  | Mega Potion |
| 10 |  | Sorcerer's Ring |
| 11 |  | Ether |
Detailed Location of the Lucky Emblem
| No. | Map | Location |
|---|---|---|
| 1 |  | Port Royal / Port Near the Boat Afloat In Village |
| 2 |  | Port Royal / Port Pillar in Village Building |
| 3 |  | Port Royal / Waterfront Shore Side Near House in Village |
| 4 |  | Port Royal / Waterfront Plate on the Port Entrance |
| 5 |  | Port Royal / Fort Rope Pile Seen From Above the Viewing Point |
| 6 |  | Port Royal / Fort Iron Ball in the Cell |
The Caribbean Sea (12 ~ 29) - Treasure Chest & Lucky Emblem

Detailed Location of the Treasure Chest
| No. | Map | Content |
|---|---|---|
| 12 |  | Yin-Yang Cufflink |
| 13 |  | Axios |
| 14 |  | Damascus |
| 15 |  | Blizzaga Choker |
| 16 |  | Chaos Anklet |
| 17 |  | Firaga Bangle |
| 18 |  | Cast Out to Sea Mini Game |
| 19 |  | Electrum |
| 20 |  | Orichalcum |
| 21 |  | Orichalcum + |
| 22 |  | Hi-Ether |
| 23 |  | Cosmic Arts |
| 24 |  | Map of the Ship Graveyard |
| 25 |  | Silver Necklace |
| 26 |  | Map of the Spiny Rock Island |
| 27 |  | Damascus |
| 28 |  | Insulator Rosette |
| 29 |  | Adamantite |
Detailed Location of the Lucky Emblem
| No. | Map | Location |
|---|---|---|
| 1 | | Port Royal / Port Near the Boat Afloat In Village |
| 2 | | Port Royal / Port Pillar in Village Building |
| 3 | | Port Royal / Waterfront Shore Side Near House in Village |
| 4 | | Port Royal / Waterfront Plate on the Port Entrance |
| 5 | | Port Royal / Fort Rope Pile Seen From Above the Viewing Point |
| 6 | | Port Royal / Fort Iron Ball in the Cell |
| 7 | 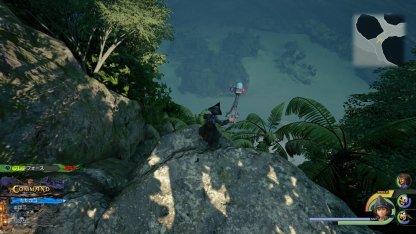 | Isla Verdemontana Island Seen from Above the Island |
| 8 |  | Isle of Luck |
| 9 |  | Horseshot Island Island Ledge Seen from the Boat |
| 10 |  | Small Island East of Thornrock Island Broken Barrel |
| 11 |  | Ship's End Sunken Ship to the South East of Exile Island |
| 12 |  | Sandbar Isle Stone in the Lake in the Island |
| 13 |  | Sandbar Isle Coral in the Lake in the Island |
The Caribbean Sea (30 ~ 47) - Treasure Chest & Lucky Emblem

Detailed Location of the Treasure Chest
| No. | Map | Content |
|---|---|---|
| 30 |  | Sand Island Map |
| 31 |  | Hungry Crystal |
| 32 |  | Adamantite |
| 33 |  | Damascus |
| 34 |  | Orichalcum |
| 35 |  | Adamantite |
| 36 |  | Electrum |
| 37 |  | Adamantite |
| 38 |  | Electrum |
| 39 |  | Adamantite |
| 40 |  | Electrum |
| 41 |  | Hungry Crystal |
| 42 |  | Adamantite |
| 43 |  | Orichalcum |
| 44 |  | Store Anchor+ |
| 45 |  | Orichalcum |
| 46 |  | Electrum |
| 47 |  | Beach Party (Classic Kingdom) |
Detailed Location of the Lucky Emblem
TBA
Underwater Cave - Treasure Chest & Lucky Emblem

Detailed Location of the Treasure Chest
| No. | Map | Content |
|---|---|---|
| 48 |  | Map of the Archipelago |
| 49 |  | Cure All |
| 50 |  | Mega Potion |
| 51 |  | Ocean Heartbinder |
| 52 |  | Fishin' Frenzy (Classic Kingdom) |
| 53 |  | Orichalchum |
| 54 |  | Adamantite |
| 55 |  | Master's Ring |
Detailed Location of the Lucky Emblem
TBA
All Lucky Emblem (Hidden Mickey) Photo LocationsKingdom Hearts 3 (KH3) Related Article
Story Walkthrough & Guides
| 0. Opening | 1. Olympus |
| 2. Twilight Town | 3. Toy Box |
| 4. Kingdom of Corona | 5. Monstropolis |
| 6. Arendelle | 7. The Caribbean |
| 8. San Fransokyo | 9. Keyblade Graveyard |
| 10.Scala Ad Caelum | After Beating the Main Story |

