 Acambe
 Afra
Afra Agata
Agata Alexei
 Auguste
 Ayishah
 Beryl
Beryl Camelot
 Caris
Caris Ciri
Ciri Clara
Clara Cocoa
Cocoa Col
Col Credenza
 Dantalion
 Edda
Edda Estra
Estra Falin
Falin Faycal
 Flavia
 Garcia
 Geralt
 Gloria
 Guzman
 Hasna
Hasna Heshan
 Homa
Homa Iggy
Iggy Inanna
 Kianshir
 Kiya
Kiya Kvare
Kvare Layla
Layla Leonide
 LilyWill
 Lukamar
 Lutfi
Lutfi Luvata
 Magnus
 Maitha
 Marcille
 Miguel
 Momo
Momo Nergal
 NonoWill
 Nungal
 Nydia
Nydia Pamina
 Parsifal
 Pooch Runrun
 Rawiyah
 Rico
Rico Safiyyah
 Samantha
 SchackLulu
 Selina
 Senshi
 Shahnaz
 Shams
Shams Simona
 SP Faycal
 SP Inanna
 SP Maitha
 SP Nungal
 SP Rawiyah
 SP Safiyyah
 SP Samantha
 Taair
Taair Teadon
 Team Meteor
 Triss
Triss Tristan
 Xavier
 Yeganeh
 Yennefer
 Yserinde
This is a guide on how to use objects in Sword of Convallaria. This covers the types of objects in each stages, how to use them, and how to deal with them in Sword of Convallaria.
Table of Contents
What are Stage Objects (Gimmicks)?
Gimmicks that Affect Both Players and Enemies
![]()
Objects are gimmicks (mechanisms) on the stage, also known as Items. Some can help the player's progress if used correctly, while others can be used by enemies, making them a very important element for progressing in Sword of Convallaria.
Examples and Usage of Objects
Explosive Barrel

![]()
The Explosive Barrel explodes in a 3×3 area centered on it when attacked, dealing damage to nearby players.
Usage and Countermeasures
Since melee attacks will cause self-damage, it's best to use knockback or ranged attacks. However, you can intentionally self-destruct with enemies during a pinch to turn the tide, so keep that in mind.
Liquor Barrel and Oil Lamp

![]()
When attacked, it rolls in the direction of the attack, dealing damage equal to 50% of Max HP to the first character it collides with. Upon destruction, it transforms a 5×5 area into “Burning Panels.”
Usage and Countermeasures
Because it deals 50% Max HP damage, it's effective against high-durability enemies. The wide 5×5 Burning Panels are also useful for DoT and movement restriction. Just be careful not to trap your own allies.
Boulder

![]()
The Boulder starts rolling when hit and destroys any enemies or objects it touches. If it falls from a height difference of 2 or more, it shatters on the spot.
Usage and Countermeasures
Touching the Boulder means instant defeat, making it extremely dangerous. Lure enemies into its path for maximum effect.
Military Flag

![]()
The Military Flag has a powerful effect that boosts damage dealt by all allies on the field and reduces damage taken.
Usage and Countermeasures
Since characters are greatly strengthened just by its presence, protect your own Military Flag while swiftly destroying the enemy’s—this is key to victory. When the enemy has a Military Flag, use characters with high maneuverability or ranged attacks to break it quickly.
Spice Bag

![]()
When destroyed, it changes a 3×3 area into “Spice Panels,” where single-target ranged attacks are always dodged. However, taking AoE damage ignites the Spice Panels and causes an explosion that deals percentage-based Max HP damage to characters standing on them.
Usage and Countermeasures
When using Spice Bag Panels, check beforehand which enemy characters have AoE attacks. In battles where the enemy might use Spice Bag Panels, it’s important to include AoE-capable characters in your team.
Vlder Rattan Ball

![]()
When attacked, it rolls and, upon falling 2 or more tiles or colliding, blocks the path and leaves cross-shaped Thornbushes that apply “Infection” (Damage Over Time) to surrounding units when destroyed. If it hits a character, they are knocked back, take Piercing Damage, and are inflicted with Infection.
Usage and Countermeasures
Getting hit can lead to dangerous situations due to Piercing Damage and DoT. Conversely, hitting troublesome enemy characters can shift the battle to your favor, so aim to lure and hit them directly. Blocking paths with Thornbushes is also strategically important.
Large Brazier

![]()
When attacked, it ignites a 3×3 area in the attack direction, turning it into Burning Panels that deal damage to characters standing there.
Usage and Countermeasures
Try to ignite areas that hit as many enemies as possible. Also, Burning Panels consume extra movement, so lighting fires where you want to block enemies beforehand is effective.
Cage

![]()
Destroying the cage frees the character inside. However, you won’t know beforehand what type of character it is. Some stages require destroying cages to rescue the characters inside.
Usage and Countermeasures
You never know what unit will appear. If it results in a disadvantage, you can use the rewind function to retry, so feel free to destroy cages proactively if you still have rewinds left.
Tarot Cards

![]()
Objects that can be picked up by both enemy and allied characters. Picking them up allows “Act Again” and triggers various effects.
Usage and Countermeasures
Picking up Tarot Cards grants powerful buffs and the ability to Act Again, so they are valuable for escape or attack. Enemies also use them, so check the buffs beforehand.
Ancestral Power

![]()
Units passing through this, friend or foe, gain the buff “Ancestral Power.” The effects are: +1 Range on Ranged Skills, +100% damage dealt, +30% damage when attacking from Highland, but lose 35% HP at end of turn. This buff cannot be negated or removed.
Usage and Countermeasures
Attack power is increased but HP decreases over time. Choose between quick decisive battles or continuous healing to maintain HP. When the enemy gains Ancestral Power, they become very dangerous, so either run away or defeat them before they act.
Thornbushes

![]()
Obstacle blocking the path. When destroyed, it applies “Infection” (Damage Over Time) to characters within 1 tile.
Usage and Countermeasures
Destroy them with ranged attacks and, if possible, lure enemies to be caught in the effect.
Healing Item

![]()
Characters who pick this up can “Act Again” and recover 100% HP.
Usage and Countermeasures
Healing is strong, and the Act Again effect allows significant movement. Use it to quickly close in on enemies or escape while healing.
Supply Box

![]()
Breaking this drops a Healing Item.
Usage and Countermeasures
Destroy the supply box before the character who needs healing acts, then pick up the Healing Item with that character.
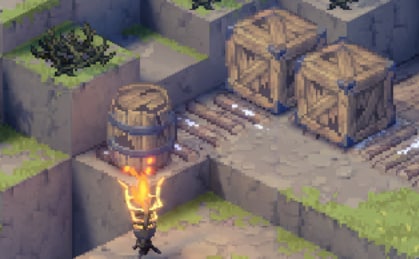
Wooden Boxes & Barrels

![]()
Objects found on many stages that can be stood on or destroyed. Some can be destroyed but not stood on, and some cannot be destroyed at all.
Usage and Countermeasures
Standing on objects increases height by +1, enabling ranged attacks or easier movement. Also, destroy obstructive objects beforehand.


