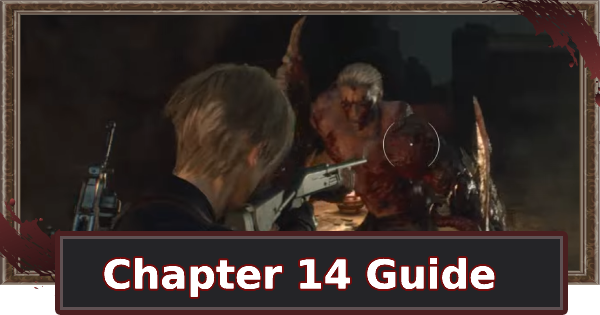
Chapter 14 Walkthrough Guide for Resident Evil 4 Remake (RE4 Remake). Learn how to complete Chapter 14 map, Blue Request Notes, treasures, and Clockwork Castellans location.
Table of Contents
| ← Previous Chapter | Next Chapter → |
| Chapter 13 | Chapter 15 |
Chapter 14 Story Walkthrough
| Chapter 14 Walkthrough Chart | |
| 1 | ▼ Make Your Way To The Summit |
| 2 | ▼ Go after Ashley |
Make Your Way To The Summit
| No. | Details |
| 1 |  |
| 2 | Go through the door that was opened for you, pass the room with the weapon merchant, and open the next door. |
| 3 | Go up the stairs, down the ladder to the left, then straight ahead and up the stairs again. |
| 4 |  ┗ Defeat the enemies beforehand. |
| 5 | Jump down from the room, go left from the end of the open iron bars, and open the door. ┗ Rescue Ashley from getting caught. |
| 6 | Proceed straight through the opened door, climb the stairs, and continue ahead. |
| 7 |  ┗ Pull the lever when the pointers comes to the red part. |
| 8 | As the Regenerator appears, hide Ashley in the locker first, then defeat it. ┗ Defeat the Regenerator by hitting its weak points, which is the head, even if it changes to a spiky form after being defeated once. When it explodes, spikes scatter around, so make sure to get to a safe spot to avoid getting hit. |
| 9 | Proceed forward and pull the lever again with Ashley ┗ Pull the lever just before it lands on the red location because Leon's lever has low sensitivity this time. |
| 10 | Ask Ashley to cross the bridge by turning the steering wheel at the landfill. |
| 11 | Follow the road and pull the power distribution switching lever ┗ To prevent Ashley from being captured, attack from between the iron bars when the enemy appears. |
| 12 |  ┗ The correct answer is shown in the image above  【Correct Answer for HARDCORE and higher】 【Correct Answer for HARDCORE and higher】 |
| 13 | Go through the unlocked door and go through the room with the Merchant to the cargo depot. |
| 14 | After going down and watching the cutscenes, get on the heavy machinery and make a hole in the wall. ┗ Enemies will appear while Ashley is operating heavy equipment, so try to hold them down while defeating them. Leon takes damage when he is hit by the Iron Ball |
| 15 | Head through the hole you made and lower the lift. Get in and go up |
| 16 | Get off the lift and follow the path to the Amber Storeroom. Examine the amber and a cutscene will play |
Go After Ashley
| No. | Details |
| 1 |  ┗ Go to the right of the forked road and go down the ladder to make it harder for the enemy to find you you |
| 2 | Go through the campsite, go inside the tent, and follow the blood onwards |
| 3 | With the Krauser battle just around the corner, go to the Merchant to repair your Knives and strengthen their durability |
| 4 | When you continue forward, a cutscene will start and the boss fight with Krauser will happen ┗ At first, you will enter the ruins while avoiding Krauser's attacks |
| 5 | Climb the stairs and Krauser will appear in front of you. Fight back against him ┗ If Krauser jumps, you will be fired on so run directly below him |
| 6 |  |
| 7 |  |
| 8 | If continue further, Krauser will show up to attack you. Follow the quick time event prompts |
| 9 |  ┗ The ground is also covered with Bear Traps, so walk with caution |
| 10 |  ┗ When you reach the entrance to the ruins, Krauser will drop a grenade so move back |
| 11 | As soon as you enter the ruins, Krauser will appear and attack you. Use the pillars as cover |
| 12 | After fighting Krauser for a while, it will change to its second form and Leon will drop down |
| 13 | Krauser will appear as you move in the dark. Use your knife or dodge when needed. |
| 14 | Climb the ladder and you will enter into another boss fight with Krauser ┗ If you shoot Krauser with your gun, he will quickly dodge it. It's better to parry with your knife, then attack with your gun when you see an opening |
| 15 | If you attack for a certain period of time, a short cutscene will play and Krauser will go down to the center to attack you. Run to corner to avoid this attack (this happens more than once) |
| 16 | Chapter 14 ends when you enter the build after defeating Krauser ▶Chapter 15 Guide |
How To Defeat Krauser (Before Mutation)
| Before Mutation Fight Guide | |
| ★ | Parrying with the knife is very important. Be sure to repair it and enhance its Durability before the fight |
| 1 | When fleeing the ruins, be aware of traps and get ready to dodge |
| 2 | Openings will be come from parrying his attacks ┗ Krauser will dodge if you shoot at him so create an opening by parrying his attacks instead |
| 3 | When Krauser is on top, hide yourself behind a pillar ┗ When he throws a grenade, hide behind another pillar instead |
Be Aware Of Traps & Be Ready To Dodge
When running away from the ruins, make sure to look around for laser traps. Get ready to dodge in case Krauser ambushes you
Before Mutating, Krauser Is The Same As In Chapter 11
Initially, Krauser's fight will be the same as the one in Chapter 11. Use the Parry→Melee Counter will be your main strategy. This time, you can also use your gun when you create an opening after Parrying.
Krauser Will Dodge When You Attack With Your Gun
If you attack with your gun when you haven't created an opening yet, Krause will dodge you attack. It's better to attack with your gun only after that opening is made.
Even If You Aim Your Gun Before Mutation, It Will Avoid At Fullspeed
Even if you aim when there is no shadow, it will avoid at full speed and attack you. It is recommended to use the gun only where there is shadow.
If Krauser Moves Up, Hide Behind A Pillar

![]()
When Krauser moves up, he will attack you with his gun. Hide behind a pillar to avoid being hit.
If A Grenade Is Thrown, Move To Another Pillar
Make sure to move to another pillar if Krause throws a grenade at you.
How To Defeat Krauser (After Mutation)
| After Mutation Fight Guide | |
| 1 | Always be ready to dodge while going through the dark |
| 2 | The left hand attack can be parried, while the right hand attack can be avoided by running |
| 3 | When he's defending with his right hand, aim at his legs to bring him down ┗ Once downed, use Melee to blow him up and follow up with a gun |
| 4 | After the cutscene, run to the edge ┗ You can also go upstairs |
Beware Of Krauser Who Will Try To Ambush You

![]()
After dropping down, Krauser will try to ambush you as you going through the dark. Get ready to parry or dodge to avoid his attacks.
Run Away From The Right Hand Attack
The left hand attack can be parried, but the right hand attack cannot. If you create distance between you and Krauser, you can avoid the right hand and you can attack from there.
When Defending With The Right Hand, Attack The Leg
When Krauser is defending with his right hand, you can shoot at his legs. If he gets downed, you can melee him with this opening.
When The Cutscene Starts, Go Upstairs
After the cutscene and Krauser goes to the cliff, he jump to the center. Either run upstairs or at the edge to avoid it.
Chapter 14 Map


| Icon Names | ||
 |  |  |
 |  |  |
 |  |  |
 |  |  |
 |  |  |
Clockwork Castellans Location
Above The Indoor Lockers At The Campsite West
| Map | Location |
 |  |
It is on top of a locker in a shark high above the Campsite.
Clockwork Castellans Locations
Blue Request Notes Location
Destroy the Blue Medallions 5
| Map | Close View |
|---|---|
 |  |
| To Complete: Destroy all Blue Medallions Reward: Spinel ×5 | |
Even More Pest Control
| Map | Close View |
|---|---|
 |  |
| To Complete: Exterminate all the rats Reward: Spinel ×3 | |
The Wandering Dead
| Map | Close View |
|---|---|
 |  |
| To Complete: Defeat the strong threat Reward: Spinel ×8 | |
 ▶Return To Top Page
 Chapter 5
