Explore our Pokemon Ultra Sun and Ultra Moon story walkthrough guide. It contains all the information you need from the start of the game to the Hall of Fame.
Table of Contents
- Opening - Lillie Event
- Lili'i Town - Hau Battle
- Hau Battle - Big Wave Beach
- Big Wave Beach - Ilima's Trial
- After Ilima's Trial - Seaward Cave
- Seaward Cave - Hala's Grand Trial
- Route 1 - Big Wave Beach
- Kantoi Beach - Ohana Town
- Ohana Ranch - Lana's Trial
- Route 5 - Royal Avenue
- Route 7 - Kiawe's Trial
- Route 7 - Wela Volcano Park
- Route 8 - Mallow's Trial
- Route 5 - Diglett's Tunnel
- Route 9 - Memorial Hill
- Akala Outskirts - Olivia's Grand Trial
- Akala Outskirts - Aether Paradise
- Malie City - Malie Library
- Route 10 - Sophocles's Trial
- Malie Garden - Tapu Village
- Route 14 - Acerola's Trial
- Aether House - Route 17
- Route 17 - Team Skull's Hideout
- Aether House - Nanu's Grand Trial
- Aether Paradise Event
- Aether Paradise (Guzma Battle)
- Aether Paradise (Lusamine Battle)
- Seafolk Village - Ruins of Abundance
- Ruins of Abundance - Exeggutor Island
- Ancient Poni Path - Trial of Vast Poni Canyon
- Ultra Megalopolis - Seafolk Village
- Seafolk Village - Mina Battle
- Mina's Trial (Part 1)
- Mina's Trial (Part 2)
- Exeggutor Island - Grand Trial
- Mount Lanakila - Pokemon League
Opening - Lillie Event
Route 1
- After starting the game, leave your room and talk to Mom.
- Return to your room, check the hanger to get your hat and bag.
- Leave your house and proceed north along the path to the left of your house.
- An event occurs in front of the tall grass along the way.
- Receive your first Pokemon from Professor Kukui.
- Proceed northwest on the road. Battle Hau in front of Lili'i Town.
- After the battle, go to Lili'i Town.
| Pokemon | QR Code | Rarity |
|---|---|---|
 Alolan Rattata Alolan Rattata |  | - |
 Caterpie Caterpie |  | - |
Scan the QR Code and check its distribution to confirm the exact habitat.
Lili'i Town
- 1. Proceed straight to Mahalo Trail.
Mahalo Trail
- Talk to Lillie in front of the suspension bridge.
- Battle Spearow on the bridge.
- An event occurs after the battle.
- Receive a Sparkling Stone from Lillie.
- Return to Lili'i Town.
Lili'i Town - Hau Battle
Lili'i Town
- Receive a Pokedex and Trainer Pass from Professor Kukui.
- After the event, you will be moved to your house.
Route 1
- Talk to Mom at home.
- Head to the east side of Route 1 with Professor Kukui.
- Professor Kukui teaches you how to catch Pokemon.
- Receive 10 Poke Balls and 5 Potions from Professor Kukui.
- Proceed northwest on the road towards Lili'i Town.
- After hearing a conversation between two mysterious people in front of Lili'i Town, go to Lili'i Town.
| Pokemon Name | QR Code | Encounter Rate |
|---|---|---|
 Pikipek Pikipek |  | High |
 Grubbin Grubbin |  | Medium |
 Buneary Buneary |  | Medium |
 Caterpie Caterpie |  | Medium |
 Pichu Pichu |  | Low |
 Pikachu Pikachu |  | Pichu SOS Call |
 Happiny Happiny |  | Pichu SOS Call |
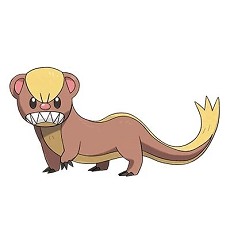 Yungoos Yungoos |  | [Day] High |
 Ledyba Ledyba |  | [Day] High |
 Alolan Rattata Alolan Rattata |  | [Night] High |
 Spinarak Spinarak |  | [Night] High |
Scan the QR Code and check its distribution to confirm the exact habitat.
Lili'i Town
- After talking to Hala and Hau, Hala will heal your Pokemon, and you'll battle Hau.
- After the battle, receive a Z-Ring from Hala.
- After the event, you will be moved to your house.
Hau's Pokemon
※ Text in red indicates a 4x weakness.| Pokemon Name | Type/Lv | Weaknesses |
|---|---|---|
 Popplio Popplio(When you chose Rowlet) | Water Lv.7 | Grass Electric |
 Rowlet Rowlet(When you chose Litten) | Grass/Flying Lv.7 | Ice Fire Poison Flying Rock |
 Litten Litten(When you chose Popplio) | Fire Lv.7 | Water Ground Rock |
 Pichu Pichu | Type Lv.6 | Ground |
Hau Battle - Big Wave Beach
Route 1
- After talking to Mom and Lillie, receive allowance from Mom.
- Follow Lillie and head to the Pokemon Research Lab on the south coast of the road.
- At the lab, Professor Kukui will upgrade your Pokedex to a Rotom Dex.
- After the event, go in front of the Pokemon Center to the left of your house.
- After talking to Lillie, she will show you around the Pokemon Center and Trainers' School.
| Pokemon Name | QR Code | Encounter Rate |
|---|---|---|
 Wingull Wingull |  | High |
 Inkay Inkay |  | High |
 Slowpoke Slowpoke |  | Medium |
Scan the QR Code and check its distribution to confirm the exact habitat.
Trainers' School
- Receive an Exp. Share from Professor Kukui at the Trainers' School.
- Battle and defeat the 4 Trainers inside the Trainers' School.
- Lillie will heal your Pokemon, then go to the 2nd floor of the school building.
- Battle the teacher next to the stairs. After the battle, receive 5 Great Balls.
- Talk to Captain Ilima. After the event, pet the Tauros that was blocking Route 1.
- Proceed along the path to Hau'oli City.
Locations of the 4 Trainers
- 1. 1st Trainer: Inside the west fence outside the Trainers' School.
- 2. 2nd Trainer: East of the Trainers' School, outside.
- 3. 3rd Trainer: To the right of the stairs inside the Trainers' School.
- 4. 4th Trainer: After battling the above 3, on the battle court in front of the Trainers' School.
Teacher (Emily) 's Pokemon
※ Text in red indicates a 4x weakness.| Pokemon Name | Type/Lv | Weaknesses |
|---|---|---|
 Popplio Popplio(When you chose Litten) | Water Lv.7 | Grass Electric |
 Rowlet Rowlet(When you chose Popplio) | Grass/Flying Lv.7 | Ice Fire Poison Flying Rock |
 Litten Litten(When you chose Rowlet) | Fire Lv.7 | Water Ground Rock |
| Pokemon Name | QR Code | Encounter Rate |
|---|---|---|
 Meowth Meowth |  | High |
 Zorua Zorua |  | Medium |
 Alolan Grimer Alolan Grimer |  | Low |
 Magnemite Magnemite |  | Low |
Scan the QR Code and check its distribution to confirm the exact habitat.
Hau'oli City
- Talk to the woman at the city entrance.
- Talk to Hau further down the road.
- Receive a Poke Finder from the woman at the Tourist Bureau reception.
- An event occurs after leaving the bureau. Take a photo with the Poke Finder.
- Receive a Lens Case from Lillie in front of the boutique, and if you're a female protagonist, a Makeup Bag.
- Hear an explanation about Totem Stickers from Ilima in front of the Pokemon Center.
- After talking to Hau in front of the Malasada Shop, battle a Team Skull Grunt.
- After the battle, Ilima will heal your Pokemon.
- Battle Captain Ilima.
- After the battle, talk to Lillie on the path to the left of the Pokemon Center.
- Receive 3 Revives from Lillie.
- Pet the Tauros and head to Route 2.
(Tall Grass)
| Pokemon Name | QR Code | Encounter Rate |
|---|---|---|
 Furfrou Furfrou |  | High |
 Abra Abra |  | High |
 Mime Jr. Mime Jr. |  | High |
 Mr. Mime Mr. Mime |  | Mime Jr. SOS Call |
 Happiny Happiny |  | Mime Jr. SOS Call |
 Alolan Grimer Alolan Grimer |  | Medium |
 Alolan Meowth Alolan Meowth |  | Medium |
 Magnemite Magnemite |  | Medium |
 Wingull Wingull |  | Low |
(Surfing)
| Pokemon Name | QR Code | Encounter Rate |
|---|---|---|
 Tentacool Tentacool |  | High |
 Finneon Finneon |  | Medium |
 Wingull Wingull |  | Medium |
 Mantyke Mantyke |  | Medium |
 Remoraid Remoraid |  | Mantyke SOS Call |
Scan the QR Code and check its distribution to confirm the exact habitat.
Obtainable Rare Items
| Item Name | Location |
|---|---|
| Silk Scarf | Talk to the old lady in front of the Boutique. |
| TM Echoed Voice | In the tall grass in front of Melemele Ferry Terminal. |
| PP Up | In front of Ilima's house. |
Route 2
- Enter the road and proceed straight north for an event.
- To the right after entering the road is Hau'oli Cemetery.
- After battling the Surfer, proceed north to Big Wave Beach.
| Pokemon Name | QR Code | Encounter Rate |
|---|---|---|
 Gastly Gastly |  | High |
 Zubat Zubat |  | Medium |
 Drifloon Drifloon |  | [Day] High |
 Murkrow Murkrow |  | [Night] High |
Scan the QR Code and check its distribution to confirm the exact habitat.
Big Wave Beach - Ilima's Trial
Big Wave Beach
- Receive an explanation about Mantine Surf from a woman.
- When you try to return the way you came, Team Skull will be there, so battle a Team Skull Grunt.
- After the battle, return to Route 2.
Route 2
- Proceed north on the road and talk to Hau in front of the Pokemon Center.
- Receive 3 Revives from Hau inside the Pokemon Center.
- Receive an explanation about Rotom Powers.
- Exit the Pokemon Center and proceed east, then talk to Ilima in front of the Verdant Cavern entrance.
- Enter Verdant Cavern for Ilima's trial.
Trivia
At the Pokemon Center in front of Verdant Cavern, you can trade a Spearow for a Hawlucha. Spearow can be obtained on Route 3, which is accessible after completing the trial.
Totem Pokemon and its Allies
| Pokemon Name | Type/Lv | Weaknesses |
|---|---|---|
 Yungoos Yungoos | Normal Lv.10 | Fighting |
 Smeargle Smeargle(When you chose Rowlet) | Normal Lv.11 | Fighting |
 Smeargle Smeargle(When you chose Litten) | Normal Lv.11 | Fighting |
 Smeargle Smeargle(When you chose Popplio) | Normal Lv.11 | Fighting |
| Pokemon Name | QR Code | Encounter Rate |
|---|---|---|
 Ekans Ekans |  | High |
 Alolan Meowth Alolan Meowth |  | Medium |
 Furfrou Furfrou |  | Medium |
 Abra Abra |  | Medium |
 Cutiefly Cutiefly |  | Medium |
 Growlithe Growlithe |  | Medium |
 Smeargle Smeargle |  | Medium |
 Spearow Spearow |  | Medium |
 Dunsparce Dunsparce |  | Medium |
 Yungoos Yungoos |  | [Day] Medium |
 Alolan Rattata Alolan Rattata |  | [Night] Medium |
 Makuhita Makuhita |  | [Day] Medium [Night] High |
 Drowzee Drowzee |  | [Day] Medium [Night] High |
Scan the QR Code and check its distribution to confirm the exact habitat.
Verdant Cavern
- Hear the trial explanation from Ilima, then find and defeat 2 hidden Pokemon.
- An event occurs while searching for the 3rd Pokemon. Battle a Team Skull Grunt.
- After the battle, cooperate with Team Skull to find and defeat the 3rd Pokemon.
- Talk to the Trial Guide in the back of the cave and proceed to the Totem's Den.
- Examine the Z-Crystal on the pedestal in the back to battle the Totem Pokemon Gumshoos (US version) / Alolan Raticate (UM version).
- After the battle, obtain the Z-Crystal "Normalium Z".
- Receive 10 Great Balls from Ilima and have your Pokemon healed.
- An event occurs when you exit the Totem's Den and return to the trial area.
- Talk to the Ultra Recon Squad.
- Return to the cave entrance and exit the cave to Route 2.
| Pokemon Name | QR Code | Encounter Rate |
|---|---|---|
 Zubat Zubat |  | Medium |
 Alolan Diglett Alolan Diglett |  | Medium |
 Noibat Noibat |  | Medium |
 Yungoos Yungoos |  | [Sun] High |
 Alolan Rattata Alolan Rattata |  | [Moon] High |
After Ilima's Trial - Seaward Cave
Route 2
- Talk to Ilima in front of the Verdant Cavern entrance.
- Receive an explanation about Z-Moves from Professor Kukui.
- Pass through the opened Captain's Gate to Route 3.
Route 3
- Proceed along the road and go to Melemele Meadow along the way.
| Pokemon Name | QR Code | Encounter Rate |
|---|---|---|
 Spearow Spearow |  | Medium |
 Vullaby Vullaby |  | Medium |
 Rufflet Rufflet |  | Medium |
 Cutiefly Cutiefly |  | Medium |
 Mankey Mankey |  | Medium |
 Hawlucha Hawlucha |  | Low |
 Bagon Bagon |  | Very Low |
 Salamence Salamence |  | Bagon SOS Call |
 Crabrawler Crabrawler |  | [Berry Pile] High |
Melemele Meadow
- Talk to Lillie upon entering the meadow.
- Follow Cosmog through the hole in the wall to Seaward Cave.
| Pokemon Name | QR Code | Encounter Rate |
|---|---|---|
 Flabebe Flabebe |  | Medium |
 Cutiefly Cutiefly |  | Medium |
 Oricorio (Pom-Pom Style) Oricorio (Pom-Pom Style) |  | Medium |
 Cottonee Cottonee |  | [Sun] Medium |
 Petilil Petilil |  | [Moon] Medium |
 Caterpie Caterpie |  | Low |
 Metapod Metapod |  | Low |
 Butterfree Butterfree |  | Very Low |
Locations of TMs and Rare Items
| Item Name | Location |
|---|---|
| Sharp Beak | On the narrow path to the left when viewed from Melemele Meadow. |
| Soothe Bell | In the tall grass to the left before crossing the bridge from Melemele Meadow. |
| TM33 Infestation | In the tall grass to the left before crossing the bridge from Melemele Meadow. Requires Tauros Charge. |
Seaward Cave - Hala's Grand Trial
Seaward Cave
- An event occurs shortly after entering the cave. Battle Dulse (US version) / Zossie (UM version) of the Ultra Recon Squad.
- After the event finishes, return to Lillie.
Dulse/Zossie's Pokemon
| Pokemon Name | Type/Lv | Weaknesses |
|---|---|---|
 Furfrou Furfrou | Normal Lv.13 | Fighting |
| Pokemon Name | QR Code | Encounter Rate |
|---|---|---|
 Psyduck Psyduck |  | Medium |
 Smoochum Smoochum |  | Medium |
 Delibird Delibird |  | Medium |
 Zubat Zubat |  | Medium |
 Jynx Jynx |  | Smoochum SOS Call |
 Happiny Happiny |  | Smoochum SOS Call |
Melemele Meadow
- After talking to Lillie, she will heal your Pokemon, then return to Route 3.
Route 3
- Battle Hau after exiting the meadow.
- After the battle, proceed south along the road to the north side of Route 1.
- Go through Route 1 to Lili'i Town.
Hau's Pokemon
※ Text in red indicates a 4x weakness.| Pokemon Name | Type/Lv | Weaknesses |
|---|---|---|
 Popplio Popplio | Water Lv.13 | Electric Grass |
 Rowlet Rowlet | Grass/Flying Lv.13 | Ice Fire Poison Flying Rock |
 Litten Litten | Fire Lv.13 | Water Ground Rock |
 Noibat Noibat | Flying/Dragon Lv.11 | Ice Rock Dragon Fairy |
 Pikachu Pikachu | Electric Lv.12 | Ground |
Lili'i Town
- Talk to Hala, who is standing on the road in front of the plaza.
- A Grand Trial battle against Island Kahuna Hala will begin in the plaza.
- After the battle, receive the Z-Crystal "Fightinium Z" and a Ride Pager from Hala.
- Tauros will be registered to your Ride Pager.
- Receive TM54 "False Swipe" from Professor Kukui and go to Route 1.
Hala's Team
| Pokemon | Level | Item |
|---|---|---|
| Machop | Lv15 | |
| Makuhita | Lv15 | |
| Crabrawler | Lv16 | Fightinium Z |
Route 1 - Big Wave Beach
Route 1
- Break the rocks blocking the path with Tauros Charge and proceed.
- Talk to Mom at home.
- Head to Ten Carat Hill, west of the lab.
Ten Carat Hill
- Obtain the Z-Crystal Flyinium Z from the pedestal in Ten Carat Hill.
- Learn the Z-Move pose from a mysterious woman (Kahili).
- Go outside and head straight to Hau'oli City.
Inside Cave
| Pokemon Name | QR Code | Encounter Rate |
|---|---|---|
 Mawile Mawile |  | Medium |
 Carbink Carbink |  | Medium |
 Roggenrola Roggenrola |  | Medium |
 Zubat Zubat |  | Medium |
 Psyduck Psyduck |  | Low |
 Sableye Sableye |  | Carbink SOS Call |
Outside Cave
| Pokemon Name | QR Code | Encounter Rate |
|---|---|---|
 Spinda Spinda |  | Medium |
 Machop Machop |  | Medium |
 Rockruff Rockruff |  | Medium |
 Carbink Carbink |  | Low |
 Roggenrola Roggenrola |  | Low |
Rare Items
| Item | Location |
|---|---|
| Flyinium Z | Deepest cave exit |
| Hard Stone | First cave exit |
Hau'oli City
- Go to the Alola Photo Club south of Hau'oli City.
- Receive an explanation about the Alola Photo Club.
- Exit the Alola Photo Club.
- Talk to Hau.
- Head to Big Wave Beach on Route 2.
Big Wave Beach
- Talk to Samson Oak on the way to Big Wave Beach.
- Go to Big Wave Beach.
- Use Mantine Surf to go to Kantai Beach on Akala Island.
Kantoi Beach - Ohana Town
Kantoi Beach
- After talking to Hau, go to Heahea City.
Heahea City
- Meet Professor Kukui and others at the pier.
- Talk to Island Queen Olivia and Captain Mallow.
- Proceed east from the pier along the road.
- Talk to Lillie in front of the boutique.
- Talk to Dexio and Sina near the fountain in front of Hotel Shiosai.
- Battle Dexio (US version) / Sina (UM version).
- After the battle, your Pokemon will be healed, and you'll receive a Full Restore.
- Take the side road before the fountain to Route 4.
Dexio's (US) Pokemon
| Pokemon Name | Type/Lv | Weaknesses |
|---|---|---|
 Mime Jr. Mime Jr. | Psychic/Fairy Lv.15 | Poison Ghost Steel |
 Espeon Espeon | Psychic Lv.15 | Bug Ghost Dark |
Sina's (UM) Pokemon
| Pokemon Name | Type/Lv | Weaknesses |
|---|---|---|
 Smoochum Smoochum | Ice/Psychic Lv.15 | Fire Bug Rock Ghost Dark Steel |
 Glaceon Glaceon | Ice Lv.15 | Fire Fighting Rock Steel |
Route 4
- Proceed east on the road to Ohana Town.
| Pokemon Name | QR Code | Encounter Rate |
|---|---|---|
 Mudbray Mudbray |  | Medium |
 Lillipup Lillipup |  | Medium |
 Pikipek Pikipek |  | Medium |
 Grubbin Grubbin |  | Low |
 Alolan Rattata Alolan Rattata |  | [Night] Low |
 Yungoos Yungoos |  | [Day] Low |
 Eevee Eevee |  | Low |
 Espeon Espeon |  | [Day] Eevee SOS Call |
 Umbreon Umbreon |  | [Night] Eevee SOS Call |
 Igglybuff Igglybuff |  | [Day] Medium |
 Happiny Happiny |  | [Day] Igglybuff SOS Call |
 Jigglypuff Jigglypuff |  | [Day] Igglybuff SOS Call |
 Crabrawler Crabrawler |  | [Berry Pile] High |
Ohana Town
- An event occurs shortly after entering the town.
- Hau will heal your Pokemon.
- Battle Hau.
- After the battle, receive an X Attack from Hau.
- Head to Ohana Ranch from the town's north exit.
Hau's Pokemon
※ Text in red indicates a 4x weakness.| Pokemon Name | Type/Lv | Weaknesses |
|---|---|---|
 Brionne Brionne(When you chose Rowlet) | Water Lv.16 | Grass Electric |
 Dartrix Dartrix(When you chose Litten) | Grass/Flying Lv.16 | Ice Fire Poison Flying Rock |
 Torracat Torracat(When you chose Popplio) | Fire Lv.16 | Water Ground Rock |
 Pikachu Pikachu | Electric Lv.15 | Ground |
 Noibat Noibat | Flying/Dragon Lv.14 | Ice Rock Dragon Fairy |
 Eevee Eevee | Normal Lv.14 | Fighting |
Ohana Ranch - Lana's Trial
Ohana Ranch
- Talk to Mallow in the plaza.
- Stoutland will be registered to your Ride Pager.
- Go to Route 5 from the northeast exit of the road.
| Pokemon Name | QR Code | Encounter Rate |
|---|---|---|
 Mudbray Mudbray |  | High |
 Mareep Mareep |  | Medium |
 Lillipup Lillipup |  | Medium |
 Miltank Miltank |  | Low |
 Tauros Tauros |  | Low |
Route 5
- Battle Gladion a short way down the road.
- After the battle, receive 3 Revives from Hau.
- Proceed west on the road to Brooklet Hill.
Gladion's Pokemon
| Pokemon Name | Type/Lv | Weaknesses |
|---|---|---|
 Zorua Zorua | Dark Lv.17 | Fighting Bug Fairy |
 Type: Null Type: Null | Normal Lv.18 | Fighting |
 Zubat Zubat | Zubat Lv.17 | Electric Ice Psychic Rock |
| Pokemon Name | QR Code | Encounter Rate |
|---|---|---|
 Grubbin Grubbin |  | Medium |
 Fomantis Fomantis |  | Medium |
 Pikipek Pikipek |  | Medium |
 Lillipup Lillipup |  | Medium |
 Caterpie Caterpie |  | Low |
 Metapod Metapod |  | Low |
 Butterfree Butterfree |  | Very Low |
 Crabrawler Crabrawler |  | [Berry Pile] High |
Lana's Trial
- Talk to Captain Lana at the end of the pier of the first pond to start the trial.
- Lapras will be registered to your Ride Pager, follow Lana along the path.
- Summon Lapras at the second pond.
- Examine the two splashing spots to battle Wishiwashi and Dewpider respectively.
- After battling both, go up to the south bank of the pond and proceed along the path.
- Summon Lapras again at the third pond.
- Examine the two splashing spots to battle Wishiwashi and Dewpider respectively.
- After the battle, go up to the south bank, proceed along the path to the Totem's Den.
- Summon Lapras again at the pond in the Totem's Den.
- Examine the splashing spot on the water to battle the Totem Pokemon Araquanid.
- After the battle, receive the Z-Crystal "Waterium Z", a Fishing Rod, and 10 Dive Balls from Lana.
- Lana will take you to Route 5.
Totem Pokemon and its Allies
※ Text in red indicates a 4x weakness.| Pokemon Name | Type/Lv | Weaknesses |
|---|---|---|
 Araquanid Araquanid | Water/Bug Lv.20 | Electric Flying Rock |
 Dewpider Dewpider | Water/Bug Lv.18 | Electric Flying Rock |
 Masquerain Masquerain | Bug/Flying Lv.18 | Rock Fire Electric Ice Flying |
| Pokemon Name | QR Code | Encounter Rate |
|---|---|---|
 Poliwag Poliwag |  | High |
 Surskit Surskit |  | High |
 Dewpider Dewpider |  | High |
 Tentacool Tentacool |  | High |
 Finneon Finneon |  | High |
 Psyduck Psyduck |  | Medium |
 Wingull Wingull |  | Medium |
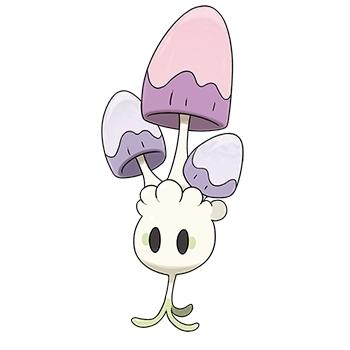 Morelull Morelull |  | Medium |
 Paras Paras |  | Medium |
TM Location
| Item | Location |
|---|---|
| TM57 Charge Beam | In the passage to the far right of the second pond. |
Route 5 - Royal Avenue
Route 5
- After talking to Lana, head to Ohana Ranch.
Ohana Ranch
- Show Waterium Z to the Sudowoodo blocking the southeast exit to pass.
- Battle Dulse (US version) / Zossie (UM version) of the Ultra Recon Squad.
- After the battle, proceed south to Route 6.
Dulse/Zossie's Pokemon
| Pokemon Name | Type/Lv | Weaknesses |
|---|---|---|
 Poipole Poipole | Poison Lv.20 | Ground Psychic |
Route 6
- An event occurs as you proceed south on the road.
- Talk to Hapu and battle a Team Skull Grunt.
- After the battle, proceed east on the road to Royal Avenue.
| Pokemon Name | QR Code | Encounter Rate |
|---|---|---|
 Mudbray Mudbray |  | Medium |
 Oricorio (Pa'u Style) Oricorio (Pa'u Style) |  | Medium |
 Lillipup Lillipup |  | Medium |
 Pikipek Pikipek |  | Medium |
 Grubbin Grubbin |  | Low |
 Alolan Rattata Alolan Rattata |  | [Night] Low |
 Yungoos Yungoos |  | [Day] Low |
 Eevee Eevee |  | Low |
 Espeon Espeon |  | [Day] Eevee SOS Call |
 Umbreon Umbreon |  | [Night] Eevee SOS Call |
 Igglybuff Igglybuff |  | [Day] Medium |
 Happiny Happiny |  | [Day] Igglybuff SOS Call |
 Jigglypuff Jigglypuff |  | [Day] Igglybuff SOS Call |
Royal Avenue
- Go to the Royal Dome in the north.
- Talk to The Royal Mask in front of the reception.
- Participate in a Battle Royal.
- After the battle, talk to Captain Kiawe.
- Exit Royal Avenue from the northeast to Route 7.
Hau's Pokemon
※ Text in red indicates a 4x weakness.| Pokemon Name | Type/Lv | Weaknesses |
|---|---|---|
 Brionne Brionne(When you chose Rowlet) | Water Lv.20 | Electric Grass |
 Dartrix Dartrix(When you chose Litten) | Grass/Flying Lv.20 | Ice Fire Poison Flying Rock |
 Torracat Torracat(When you chose Popplio) | Fire Lv.20 | Water Ground Rock |
The Royal Mask's Pokemon
| Pokemon Name | Type/Lv | Weaknesses |
|---|---|---|
 Rockruff Rockruff | Rock Lv20 | Water Grass Fighting Ground Steel |
Gladion's Pokemon
| Pokemon Name | Type/Lv | Weaknesses |
|---|---|---|
 Type: Null Type: Null | Normal Lv.20 | Fighting |
Route 7 - Kiawe's Trial
Route 7
- Take the left path at the fork.
- Head to Wela Volcano Park.
Water's Edge
| Pokemon Name | QR Code | Encounter Rate |
|---|---|---|
 Tentacool Tentacool |  | Medium |
 Finneon Finneon |  | Medium |
 Pyukumuku Pyukumuku |  | Medium |
 Wingull Wingull |  | Medium |
Ground
| Pokemon Name | QR Code | Encounter Rate |
|---|---|---|
 Alolan Diglett Alolan Diglett |  | Medium |
Fishing
| Pokemon Name | QR Code | Encounter Rate |
|---|---|---|
 Magikarp Magikarp |  | High |
 Gyarados Gyarados |  | Magikarp SOS Call |
 Wishiwashi Wishiwashi(Solo Form) |  | Medium |
 Staryu Staryu |  | Medium |
 Starmie Starmie |  | Staryu SOS Call |
Wela Volcano Park
- Proceed along the mountain path, pass through the cave to the summit entrance.
- Continue upwards to the Totem's Den.
| Pokemon Name | QR Code | Encounter Rate |
|---|---|---|
 Cubone Cubone |  | Medium |
 Fletchling Fletchling |  | Medium |
 Fletchinder Fletchinder |  | Fletchling SOS Call |
 Salandit Salandit |  | Medium |
 Salazzle Salazzle |  | Salandit SOS Call |
 Magby Magby |  | Low |
 Happiny Happiny |  | Magby SOS Call |
 Magmar Magmar |  | Magby SOS Call |
 Kangaskhan Kangaskhan |  | Very Low |
Kiawe's Trial
- Talk to Kiawe at the summit to challenge the trial.
- Take on a quiz-style trial.
- Each correct answer leads to a battle with a Marowak and a Hiker.
- After answering the 3rd question correctly, battle the Totem Pokemon Salazzle (US version) / Marowak (UM version).
- After the battle, receive the Z-Crystal "Firium Z" and 10 Quick Balls from Kiawe.
- Charizard will be registered to your Ride Pager.
- Descend the mountain and return to Route 7.
Totem Pokemon and its Allies
※ Text in red indicates a 4x weakness.| Pokemon Name | Type/Lv | Weaknesses |
|---|---|---|
 Alolan Marowak Alolan Marowak | Ground Lv.22 | Water Ground Rock Ghost Dark |
 Salazzle Salazzle | Poison/Fire Lv.20 | Ground Water Psychic Rock |
Route 7 - Wela Volcano Park
Route 7
- Show Firium Z to the Trial Guide in front of the north gate to have it opened.
- Pass through the gate to Wela Volcano Park.
Wela Volcano Park
- Talk to the Ultra Recon Squad inside the tunnel.
- Exit the tunnel to Route 8.
| Pokemon Name | QR Code | Encounter Rate |
|---|---|---|
 Wimpod Wimpod |  | High |
 Kecleon Kecleon |  | High |
Route 8 - Mallow's Trial
Route 8
- An event occurs as you proceed along the road.
- Receive TM43 [Flame Charge] from Colress.
- Proceed west on the road and talk to Hau in front of the Pokemon Center.
- Warp to Festival Plaza and receive an explanation from Sophocles.
- Return to Route 8.
- From the Pokemon Center, proceed to the exit in front to reach the north side of Route 5.
- Enter Lush Jungle through the entrance there.
Tall Grass
| Pokemon Name | QR Code | Encounter Rate |
|---|---|---|
 Trumbeak Trumbeak |  | Medium |
 Alolan Rattata Alolan Rattata |  | Medium |
 Alolan Raticate Alolan Raticate |  | Alolan Rattata SOS Call |
 Yungoos Yungoos |  | Medium |
 Gumshoos Gumshoos |  | Yungoos SOS Call |
 Fletchling Fletchling |  | Small |
 Fletchinder Fletchinder |  | Fletchling SOS Call |
 Salandit Salandit |  | Small |
 Stufful Stufful |  | Small |
 Crabrawler Crabrawler |  | [Berry Pile] Large |
Water's Edge
| Pokemon Name | QR Code | Encounter Rate |
|---|---|---|
 Tentacool Tentacool |  | Large |
 Finneon Finneon |  | Medium |
 Wingull Wingull |  | Medium |
 Mantyke Mantyke |  | Medium |
 Remoraid Remoraid |  | Mantyke SOS Call |
Fishing
| Pokemon Name | QR Code | Encounter Rate |
|---|---|---|
 Magikarp Magikarp |  | Large |
 Gyarados Gyarados |  | Magikarp SOS Call |
 Chinchou Chinchou |  | Medium |
 Lanturn Lanturn |  | Chinchou SOS Call |
 Wishiwashi Wishiwashi(Solo Form) |  | Medium |
 Remoraid Remoraid |  | Low |
 Octillery Octillery |  | Remoraid SOS Call |
Lush Jungle
- Talk to Mallow right after entering.
- Receive a Forage Bag and challenge the trial.
Pokemon Fought to Gather Ingredients
| Pokemon Name | Type/Lv | Ingredient Obtained |
|---|---|---|
 Fomantis Fomantis | Grass Lv.17 | Mago Berry Honey |
 Comfey Comfey | Fairy Lv.21 | Honey |
 Sudowoodo Sudowoodo | Rock Lv.24 | Big Root |
Mallow's Trial
- Find the 3 ingredients specified by Mallow within the jungle.
- An event occurs when you return to the entrance after obtaining all ingredients.
- Battle Fomantis, Comfey, and Sudowoodo in succession (no event depending on where you picked up the ingredients).
- Battle the Totem Pokemon Lurantis.
- After the battle, receive the Z-Crystal "Grassium Z" and 10 Nest Balls from Mallow.
- Receive TM67 "Smart Strike" from Professor Kukui.
- Return to Route 5.
Totem Pokemon and its Allies
| Pokemon Name | Type/Lv | Weaknesses |
|---|---|---|
 Lurantis Lurantis | Grass Lv.24 | Fire Ice Poison Flying Bug] |
 Kecleon Kecleon | Normal Lv.22 | Fighting |
 Comfey Comfey | Fairy Lv.22 | Poison Steel |
Route 5 - Diglett's Tunnel
Route 5
- After talking to Professor Kukui, proceed south.
- Go through Ohana Ranch and Route 6 to Heahea City.
Heahea City
- Talk to Lillie in front of the Dimensional Research Lab.
- Enter the building and take the elevator to the 3rd floor.
- Hear about Ultra Wormholes from Professor Burnet.
- Talk to everyone inside the building.
- Talk to Professor Kukui.
- Take the elevator down to the 1st floor.
- An event occurs when you go outside.
- Proceed south on the road near Heahea City's Pokemon Center to Diglett's Tunnel.
Diglett's Tunnel
- Talk to Olivia right after entering.
- Proceed through the cave and talk to an Aether Foundation employee along the way.
- Near the south exit of the cave, team up with Hau for a Multi Battle against 2 Team Skull Grunts.
- After the battle, receive a PP Restore from Hau.
- Go to Route 9 from the cave's south exit.
| Pokemon Name | QR Code | Encounter Rate |
|---|---|---|
 Zubat Zubat |  | High |
 Golbat Golbat |  | Zubat SOS Call |
 Alolan Diglett Alolan Diglett |  | Medium |
 Larvitar Larvitar |  | Low |
Route 9 - Memorial Hill
Route 9
- Talk to Looker of the International Police in front of the police station.
- Receive a Thunder Stone from Looker.
- Proceed southwest on the road to Konikoni City.
Konikoni City
- Enter Olivia's shop near the center of the city.
- Receive and read Olivia's letter from Probopass.
- Receive a Max Potion from Probopass.
- Leave the city, go through Route 9, and proceed southeast to Memorial Hill.
Memorial Hill
- Proceed through the hedge maze to the east side of the road for an event.
- Battle a Team Skull Grunt.
- After the battle, proceed east to Akala Outskirts.
| Pokemon Name | QR Code | Encounter Rate |
|---|---|---|
 Gastly Gastly |  | High |
 Phantump Phantump |  | Medium |
 Zubat Zubat |  | Medium |
 Golbat Golbat |  | Zubat SOS Call |
Akala Outskirts - Olivia's Grand Trial
Akala Outskirts
- Battle Team Skull Admin Plumeria further down the road.
- After the battle, proceed north to the Ruins of Life.
Plumeria's Pokemon
※ Text in red indicates a 4x weakness.| Pokemon Name | Type/Lv | Weaknesses |
|---|---|---|
 Golbat Golbat | Poison/Flying Lv.26 | Electric Ice Psychic Rock |
 Salandit Salandit | Poison/Fire Lv.27 | Ground Water Psychic Rock |
Tall Grass
| Pokemon Name | QR Code | Encounter Rate |
|---|---|---|
 Wingull Wingull |  | [Day] Medium [Night] High |
 Natu Natu |  | [Day] Medium |
 Xatu Xatu |  | Natu SOS Call |
 Gumshoos Gumshoos |  | [Day] Medium |
 Alolan Raticate Alolan Raticate |  | [Night] Medium |
 Stufful Stufful |  | Low |
 Nosepass Nosepass |  | Low |
Fishing
| Pokemon Name | QR Code | Encounter Rate |
|---|---|---|
 Magikarp Magikarp |  | High |
 Gyarados Gyarados |  | Magikarp SOS Call |
 Chinchou Chinchou |  | Medium |
 Lanturn Lanturn |  | Chinchou SOS Call |
 Wishiwashi Wishiwashi(Solo Form) |  | Medium |
Olivia's Grand Trial
- Talk to Burnet.
- Lillie will heal your Pokemon.
- Battle Island Queen Olivia.
- After the battle, receive the Z-Crystal Rockium Z from Olivia.
- Exit the Ruins of Life and move to Akala Outskirts.
Olivia's Pokemon
| Pokemon Name | Type/Lv | Weaknesses |
|---|---|---|
 Anorith Anorith | Rock/Bug Lv.27 | Water Rock Steel |
 Lileep Lileep | Rock/Grass Lv.27 | Ice Fighting Bug Steel |
 Lycanroc Lycanroc(Midnight Form) | Rock Lv.28 | Water Grass Fighting Ground Steel |
Akala Outskirts - Aether Paradise
Akala Outskirts
- Use Charizard Glide to go to Heahea City.
Heahea City
- Proceed east on the road to Hano Grand Resort.
Hano Grand Resort
- Enter the building, an event occurs.
- Take a boat to Aether Paradise.
Water's Edge
| Pokemon Name | QR Code | Encounter Rate |
|---|---|---|
 Tentacool Tentacool |  | Medium [Rippling Water] 100% |
 Pyukumuku Pyukumuku |  | Medium |
 Finneon Finneon |  | Medium |
 Wingull Wingull |  | Low |
Dust Cloud
| Pokemon Name | QR Code | Encounter Rate |
|---|---|---|
 Staryu Staryu |  | High |
 Starmie Starmie |  | Staryu SOS Call |
 Sandygast Sandygast |  | Medium |
Aether Paradise
- Talk to Wicke of the Aether Foundation.
- Go to the north side of the conservation area and talk to President Lusamine.
- After the event, battle ?????.
- After the battle, hear from the Ultra Recon Squad.
- Go to Malie City on Ula'ula Island.
????? Details
※ Text in red indicates a 4x weakness.| Pokemon Name | Type/Lv | Weaknesses |
|---|---|---|
 ???? ???? | Rock/Poison Lv.27 | Ground Water Psychic Steel |
Malie City - Malie Library
Malie City
- Battle Hau upon arrival.
- After the battle with Hau, go to Malie Garden.
Hau's Pokemon
※ Text in red indicates a 4x weakness.| Pokemon Name | Type/Lv | Weaknesses |
|---|---|---|
 Brionne Brionne(When you chose Rowlet) | Water Lv.30 | Grass Electric |
 Flareon Flareon(When you chose Rowlet) | Fire Lv.28 | Water Ground Rock |
 Dartrix Dartrix(When you chose Litten) | Grass/Flying Lv.30 | Ice Fire Poison Flying Rock |
 Vaporeon Vaporeon(When you chose Litten) | Water Lv.28 | Grass Electric |
 Torracat Torracat(When you chose Popplio) | Fire Lv.30 | Water Ground Rock |
 Leafeon Leafeon(When you chose Popplio) | Grass Lv.28 | Fire Ice Poison Flying Bug |
 Noibat Noibat | Flying/Dragon Lv.28 | Ice Rock Dragon Fairy |
 Tauros Tauros | Normal Lv.28 | Fighting |
 Raichu Raichu | Electric Lv.29 | Ground |
Malie Garden
- Go counter-clockwise to the back to reach Professor Kukui.
- After the event ends, go south and exit Malie Garden.
- An event occurs upon exiting Malie Garden.
- Proceed north to Malie Library.
Tall Grass
| Pokemon Name | QR Code | Encounter Rate |
|---|---|---|
 Poliwhirl Poliwhirl |  | Medium |
 Ledian Ledian |  | [Day] Medium |
 Araquanid Araquanid |  | [Day] Medium |
 Masquerain Masquerain |  | [Night] Medium |
 Ariados Ariados |  | [Night] Medium |
 Alolan Meowth Alolan Meowth |  | Medium |
 Alolan Persian Alolan Persian |  | Alolan Meowth SOS Call |
 Petilil Petilil |  | [Sun] Low |
 Cottonee Cottonee |  | [Moon] Low |
 Psyduck Psyduck |  | Low |
 Castform Castform |  | When Raining |
 Politoed Politoed |  | [Night] When Raining |
 Poliwrath Poliwrath |  | [Day] When Raining |
Fishing
| Pokemon Name | QR Code | Encounter Rate |
|---|---|---|
 Gyarados Gyarados |  | Medium |
 Magikarp Magikarp |  | Medium |
 Goldeen Goldeen |  | Medium |
 Seaking Seaking |  | Goldeen SOS Call |
 Basculin Basculin |  | ※Medium |
※Color varies between Ultra Sun and Moon.
Malie Library
- An event occurs on the 2nd floor.
- After the event ends, go to Route 10.
Route 10 - Sophocles's Trial
Route 10
- Follow the path.
- Battle Team Skull Grunts in 2 consecutive battles.
- Take the bus to Hokulani Observatory.
Tall Grass
| Pokemon Name | QR Code | Encounter Rate |
|---|---|---|
 Alolan Raticate Alolan Raticate |  | Medium |
 Gumshoos Gumshoos |  | Medium |
 Fearow Fearow |  | Medium |
 Ariados Ariados |  | Medium |
 Ledian Ledian |  | Medium |
 Skarmory Skarmory |  | Low |
 Pancham Pancham |  | Low |
 Pangoro Pangoro |  | Pancham SOS Call |
Tree
| Pokemon Name | QR Code | Encounter Rate |
|---|---|---|
 Fearow Fearow |  | High |
 Pineco Pineco |  | Medium |
 Skarmory Skarmory |  | Medium |
Hokulani Observatory
- An event occurs as you approach Hokulani Observatory.
- Receive Steelium Z.
- Go to the back of Hokulani Observatory.
Tall Grass
| Pokemon Name | QR Code | Encounter Rate |
|---|---|---|
 Minior Minior |  | [Day] High [Night] Medium |
 Elgyem Elgyem |  | Medium |
 Beldum Beldum |  | Medium |
 Cleffa Cleffa |  | [Night] Medium |
 Clefairy Clefairy |  | [Night] Cleffa SOS Call |
 Happiny Happiny |  | [Day] Elekid SOS Call [Night] Cleffa SOS Call |
 Fearow Fearow |  | [Day] Medium [Night] Low |
 Skarmory Skarmory |  | Low |
 Elekid Elekid |  | Low |
 Electabuzz Electabuzz |  | Elekid SOS Call |
 Ditto Ditto |  | Low |
Hokulani Observatory
- An event occurs as you go further in.
- Exit Hokulani Observatory and listen to the explanation.
- Find 2 Charjabug in the tall grass in the plaza in front of the Pokemon Center.
- Find the last one behind the bus.
- Go to the very back of Hokulani Observatory.
- Sophocles's trial begins.
Sophocles's Trial
- Clear the first round and battle Elekid.
- Clear the second round and battle Electabuzz.
- Clear the third round and battle the Totem Pokemon Togedemaru.
- Listen to the Battle Agency tutorial.
- Head to Malie Garden.
Charjabug Puzzle Solution

| 1st Round | Top Left → Top Right |
|---|---|
| 2nd Round | Bottom Left → Bottom Right → Bottom Right |
| 3rd Round | Top Left → Top Left → Top Right → Top Right → Bottom Right → Bottom Right → Top Right → Top Right → Top Right → Bottom Right → Bottom Left → Bottom Right → Bottom Right → Bottom Right → Bottom Left |
Totem Pokemon and its Allies
※ Text in red indicates a 4x weakness.| Pokemon Name | Type/Lv | Weaknesses |
|---|---|---|
 Togedemaru Togedemaru | Electric/Steel Lv.33 | Ground Fire Fighting |
 Skarmory Skarmory | Steel/Flying Lv.32 | Fire Electric |
 Dedenne Dedenne | Electric/Fairy Lv.31 | Poison Ground |
Malie Garden - Tapu Village
Malie Garden
- An event occurs, and you battle Guzma.
- Afterwards, go south of Malie City.
| Pokemon Name | QR Code | Encounter Rate |
|---|---|---|
 Ledian Ledian |  | [Day] Low |
 Araquanid Araquanid |  | [Day] Low |
 Masquerain Masquerain |  | [Night] Low |
 Psyduck Psyduck |  | Low |
 Ariados Ariados |  | [Night] Low |
 Alolan Meowth Alolan Meowth |  | Low |
 Alolan Persian Alolan Persian |  | Alolan Meowth SOS Call |
 Petilil Petilil |  | [Moon] Low |
 Cottonee Cottonee |  | [Sun] Low |
 Poliwhirl Poliwhirl |  | Low |
 Politoed Politoed |  | [Weather SOS Call] Day |
 Castform Castform |  | [Weather SOS Call] |
 Poliwrath Poliwrath |  | [Weather SOS Call] Day |
Scan the QR Code and check its distribution to confirm the exact habitat.
| Pokemon Name | QR Code | Encounter Rate |
|---|---|---|
 Ledian Ledian |  | [Daytime] Low |
 Araquanid Araquanid |  | [Daytime] Low |
 Masquerain Masquerain |  | [Nighttime] Low |
 Psyduck Psyduck |  | Low |
 Ariados Ariados |  | [Nighttime] Low |
 Alolan Meowth Alolan Meowth |  | Low |
 Alolan Persian Alolan Persian |  | Alolan Meowth SOS Call |
 Petilil Petilil |  | [Moon] Low |
 Cottonee Cottonee |  | [Sun] Low |
 Poliwhirl Poliwhirl |  | Low |
 Politoed Politoed |  | [Weather SOS Call] Daytime |
 Castform Castform |  | [Weather SOS Call] |
 Poliwrath Poliwrath |  | [Weather SOS Call] Daytime |
Scan the QR code and check the distribution to confirm the exact habitat.
Route 12
- Event occurs, obtain "Mudsdale Ride".
- Follow the path to Route 13.
| Pokemon Name | QR Code | Encounter Rate |
|---|---|---|
 Mudbray Mudbray |  | Medium |
 Mudsdale Mudsdale |  | Mudbray SOS Call |
 Alolan Graveler Alolan Graveler |  | Medium |
 Torkoal Torkoal |  | Low |
 Houndoom Houndoom |  | [Sun] Low |
 Manectric Manectric |  | [Moon] Low |
Scan the QR code and check the distribution to confirm the exact habitat.
Route 13
- Upon arrival, go left to Tapu Village.
| Pokemon Name | QR Code | Encounter Rate |
|---|---|---|
 Magikarp Magikarp |  | High |
 Gyarados Gyarados |  | Magikarp SOS Call |
 Bruxish Bruxish |  | Medium [Fishing] Very Low |
 Wishiwashi (Solo Form) Wishiwashi (Solo Form) |  | Low [Fishing] Medium |
Scan the QR code and check the distribution to confirm the exact habitat.
Tapu Village
- Go left to Aether Paradise on Route 15.
| Pokemon Name | QR Code | Encounter Rate |
|---|---|---|
 Pelipper Pelipper |  | Medium |
 Snorunt Snorunt |  | Low |
 Absol Absol |  | Very Low |
 Gumshoos Gumshoos |  | [Daytime] Medium |
 Alolan Raticate Alolan Raticate |  | [Daytime] Medium |
 Alolan Vulpix Alolan Vulpix |  | [Sun] Very Low |
 Alolan Sandshrew Alolan Sandshrew |  | [Moon] Very Low |
 Vanillite Vanillite |  | Weather SOS Call |
 Castform Castform |  | Weather SOS Call |
Scan the QR code and check the distribution to confirm the exact habitat.
Aether Paradise
- Event at Aether House in the back.
- Talk to Acerola inside, then go out.
- Battle with Team Skull Grunt.
- Go to Route 14.
Tapu Village
- Go left to Aether Paradise on Route 15.
Route 14 - Acerola's Trial
Route 14
- Proceed along Route 14 to the Thrifty Megamart (Abandoned Site).
On Water
| Pokemon Name | QR Code | Encounter Rate |
|---|---|---|
 Tentacool Tentacool |  | Medium |
 Pelipper Pelipper |  | Medium |
 Finneon Finneon |  | Low |
Scan the QR code and check the distribution to confirm the exact habitat.
Fishing
| Pokemon Name | QR Code | Encounter Rate |
|---|---|---|
 Magikarp Magikarp |  | High |
 Gyarados Gyarados |  | Magikarp SOS Call |
 Bruxish Bruxish |  | Medium [Fishing] Very Low |
 Wishiwashi (Solo Form) Wishiwashi (Solo Form) |  | Low [Fishing] Medium |
Thrifty Megamart (Abandoned Site)
- Talk to Acerola in front of the Thrifty Megamart (Abandoned Site).
- Acerola's trial begins.
Acerola's Trial
- Take photos of Pokemon with Poke Finder & battle. (3 times)
- Proceed to the back and battle Totem Pokemon Mimikyu.
- After the trial, go to Aether House.
Totem Pokemon and Allies It Calls
| Pokemon Name | Type/Lv | Weakness |
|---|---|---|
 Mimikyu Mimikyu | Ghost/Fairy Lv.35 | Ghost Steel |
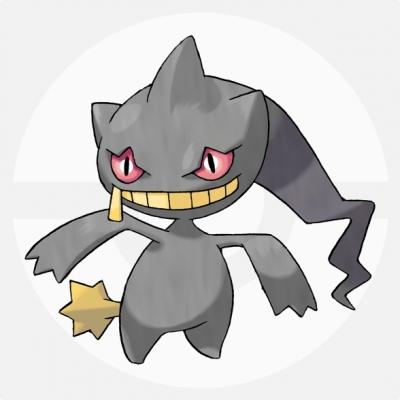 Banette Banette | Ghost Lv.32 | Ghost Dark |
 Jellicent Jellicent | Water/Ghost Lv.32 | Grass Electric Ghost Dark |
| Pokemon Name | QR Code | Encounter Rate |
|---|---|---|
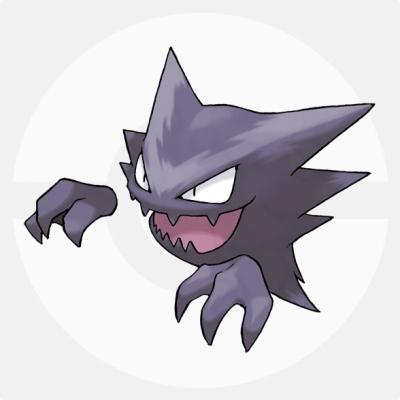 Haunter Haunter |  | Medium |
 Gengar Gengar |  | Haunter SOS Call |
 Shuppet Shuppet |  | Medium |
 Golbat Golbat |  | Low |
 Klefki Klefki |  | Low |
 Mimikyu Mimikyu |  | Very Low |
Aether House - Route 17
Aether House
- Battle with Plumeria after the event.
- After the battle, go to Route 15.
Route 15
- On the coast to the left of Route 15, talk to the person in a kimono.
- Sharpedo Ride becomes available.
- Use Sharpedo Ride to break rocks and proceed to Route 16.
Tall Grass
| Pokemon Name | QR Code | Encounter Rate |
|---|---|---|
 Pelipper Pelipper |  | High |
 Slowpoke Slowpoke |  | Low |
 Gumshoos Gumshoos |  | [Daytime] Medium |
 Alolan Raticate Alolan Raticate |  | [Nighttime] Medium |
On Water
| Pokemon Name | QR Code | Encounter Rate |
|---|---|---|
 Tentacruel Tentacruel |  | High |
 Finneon Finneon |  | High |
 Lumineon Lumineon |  | Finneon SOS Call |
 Pelipper Pelipper |  | Low |
Fishing
| Pokemon Name | QR Code | Encounter Rate |
|---|---|---|
 Magikarp Magikarp |  | High |
 Wishiwashi Wishiwashi(Solo Form) |  | High |
 Bruxish Bruxish |  | Very Low |
 Clamperl Clamperl |  | Very Low |
 Huntail Huntail |  | [Daytime] Clamperl SOS Call |
 Gorebyss Gorebyss |  | [Nighttime] Clamperl SOS Call |
 Gyarados Gyarados |  | Magikarp SOS Call |
Fishing (Bubbling Spot)
| Pokemon Name | QR Code | Encounter Rate |
|---|---|---|
 Bruxish Bruxish |  | Medium |
 Clamperl Clamperl |  | Medium |
 Magikarp Magikarp |  | Low |
 Wishiwashi Wishiwashi(Solo Form) |  | Very Low |
 Huntail Huntail |  | [Daytime] Clamperl SOS Call |
 Gorebyss Gorebyss |  | [Nighttime] Clamperl SOS Call |
 Gyarados Gyarados |  | Magikarp SOS Call |
Scan the QR code and check the distribution to confirm the exact habitat.
Route 16
- Pass through Ula'ula Meadow to Route 17.
Route 16
| Pokemon Name | QR Code | Encounter Rate |
|---|---|---|
 Pelipper Pelipper |  | Medium |
 Scraggy Scraggy |  | Medium |
 Slowpoke Slowpoke |  | Low |
 Alolan Raticate Alolan Raticate |  | [Nighttime] Low |
 Gumshoos Gumshoos |  | [Daytime] Low |
 Crabrawler Crabrawler |  | Berry pile |
Ula'ula Meadow
| Pokemon Name | QR Code | Encounter Rate |
|---|---|---|
 Oricorio (Baile Style) Oricorio (Baile Style) |  | Low |
 Ribombee Ribombee |  | Low |
 Floette Floette |  | Low |
 Ledian Ledian |  | [Daytime] Low |
 Ariados Ariados |  | [Nighttime] Low |
 Cottonee Cottonee |  | [Sun] Low |
 Petilil Petilil |  | [Moon] Low |
Route 17 - Team Skull's Hideout
Route 17
- Battle with Team Skull Grunt.
- After the battle, talk to Nanu and enter Po Town.
Tall Grass
| Pokemon Name | QR Code | Encounter Rate |
|---|---|---|
 Scraggy Scraggy |  | High |
 Alolan Raticate Alolan Raticate |  | [Nighttime] Low |
 Ledian Ledian |  | [Daytime] Low |
 Fearow Fearow |  | Low |
 Ariados Ariados |  | [Nighttime] Low |
 Gumshoos Gumshoos |  | [Daytime] Low |
 Castform Castform |  | Weather SOS Call |
 Goomy Goomy |  | Weather SOS Call |
Tall Grass (Rocky Area)
| Pokemon Name | QR Code | Encounter Rate |
|---|---|---|
 Alolan Raticate Alolan Raticate |  | [Nighttime] Low |
 Gumshoos Gumshoos |  | [Daytime] Low |
 Fearow Fearow |  | Low |
 Scraggy Scraggy |  | Low |
 Alolan Graveler Alolan Graveler |  | Low |
 Skarmory Skarmory |  | Low |
 Bisharp Bisharp |  | Very Low |
 Pawniard Pawniard |  | Bisharp SOS Call |
 Castform Castform |  | Weather SOS Call |
 Goomy Goomy |  | Weather SOS Call |
Po Town
- Enter through the hole on the left.
- Battle with Team Skull Grunts (2 consecutive battles).
- Proceed to the back of Po Town.
- Enter Team Skull's hideout.
Team Skull's Hideout
- Go to the 2nd floor and say the password to pass. (Password: Poison Jab -> Bounsweet -> Skitty Cocoa -> NO)
- Follow the path and battle Guzma.
- After the battle, check the treasure chest.
- An event occurs when you go outside.
- Fly to Tapu Village.
- Head to Aether House.
Guzma's Pokemon
*Red text indicates a 4x weakness.| Pokemon | Type Level | Weakness |
|---|---|---|
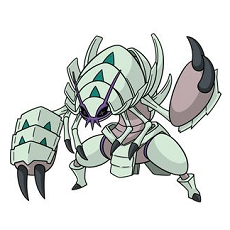 Golisopod Golisopod | Bug/Water Lv.41 | Electric Flying Rock |
 Masquerain Masquerain | Bug/Flying Lv.41 | Rock Fire Electric Ice Flying |
 Pinsir Pinsir | Bug Lv.41 | Fire Flying Rock |
Aether House - Nanu's Grand Trial
Aether House
- Battle with Gladion inside.
- After the battle, fly to the Ula'ula Island ferry terminal.
Gladion's Pokemon
| Pokemon | Type Level | Weakness |
|---|---|---|
 Golbat Golbat | Poison/Flying Lv.42 | Electric Ice Psychic Rock |
 Zoroark Zoroark | Dark Lv.42 | Fighting Bug Fairy |
 Type: Null Type: Null | Normal Lv.43 | Fighting |
Nanu's Grand Trial
- Battle Nanu.
- Go to Aether Paradise.
Nanu's Pokemon
| Pokemon | Type Level | Weakness |
|---|---|---|
 Sableye Sableye | Dark/Ghost Lv43 | Fairy |
 Krokorok Krokorok | Ground/Dark Lv43 | Water Grass Ice Fighting Bug Fairy |
 Alolan Persian Alolan Persian(Darkinium Z) | Dark Lv44 | Fighting Bug Fairy |
Aether Paradise Event
Aether Paradise (Part 1)
- After arriving, proceed through the passage at the B1F Docks.
- Take the elevator up to the 1F Entrance.
- Battle with Aether Branch Chief Faba.
- Answer "Yes" to Gladion's question.
- Go to the B2F Lab Area.
Faba's Pokemon
| Pokemon Level/Item | Moves | Weakness |
|---|---|---|
 Claydol ClaydolLv.44/- | Earth Power Grass Knot Ancient Power Extrasensory | Water Grass Ice Bug Ghost Dark |
 Bruxish BruxishLv.44/- | Crunch Psychic Fangs Aqua Jet Waterfall | Grass Electric Bug Ghost Dark |
 Hypno HypnoLv.44/- | Hypnosis Psychic Focus Blast Nightmare | Bug Ghost Dark |
Employee's Pokemon
*Red text indicates a 4x weakness.| Pokemon Level/Item | Moves | Weakness |
|---|---|---|
 Ledian LedianLv.42/- | Light Screen Bug Buzz Reflect Air Slash | Rock Fire Electric Ice Flying |
 Pupitar PupitarLv.42/- | Snarl | Water Grass Ice Fighting Ground Steel |
Aether Paradise (Part 2)
- Proceed through the door on the right.
- Battle with 3 Aether Foundation Employees.
- Proceed right down the passage, and go through the door at the end to Secret Lab B.
- Team up with Hau and battle 2 Aether Foundation Employees.
- Examine the PC on the right side of the room.
- Exit Secret Lab B, return to the elevator, and go up to the 1F Entrance.
Aether Paradise (Guzma Battle)
Guzma Battle
- At the 1F Entrance, team up with Hau and battle 2 Aether Foundation Employees.
- Follow Gladion and the others to the back.
- Team up with Gladion and battle 2 Aether Foundation Employees.
- Team up with Hau and battle Aether Branch Chief Faba & an Aether Foundation Employee.
- Proceed through the opened door and go outside the Aether Paradise building.
- Defeat 2 Team Skull Grunts and proceed to the back for an event.
- Battle with Team Skull Boss Guzma.
Guzma's Pokemon

| Pokemon Level/Item | Moves | Weakness |
|---|---|---|
 Golisopod GolisopodLv45/- | First Impression Sucker Punch Razor Shell | Electric Flying Rock |
 Vikavolt VikavoltLv45/- | Flash Cannon Thunderbolt Bug Buzz Energy Ball | Fire Rock |
 Pinsir PinsirLv45/- | Throat Chop Storm Throw X-Scissor Stone Edge | Fire Flying Rock |
 Masquerain MasquerainLv45/- | Air Slash Bug Buzz Icy Wind | Rock Fire Electric Ice Flying |
Aether Paradise (Lusamine Battle)
Lusamine Battle
- Enter Lusamine's house and battle Dulse (US version) / Zossie (UM version) of the Ultra Recon Squad.
- Proceed to the back of the room and battle Aether President Lusamine in the collection room.
- Return to the elevator and go down to the B1F Docks.
- Talk to Gladion on the left side of the docks.
- Go to Seafolk Village on Poni Island.
Lusamine's Pokemon

| Pokemon Level/Item | Moves | Weakness |
|---|---|---|
 Clefable ClefableLv47/- | Moonblast Charm Hyper Voice Psychic | Poison Steel |
 Lopunny LopunnyLv47/- | Dizzy Punch Thunder Punch Ice Punch Fire Punch | Fighting |
 Lilligant LilligantLv47/- | Stun Spore Teeter Dance Petal Dance | Fire Ice Poison Flying Bug |
 Bewear BewearLv47/- | Take Down Dual Chop Drain Punch Zen Headbutt | Fighting Flying Psychic Fairy |
 Milotic MiloticLv47/- | Hydro Pump Safeguard Flail Dragon Pulse | Grass Electric |
Seafolk Village - Ruins of Abundance
Seafolk Village
- Listen to Gladion and Lillie near the docks.
- Event occurs when you go near the center of the village.
- Talk to Captain Mina.
- Exit from the north side of the village to Poni Wilds.
Poni Wilds
- Event occurs when you enter Poni Wilds.
- Talk to Lillie.
- Proceed southeast to Ancient Poni Path.
| Pokemon Name | QR Code | Encounter Rate |
|---|---|---|
 Pelipper Pelipper |  | Medium |
 Furfrou Furfrou |  | Low |
 Granbull Granbull |  | Low |
 Inkay Inkay |  | Low |
 Gastrodon Gastrodon |  | Very Low |
 Crabrawler Crabrawler |  | Berry pile |
Ancient Poni Path
- Talk to Hapu.
- Register Machamp in your Ride Pager.
- Proceed east to Poni Breaker Coast.
| Pokemon Name | QR Code | Encounter Rate |
|---|---|---|
 Pelipper Pelipper |  | Medium |
 Furfrou Furfrou |  | Low |
 Granbull Granbull |  | Low |
 Inkay Inkay |  | Low |
 Gastrodon Gastrodon |  | Very Low |
 Crabrawler Crabrawler |  | Berry pile |
Poni Breaker Coast
- Proceed east to Ruins of Abundance.
On Water
*Red text indicates a 4x weakness.| Pokemon Name | QR Code | Encounter Rate |
|---|---|---|
 Wimpod Wimpod |  | Ground |
 Tentacruel Tentacruel |  | Medium |
 Lumineon Lumineon |  | Medium |
 Gastrodon Gastrodon |  | Low |
 Pelipper Pelipper |  | Low |
 Lapras Lapras |  | Very Low |
Water Spout
| Pokemon Name | QR Code | Encounter Rate |
|---|---|---|
 Wailmer Wailmer |  | High |
 Dragalge Dragalge |  | [Moon] Medium |
 Clawitzer Clawitzer |  | [Sun] Medium |
 Wailord Wailord |  | Low |
Fishing
| Pokemon Name | QR Code | Encounter Rate |
|---|---|---|
 Magikarp Magikarp |  | High |
 Gyarados Gyarados |  | Magikarp SOS Call |
 Wailmer Wailmer |  | High |
 Wailord Wailord |  | Wailmer SOS Call |
 Carvanha Carvanha |  | Low |
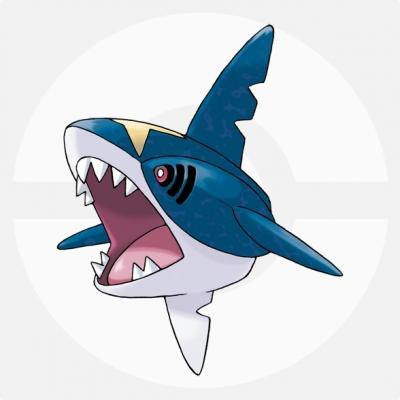 Sharpedo Sharpedo |  | Carvanha[brSOS Call |
 Relicanth Relicanth |  | Very Low |
Appearing Pokemon and encounter rates are almost the same for regular fishing and bubbling spots.
Ruins of Abundance - Exeggutor Island
Ruins of Abundance
- Go down the spiral slope and talk to Lillie in front of the ruins entrance.
- Enter the ruins, use Machamp from the Ride Pager to move the large rock, and proceed to the back room.
- After the event, exit the ruins and return to Seafolk Village.
Seafolk Village
- After listening to Lillie and the others, go to Mina's place.
- Have the Seafolk chief take you to Exeggutor Island.
Exeggutor Island
- Investigate the 3 rampaging Exeggutor and defeat the Pinsir that were on them.
- Talk to the Exeggutor that moved to the back of the island to get lifted onto the cliff.
- Examine the pedestal to obtain the Sun Flute (US version) or Moon Flute (UM version).
- Return to Seafolk Village.
- Go to Ancient Poni Path again.
| Pokemon Name | QR Code | Encounter Rate |
|---|---|---|
 Tropius Tropius |  | Low |
 Exeggcute Exeggcute |  | Low |
 Alolan Exeggutor Alolan Exeggutor |  | Low |
 Pelipper Pelipper |  | Low |
 Gastrodon Gastrodon |  | Very Low |
 Pinsir Pinsir |  | Very Low |
 Castform Castform |  | Weather SOS Call |
 Sliggoo Sliggoo |  | Weather SOS Call |
Ancient Poni Path - Trial of Vast Poni Canyon
Ancient Poni Path
- Proceed north at the fork in the ancient path and battle a Team Skull Grunt.
- Follow the path to Vast Poni Canyon.
Vast Poni Canyon
- Talk to Hapu in front of the cave entrance.
- Battle Dulse (US version) / Zossie (UM version) of the Ultra Recon Squad.
- Enter the cave and proceed.
- Event on the suspension bridge.
- Once you reach the bottom of the canyon, defeat 3 trainers while heading north.
- After defeating the trainers, proceed a little further for an event.
- Enter the cave from the entrance at the bottom of the valley and take on the trial.
| Pokemon Name | QR Code | Encounter Rate |
|---|---|---|
 Machoke Machoke |  | Low |
 Mienfoo Mienfoo |  | Low |
 Carbink Carbink |  | Low |
 Boldore Boldore |  | Low |
 Skarmory Skarmory |  | Low |
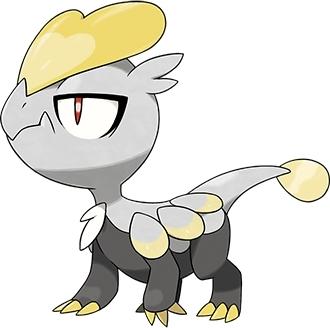 Jangmo-o Jangmo-o |  | Very Low |
 Hakamo-o Hakamo-o |  | Jangmo-o SOS Call |
 Kommo-o Kommo-o |  | Jangmo-o SOS Call |
Fishing
| Pokemon Name | QR Code | Encounter Rate |
|---|---|---|
 Golduck Golduck |  | [On Water] Low |
 Golbat Golbat |  | [On Water] High |
 Magikarp Magikarp |  | High |
 Basculin Basculin |  | [Sun] (Red-Striped) [Moon] (Blue-Striped) Low |
 Barboach Barboach |  | Low |
 Corphish Corphish |  | Very Low [Bubbling Spot] High |
 Whiscash Whiscash |  | Barboach SOS Call |
 Gyarados Gyarados |  | Magikarp SOS Call |
 Crawdaunt Crawdaunt |  | Corphish SOS Call |
Cave
| Pokemon Name | QR Code | Encounter Rate |
|---|---|---|
 Golbat Golbat |  | High |
 Boldore Boldore |  | High |
 Alolan Dugtrio Alolan Dugtrio |  | Low [Ground Encounter] Guaranteed |
 Carbink Carbink |  | Low |
 Sableye Sableye |  | Carbink SOS Call |
Trial of Vast Poni Canyon
- Proceed to the back of the cave, defeating the Jangmo-o and Hakamo-o that appear.
- Examine the Z-Crystal on the pedestal at the back.
- Battle Totem Pokemon Kommo-o.
- Proceed to the back to reach the Altar of the Sunne (US version) / Altar of the Moone (UM version).
Totem Pokemon and Allies It Calls
*Red text indicates a 4x weakness.| Pokemon Level/Item | Moves | Weakness |
|---|---|---|
 Kommo-o Kommo-oLv.49/- | Dragon Claw Drain Punch Thunder Punch Poison Jab | Fairy Ice Flying Psychic Dragon |
 Noivern NoivernLv.48/- | Screech Air Slash Dragon Pulse Boomburst | Ice Rock Dragon Fairy |
 Scizor ScizorLv.46/- | Light Screen Pursuit X-Scissor Bullet Punch | Fire |
Ultra Megalopolis - Seafolk Village
Altar of the Sunne / Altar of the Moone
- Have Lillie heal your Pokemon.
- Climb the stairs to the altar, stand on the opposite side of the altar from Lillie, and play the flute.
- After the event, battle Necrozma (Dusk Mane) (US version) / Necrozma (Dawn Wings) (UM version).
- After the battle, listen to the Ultra Recon Squad.
- Use Ultra Warp Ride and enter the white warp hole.
- Arrive at Ultra Megalopolis.
Ultra Megalopolis

- After talking with the Ultra Recon Squad, go to the top floor of Megalo Tower.
- Battle Ultra Necrozma at the top floor. (Lv60)
- After the battle, receive Poipole from Zossie (US version) / Dulse (UM version).(*)Return to the Altar of the Sunne / Altar of the Moone.
(*)If you want to soft-reset for stats/nature, it's recommended to receive it later.
Altar of the Sunne / Altar of the Moone
- Listen to the Ultra Recon Squad.
- Receive 3 Beast Balls from Lusamine.
- Talk to Mina and travel to Seafolk Village.
Seafolk Village - Mina Battle
Seafolk Village
- Start the trial at Mina's house.
- Battle Captain Mina.
- After the battle, receive the Pink Petal from Mina.
- Go to Hau'oli Cemetery.
Mina's Pokemon

*Red text indicates a 4x weakness.
| Pokemon Level/Item | Moves | Weakness |
|---|---|---|
 Mawile MawileLv51/- | Iron Head Play Rough Sucker Punch | Fire Ground |
 Granbull GranbullLv51/- | Stone Edge Play Rough Earthquake | Poison Steel |
 Ribombee RibombeeLv51/Fairium Z | Pollen Puff Dazzling Gleam Psychic | Fire Poison Flying Rock Steel |
Mina's Trial (Part 1)
Hau'oli Cemetery
- Go to Ilima in the cemetery.
- Battle Captain Ilima.
- After the battle, receive the Orange Petal from Ilima.
- Have Ilima take you to Lush Jungle.
Ilima's Pokemon (Mina's Trial)

*Red text indicates a 4x weakness.
| Pokemon Level/Item | Moves | Weakness |
|---|---|---|
 Gumshoos GumshoosLv51/- | Crunch Hyper Fang Super Fang | Fighting |
 Smeargle SmeargleLv51/- | Extreme Speed Flamethrower Surf Energy Ball | Fighting |
 Komala KomalaLv51/Normalium Z | Sucker Punch Wood Hammer Slam | Fighting |
Lush Jungle
- Follow Mallow to the back of the jungle.
- Battle Captain Mallow (US version) / Captain Lana (UM version) in the north area.
- After the battle, receive the Green Petal from Mallow and the Blue Petal from Lana.
- Have Mallow and Lana take you to Wela Volcano Park.
Lana's Pokemon (Mina's Trial)
*Red text indicates a 4x weakness.
| Pokemon Level/Item | Moves | Weakness |
|---|---|---|
 Lanturn LanturnLv51/- | Discharge Hydro Pump Thunder Wave | Grass Ground |
 Cloyster CloysterLv51/- | Spike Cannon Icicle Crash Spikes | Grass Electric Fighting Rock |
 Araquanid AraquanidLv51/Waterium Z | Liquidation Leech Life Crunch | Electric Flying Rock |
Mallow's Pokemon (Mina's Trial)

*Red text indicates a 4x weakness.
| Pokemon Level/Item | Moves | Weakness |
|---|---|---|
 Trevenant TrevenantLv51/- | Horn Leech Shadow Claw Leech Seed | Fire Ice Flying Ghost Dark |
 Shiinotic ShiinoticLv51/- | Moonblast Giga Drain Spore | Poison Fire Ice Flying Steel |
 Tsareena TsareenaLv51/Grassium Z | Trop Kick Low Sweep U-turn | Fire Ice Poison Flying Bug |
Wela Volcano Park
- Talk to the Hiker at the summit.
- Battle Captain Kiawe and Hiker David.
- After the battle, receive the Red Petal from Kiawe.
- Have Kiawe take you to Hokulani Observatory.
Kiawe's Pokemon (Mina's Trial)

*Red text indicates a 4x weakness.
| Pokemon Level/Item | Moves | Weakness |
|---|---|---|
 Arcanine ArcanineLv51/- | Crunch Flare Blitz Extreme Speed | Ground Water Rock |
 Talonflame TalonflameLv51/- | Quick Attack Flame Charge Brave Bird | Rock Water Electric |
 Alolan Marowak Alolan MarowakLv51/Firium Z | Flame Wheel Shadow Bone Bonemerang | Water Ground Rock Ghost Dark |
Mina's Trial (Part 2)
Hokulani Observatory
[US Version]- Go to the back room of the observatory and battle Captain Sophocles.
- After the battle, receive the Yellow Petal from Sophocles.
- Have Sophocles take you to the Aether House on Route 15.
- Receive the Yellow Petal from Sophocles.
- Have Sophocles take you to the Aether House on Route 15.
Sophocles' Pokemon (Mina's Trial)

*Red text indicates a 4x weakness.
| Pokemon Level/Item | Moves | Weakness |
|---|---|---|
 Togedemaru TogedemaruLv51/- | Fell Stinger Zing Zap Spiky Shield | Ground Fighting Fire |
 Magnezone MagnezoneLv51/- | Flash Cannon Discharge Tri Attack | Ground Fighting Fire |
 Alolan Golem Alolan GolemLv51/Electrium Z | Stone Edge Steamroller Thunder Punch | Ground Fighting Water Grass |
Route 15
[US Version]- An event occurs in front of Aether House.
- Receive the Purple Petal from Nanu at Aether House.
- Return to Seafolk Village.
- An event occurs in front of Aether House.
- Battle Nanu.
- After the battle, receive the Purple Petal from Nanu.
- Return to Seafolk Village.
Nanu's Pokemon (Mina's Trial)

*Red text indicates a 4x weakness.
| Pokemon Level/Item | Moves | Weakness |
|---|---|---|
 Sableye SableyeLv52/- | Power Gem Dark Pulse Shadow Ball | Fairy |
 Absol AbsolLv52/- | Night Slash Psycho Cut Sucker Punch | Fighting Bug Fairy |
 Alolan Persian Alolan PersianLv53/Darkinium Z | Power Gem Fake Out Dark Pulse | Fighting Bug Fairy |
Seafolk Village
- Go to Mina's house, give her the collected petals to make the Rainbow Flower.
- Battle Totem Pokemon Ribombee.
- After the battle, receive the Z-Crystal "Fairium Z" from Mina.
- An event occurs when you leave Mina's house.
- After talking with Hapu and Hala, go to Exeggutor Island on the Seafolk chief's boat.
Exeggutor Island - Grand Trial
Exeggutor Island
- Go to the high ground on the north side of the island.
- Battle Island Kahuna Hapu.
- After returning to Seafolk Village, go to Tapu Village.
- Go to Mount Lanakila from the north exit of the village.
Hapu's Pokemon

*Red text indicates a 4x weakness.
| Pokemon Level/Item | Moves | Weakness |
|---|---|---|
 Golurk GolurkLv53/- | Hammer Arm Earthquake Shadow Punch Stealth Rock | Water Grass Ice Ghost Dark |
 Flygon FlygonLv53/- | Earth Power Dragon Breath | Ice Dragon Fairy |
 Mudsdale MudsdaleLv54/Groundium Z | Heavy Slam Earthquake Double Kick Counter | Water Grass Ice |
 Gastrodon GastrodonLv53/- | Muddy Water Mud Bomb Recover | Grass |
Mount Lanakila - Pokemon League
Mount Lanakila
- Battle Gladion right after entering.
- Proceed through the mountain paths and caves of Mount Lanakila.
- Necrozma is along the way; talk to it to battle and catch it (can be ignored).
- Talk to Professor Kukui at the summit of Mount Lanakila, then go to the Pokemon League.
Tall Grass before the elevator
| Pokemon Name | QR Code | Encounter Rate |
|---|---|---|
 Absol Absol |  | Medium |
 Alolan Vulpix Alolan Vulpix |  | [Sun] Medium |
 Alolan Sandshrew Alolan Sandshrew |  | [Moon] Medium |
 Snorunt Snorunt |  | Medium |
 Gumshoos Gumshoos |  | [Daytime] Medium |
 Alolan Raticate Alolan Raticate |  | [Nighttime] Medium |
 Vanillite Vanillite |  | Weather SOS Call |
 Castform Castform |  | Weather SOS Call |
Tall Grass
| Pokemon Name | QR Code | Encounter Rate |
|---|---|---|
 Absol Absol |  | Medium |
 Alolan Vulpix Alolan Vulpix |  | [Sun] Medium |
 Alolan Sandshrew Alolan Sandshrew |  | [Moon] Medium |
 Glalie Glalie |  | Medium |
 Sneasel Sneasel |  | Low |
 Vanillish Vanillish |  | Weather SOS Call |
 Vanilluxe Vanilluxe |  | Weather SOS Call |
 Castform Castform |  | Weather SOS Call |
Cave
| Pokemon Name | QR Code | Encounter Rate |
|---|---|---|
 Golbat Golbat |  | Medium |
 Glalie Glalie |  | Medium |
 Sneasel Sneasel |  | Medium |
 Absol Absol |  | [Sun] Medium [Moon] Low |
 Drampa Drampa |  | [Moon] Low |
Scan the QR code and check the distribution to confirm the exact habitat.
Gladion's Pokemon

| Pokemon Level/Item | Moves | Weakness |
|---|---|---|
 Crobat CrobatLv53/- | Acrobatics | Electric Ice Psychic Rock |
 Zoroark ZoroarkLv53/Darkinium Z | Dark Pulse | Fighting Bug Fairy |
 Lucario LucarioLv54/- | Aura Sphere | Fire Fighting Ground |
 Silvally SilvallyLv55/- | Crunch | Fighting |
