How to survive the Night's Tide in Elden Ring Nightreign. Learn what is Night's Tide, how to avoid it, whether it's safe to enter, what it does, and key survival tips.
Table of Contents
How to Survive the Night's Tide
Move to Get Inside the Blue Circle


There is no way to prevent damage from Nightreign's Night's Tide. The basic rule is not to enter the Night's Tide's range, so if you do get caught in its range, immediately move inside the blue circle.
The inside of the white circle displayed on the map is the final safe zone, so head towards it.
Try to Pass Through Sites of Grace

By approaching a Site of Grace, you can restore your HP and Sacred Flask charges to maximum. When escaping the Night's Tide's range, if you find a Site of Grace, try to touch it to heal.
Site of Grace Locations & FunctionsUse the Nearby Spectral Hawk

If there is a Spectral Hawk Tree nearby, you can use it to travel through the air without worrying about obstacles. However, for the Spectral Hawk, the white line displayed on the map is its direction of travel, so you need to check which direction it will go in advance.
Keep Healing with Sacred Flask
Even if you are near death in the Night's Tide, it is difficult for allies to rescue you. Also, it is difficult to retrieve Runes dropped upon death, so move while frequently healing HP with the Sacred Flask to avoid dying.
Upgrade Sacred Flasks at Churches

If the travel distance is long, you may run out of Sacred Flasks. At a Church, you can increase the maximum number of Sacred Flasks, which can increase your chances of surviving the Night's Tide. Additionally, when you obtain a Sacred Flask, your HP and Sacred Flask refills are restored.
How to Increase Sacred FlasksHow to Avoid Getting Caught
Don't Miss the Announcement

When the Night's Tide begins to expand, an announcement will be displayed on the upper right of the screen. The BGM also changes when the announcement is displayed, so always be aware of it.
Night’s Tide Expands at 5 and 11 Minutes
| 1st (5 minutes) | 2nd (11 minutes) |
|---|---|
 |  |
The only way to avoid entering Nightreign's Night's Tide is to frequently check the map for its range. Expansion begins 5 minutes and 11 minutes after the day starts, so frequently check the map to confirm the safe zone.
First Safe Zone Includes Shifting Earth

If Shifting Earth is occurring, the Shifting Earth area will be included in the safe zone during the first Night's Tide expansion. You can predict the safe zone from the start, making it easier to decide which areas to explore and how to maneuver.
Shifting Earth GuideRetreat if Movement is Hard
If an announcement appears while you are clearing locations like Castles or Tunnels where immediate movement is difficult, or while fighting a Field Boss, always consider abandoning the attempt and retreating.
Field Bosses can be Lured to Safe Zones
If a Field Boss is near the Night's Tide's range, it is possible to lure it to a safe zone and defeat it. Be careful, as they will stop chasing if they get too far from their original location.
Is It Safe to Enter the Night's Tide?
Avoid the Night's Tide

Staying within the Night's Tide in Nightreign is not recommended. The damage from the Night's Tide is significant, and the time you can stay there is short, increasing the risk of death. It is also difficult to retrieve dropped Runes, so the disadvantages are substantial.
Allies Cannot Come to Rescue You
If you happen to be near death in the Night's Tide, it is difficult for allies to come to your rescue. It is highly likely to inconvenience them, so it is not recommended for that reason too.
No Need to Wait for Day 2
Immediately after defeating the Day 1 Nightlord, it is okay to start moving before the Night's Tide clears and Day 2 begins. The Night's Tide will stop quickly, and you can also Heal at a nearby Site of Grace, making it an effective way to extend your operational time.
Especially if there is a Church nearby, you can increase the number of Sacred Flasks and also Heal, so make it a priority destination.
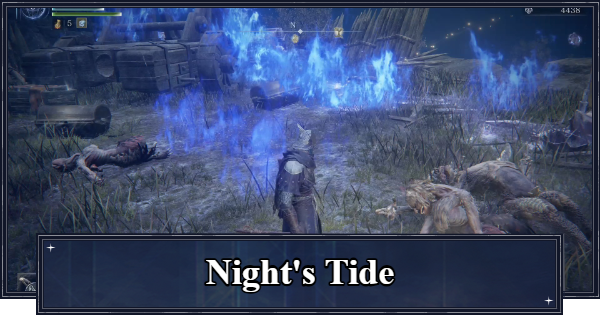
What is Night's Tide?
Damage Area That Expands Over Time

Nightreign's Night's Tide is a damage area that expands over time. While inside the Night's Tide, your HP gradually decreases, and if your HP reaches 0, you will be near death. In solo play, reaching 0 HP results in instant death.
Damage Can't Be Avoided In Buildings
Even if you are inside buildings like Castles or Tunnels where rain doesn't hit, you will still take damage regardless. Being inside a building can take longer to escape, so entering a building when the range is closing in is dangerous.
Night’s Tide Expands at 5 and 11 Minutes
| 1st (5 minutes) | 2nd (11 minutes) |
|---|---|
| |
The Night's Tide exists on both Day 1 and Day 2, and the expansion begins 5 minutes and 11 minutes after that day starts, taking about 3 minutes to reach the white circle displayed on the map. The inside of the white circle is the safe zone, but its location is random each time.
First Safe Zone Includes Shifting Earth
If Shifting Earth is occurring, the Shifting Earth area will be included within the white circle during the first Night's Tide expansion. If Shifting Earth is active, you can predict the safe zone, so it's a good idea to decide which areas to explore based on that.
Shifting Earth GuideEnemies Do Not Take Damage
Enemies do not take damage from the Night's Tide. Fighting enemies within the Night's Tide is extremely disadvantageous, so be careful.
Elden Ring Nightreign Related Guides

Recommended Articles
Growth & Farming
| How to Level Up | Rune Farming |
| Murk Guide |
Roundtable Hold Related
| Roundtable Hold Functions | How to Get Relics |
| Sparring Grounds Functions | Small Jar Bazaar |
| Vessels | How to Get and Change Skins |
Combat & Field
Shifting Earth
| List of Shifting Earth Types | The Crater |
| Mountaintop | Rotted Woods |
System & Settings
Other Useful Info
| How to Enter Product Codes | DLC Information Summary |
| Latest Update Information | Latest Maintenance Information |

