

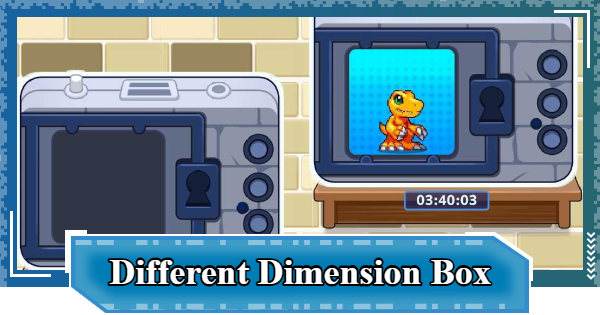
The Different Dimension Box in Digimon UP provides additional stat bonuses via placing Decor. Read on to learn how to use the DD Box, and also our recommendations for the shop!
Table of Contents
| Explore Related Articles | |
|---|---|
| Digital World Search | Different Dimension Box |
| Meat Field | Training |
| Eat | |
Different Dimension Box Overview
Unlocks at Stage 160
| Unlock Conditions | - Reach Stage 160 - Opens 3 days after server launch *Must have a Buddy in in your party |
|---|
The Different Dimension Box is unlocked once you reach Stage 160 and 3 days have passed since the server launched. Start by progressing until you hit Stage 160, then start playing the content once it becomes available in your server.
| Related Articles | |
|---|---|
| Unlock Condition List | Stage Progression Guide |
16-Hour Daily Limit


Buddies can only accumulate rewards for a maximum of 8 hours per session. Assuming you maximize 8-hour sessions, you can do this up to twice a day. Also, Buddies will automatically disconnect if they stay connected for 10 uninterrupted hours.
| Tip! | Rather than leaving your Buddies connected for 8 hours straight, we recommend checking in on them every couple hours. |
|---|
What is Battle Overload?

Overload is a value that increases every time you participate in DD Box Battles. Debuff effects are applied according to the Overload value, and the Overload value gradually decreases over time.
Attacker's Overload (A.OVR)
| Value | Effect |
|---|---|
| 15% - 29% | Base ATK, DEF, and HP reduced by 10% |
| 30% - 44% | Base ATK, DEF, and HP reduced by 30% |
| 45% - 59% | Base ATK, DEF, and HP reduced by 70% |
| 60% - 89% | Base ATK, DEF, and HP reduced by 80% |
| 90%+ | Base ATK, DEF, and HP reduced by 99% |
Defender's Overload (D.OVR)
| Value | Effect |
|---|---|
| 15% - 29% | Base ATK and DEF reduced by 10% |
| 30% - 44% | Base ATK and DEF reduced by 35% |
| 45% - 59% | Base ATK and DEF reduced by 75% |
| 60% - 89% | Base ATK and DEF reduced by 85% |
| 90%+ | Base ATK and DEF reduced by 99% |
Dedicated DD Box Shop

The DD Box has a dedicated shop where you can purchase Decor with Data Shards. Decor improves the efficiency of Different Dimension Boxes, as well as boosts your Battle Power, so be sure to purchase Decor once you have gathered enough Shards.
▼Jump to Recommended DD Box Shop Items
How to Use the Different Dimension Box
| 1 | ▼Connect a Buddy to Your DD Boxes |
|---|---|
| 2 | ▼Connect a Buddy to Another Player |
| 3 | ▼Configure Management Settings |
| 4 | ▼Attack Other Buddies |
| 5 | ▼Place Decor to Improve Efficiency |
1: Connect a Buddy to Your DD Boxes

Start by connecting one of your Buddies to a Different Dimension Box. Each player has 4 Different Dimension Boxes, but only 1 Buddy can be connected to your owned Different Dimension Boxes.
Rewards Differ According to Buddy

The amount of Data Shards and collection rewards vary by Buddy. Rarer Buddies are more efficient, earning more rewards per minute when connected while also having a higher chance of collecting rare items.
List of Buddies
2: Connect a Buddy to Another Player

Once you own multiple Buddies, connect them to another players' Different Dimension Box or use the Public DD Boxes. You can connect up to 5 Buddies simultaneously, and only 1 can be connected to any Public DD Box.
Friends and Camp are Recommended
When connecting to another player's DD Box, we recommend cooperating with Friends and Camp members. Try connecting Buddies to each other and protecting one another via the management settings.
| Related Articles | |
|---|---|
| How to Add Friends | How to Join a Camp |
| Note! | If you connect to a stranger's DD Box, there's a chance that the owner of that DD Box will attack you. |
|---|
3: Configure Management Settings

▲Tap the frame containing your Tamer name at the top of the Different Dimension Box to display the settings.
If you want to protect the Buddies connected to your DD Box, configure the Management Settings. Check the Protect Buddies
box, set the protection targets and your protection fee, then press Apply
to finalize the settings.
What is Protection?
Protection is a setting where you battle on behalf of the Buddies connected to you whenever they're attacked. There is no penalty for losing or failing to defend, when once the connected Buddy returns to their owner, you earn Data Shards according to your Protection Fee.
4: Attack Other Buddies

Attack other Buddies to earn Data Shards. To Attack, select a Buddy connected to your DD Box or use the DD Box Search function to look for targets.
5: Place Decor to Improve Efficiency

Once you've obtained Decor, place it immediately to improve the efficiency of your DD Box. Placing Decor allows you to increase the amount of rewards received, as well as increase your stats.
Decor Leveling and Benefits
Decor Increases Stats

Simply owning Decor provides Passive Bonuses that increase your stats and affect your battle power.
You Can Enhance Decor with Duplicates
| Decor Level | 1 | 10 |
|---|---|---|
| Effect | +1% | +10% |
Obtaining duplicate Decor allows you to enhance it. Enhancements increase the Decor's Passive Bonus, so remember to enhance whenever you can.
| Note! | Since Passive Bonuses affect your Battle Power, even Decor with inferior effects should be enhanced whenever you can. |
|---|
Different Dimension Box Shop Recommendations
| Item | Price / Effect | Recommendation |
|---|---|---|
| Experimental LCD | Data Shard ×65,000 Collectibles 14% UP | ★★★ |
| Experimental Stand | Data Shard ×65,000 Data Shard Acquisition Rate 10% | ★★★ |
| Cylindrical Glass Pod | Data Shard ×65,000 Data Shard Acquisition Rate 5% | ★★・ |
| Distribution Board | Data Shard ×65,000 Data Shard Acquisition Rate 5% | ★★・ |
| Analysis Equipment | Data Shard ×65,000 Data Shard Acquisition Rate 5% | ★★・ |
| Lab Light | Data Shard ×65,000 Collectibles 10% UP | ★★・ |
| Lab Wallpaper | Data Shard ×65,000 Data Shard Acquisition Rate 10% | ★★★ |
| Tile Flooring | Data Shard ×65,000 Collectibles 10% UP | ★★・ |
| Stamina ×50 | ★・・ | |
| Attack ×1 | ★・・ | |
| Dash ×1 | ★・・ |
Prioritize Decor with Better Effects

We recommend the Experimental LCD for the extra 14% increased collection rate, and both the Experimental Stand and Lab Wallpaper, which increase Data Shards by 10%. Note that there's also a chance of obtaining these Decors from the DD Box collection rewards.
Collect One of Each Type

Since Placement Effects of Decor are cumulative, try to collect at least one of each Decor type. There are 8 types in total, and having them all results in a 35% increase in Data Shards and a 34% collection boost.
| Types of Decor | |
|---|---|
| LCD | Display Stand |
| Decoration (Large) | Decoration (Medium) |
| Decoration (Wide) | Light |
| Wallpaper | Floor |
Buy DW Search Items As Needed
If you want to focus on Training, it's worth considering items used in Digital World Search. Items like Stamina, Attack, and Dash allow you to collect SP Training Chips used for Training.
Digital World Search GuideDigimon UP Related Articles
Return to HomeRecommended Articles
 How to Reroll
 Early Game Guide
 Recommended Partners
 Daily Tasks Guide
 How to Choose Server
 How to Create Character
 How to Change Name
 Idle Rewards
 Unlock Condition List
 Guide Quest
 Hologram Device
 Mission Guide
 Stage Progression
 How to Add Friends
 To-Do When Stuck
 How to Speed Up Battles
 Account Linking
 Customization Guide
 Gacha List
 Event List
 Latest Updates
Training Guide
 Training Guide Training Guide |  Raising Tamer Lv. Raising Tamer Lv. |  How to Raise Rank How to Raise Rank |
 Partner Training Partner Training |  Get Best Equipment Get Best Equipment |  Skill Cards Guide Skill Cards Guide |
 Get Support Digimon Get Support Digimon |  Buddies Guide Buddies Guide |  Get SP Support Get SP Support |
 Digivice Guide Digivice Guide |  Use Tactical Memory Use Tactical Memory |
 Dungeon Guide
 PVP Guide
 Camp Guide
 Digital World Search
 Ad Skip Pass
 Battle Pass
 Digimon List
 Skill Card List
 Equipment List











