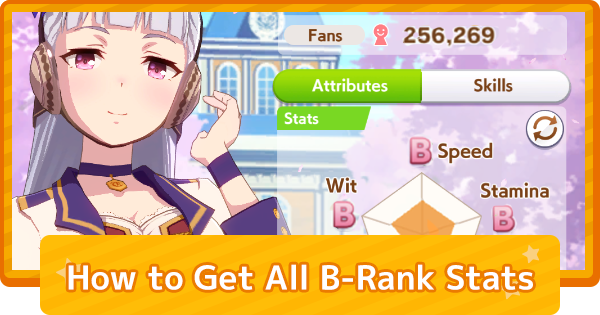
This article introduces how to get all B-rank stats in Uma musume: Pretty Derby and the best characters. Including best builds, substitute Support Cards, walkthrough, and strategy in Umamusume.
Table of Contents
Benefits of Getting All B-Rank Stats
Effective for Spark Farming

The benefit of an all B-rank Career is that you can aim for a 3★ blue Spark regardless of which of the five stat types is selected for the roll. Conversely, be aware that this method is often unsuitable for aiming for victories in Team Trials or race events.
[Note] It's One Way to Increase the Probability
The current condition for a 3★ blue Spark to appear is believed to be achieving B rank (≥600) in the selected stat. Note that this is a probability increase, not a guaranteed trigger.
How to Get All B-Rank Stats
Process to Achieve All B-Rank Stats
- 1. Prepare by Gathering 2★ Sparks
- 2. Aim for a Stable 3 B-Ranks in Your Career
- 3. Ultimately, Aim for a Stable All B-Rank Career
1. Prepare by Gathering 2-Star Sparks
First, prepare a Umamusume with 2★ or higher Sparks of your own to compensate for any lacking Stats. For example, with a Guts build, you'll often be short on Stamina, so it's helpful to have a 2★ Stamina Spark on hand.
A 6★+ Spark Lowers Career Difficulty
Try renting a Umamusume with a 3★ Spark from your Friends and inheriting it with your own 2★ Spark to start a Career with a 6★ or higher Spark. For a Guts build, three Stamina Sparks are ideal.
Run Careers Until You Get a 2★ Spark
While possible without it, leveled Supports and Sparks help stabilize an all B-rank Career. A 2★ Spark can appear from any stat, so keep playing until you get one.
2. Aim for Consistent 3 B-Ranks in Career

In Career, the most commonly used Sparks are Speed, Stamina, and Power. Focus on consistently raising these stats to B or higher.
Next, Aim for 4 B-ranks with Wit
Once you're accustomed to a 3 B-rank Career, aim for a 4 B-rank Career that includes Wit. If you're farming by raising the four stat types other than Guts to B, reaching this point is sufficient.
3. Aim for a Stable All B-Rank Career
For an all-type 3★ Spark, aim to stabilize an all B-rank Career. This requires Guts Supports to raise Guts to B, but note the additional cost of developing Guts-focused characters.
If It's Difficult, You Don't Have to Force It
As mentioned before, the currently popular Sparks are the three types, excluding Guts and Wit. If you don't have the resources to develop Support Cards, farm with a stable 4 B-rank Career and aim for 3★ blue Sparks.
You'll Need Some Sparks and Support Cards
Random events make an all B-rank Career difficult without a 6★+ Spark or with all Supports at 0LB. For SR Supports, aim for 1LB at Lv30, and borrow strong Sparks from Friends' Umamusume to prepare.
Best Characters and Support Builds
Use Low-Difficulty Umamusume
Due to its nature, an all B-rank Career is premised on being able to efficiently and stably farm for 3★ Sparks. Some Sparks are related to clearing the URA Finals, so you'll want to select a Umamusume whose objectives are as easy to achieve as possible.
 Tips! Tips! | It also depends on the Support Cards you own, so we recommend a Umamusume you are used to. Since Guts and Wit tend to be lacking, you could also decide based on which can be covered by their Stat Growth Rate. |
|---|
Best Support Build 1: 4 B-Rank Aim
| Speed Slot | Speed Slot | Power Slot |
|---|---|---|
| Sweep Tosho | Eishin Flash | Oguri Cap |
| Wit Slot | Pal and Wit Slot | Stamina Slot (Friend) |
| Marvelous Sunday | Aoi Kiryuin | Super Creek |
| Required Spark Combination Stamina 6★ x Stamina 9★ (Rental) | ||
The goal is to raise the four stat types, excluding Guts, to B, focusing on developing Speed, Stamina, and Power. Aim to boost Wit and Stamina all at once with Friendship Training at Summer Camp. The Pal slot is for Mood management, but it's fine to swap it for a Wit character.
| Tips! | If you lack LBs, swap them with other Support Cards. If there are white Skills you want to inherit, you can also swap cards in slots for easily raised stats with cards that grant those Skills. |
|---|
Best Support Build 2: Guts & Wit Type
| Guts Slot | Guts Slot | Power and Speed Slot |
|---|---|---|
| Grass Wonder | Air Groove | King Halo |
| Wit Slot | Wit Slot | Stamina Slot (Friend) |
| Marvelous Sunday | Daiwa Scarlet | Super Creek |
| Required Spark Combination Stamina 6★ x Stamina 9★ (Rental) | ||
Raise Speed, Power, and Guts with Guts training while adjusting with a Speed or Power character, and increase the number of training sessions while developing Wit with two character slots. Aim to achieve all B-rank stats by boosting Stamina all at once with Sparks and at Summer Camp.
Recommended Alternative
Supports Used in the Speed Slot
| SSR | |
|---|---|
| Kitasan Black - Two Training Effectiveness boosts - Highly versatile Skills - Very high Affinity Rate at 3 LB or more |
| Biko Pegasus - Very high Training Effectiveness, contributes to all training - Initial Friendship Gauge increases at 3 LB or more - High Race/Fan Bonus |
| Tokai Teio - Easy to use with many recovery events - Powerful Skills - Power Bonus at 1 LB |
| Nishino Flower - Can aim for friendship early with Charming ◯ - Can increase max Energy through events - Speed Bonus at 1 LB |
| Special Week - High ownership rate at MLB as it's from an event - 'Gourmand' is very powerful - Can also serve as a recovery skill slot |
| SR | |
| Eishin Flash - Easy to use with many recovery events - Can increase max Energy through events - Speed Bonus at MLB |
| King Halo - Has Corner Recovery ◯ and Hint Lv - Power Bonus at MLB |
| Sweep Tosho - Can aim for friendship early with Charming ◯ - Excellent Support Effects overall |
Supports Used in the Stamina Slot
| SSR | |
|---|---|
| Super Creek - Initial Stamina + Affinity Rate - Has 'Swinging Maestro' - Stamina Bonus at 1 LB - Initial Friendship Gauge at 3 LB - You'll want to borrow an MLB one from Friends |
| SR | |
| Mayano Top Gun - Initial Stamina + Affinity Rate - Mood Effect at 1 LB - Excellent for filling a Stamina slot |
| Zenno Rob Roy - Specialty Bonus at 1 LB - Stamina Bonus at MLB - Also has Initial Friendship Gauge, excellent for raising Stamina |
Supports Used in the Power Slot
| SSR | |
|---|---|
| Vodka - Mood Effect + Affinity Rate - Has 'Breath of Fresh Air' - Power Bonus at 1 LB - You'll want to borrow an MLB one from Friends |
| Smart Falcon - Max 60% Mood Effect - Innate Power Bonus - Stamina Bonus at 1 LB |
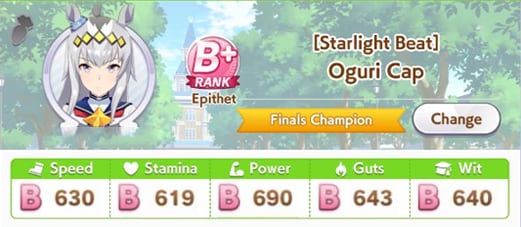
| Oguri Cap - Max 60% Mood Effect - Innate Power Bonus - Additional Power Bonus at 1 LB |
| SR | |
| Mihono Bourbon - Hint event for Corner Recovery ◯ - Hint event for Focus - Initial Power at 1 LB - Power Bonus at MLB |
Supports Used in the Guts Slot
| SSR | |
|---|---|
| Special Week - Max 60% Mood Effect - Innate Guts Bonus - Power Bonus at 1 LB |
| Grass Wonder - Has Mood Effect - Innate Mood Effect as well - High Affinity Rate - Guts Bonus at 1 LB |
| Ines Fujin - Max 80% Affinity Rate - High Training Effectiveness - Speed Bonus at 1 LB |
| Winning Ticket - Lower priority for all B-rank builds - Guts Bonus at 1 LB |
| SR | |
| Air Groove - Has Mood Effect - Innate Mood Effect as well - High Affinity Rate - Guts Bonus at MLB |
| Meisho Doto - Easy to use with many recovery events - Has Specialty Bonus - Guts Bonus at MLB |
Supports Used in the Wit slot
| SSR | |
|---|---|
| Fine Motion - Get 'Practice Perfect ◯' from an event - If at 0 LB, prioritize a 2+ LB Wit SR - Wit Bonus at 1 LB - You'll want to borrow an MLB one from Friends |
| SR | |
| Marvelous Sunday - Easy to use with many recovery events - Two events that raise Mood - Has Mood Effect - Innate Mood Effect as well - Wit Bonus at MLB |
| Daiwa Scarlet - Easy to use with many recovery events - Has Mood Effect - Innate Mood Effect as well - Wit Bonus at MLB |
| Matikanefukukitaru - Event with random Energy gain/loss - Can obtain a lot of Skill Pts |
Supports Used in the Friend Slot
| SSR | |
|---|---|
| Tazuna Hayakawa - Easy to use with many recovery events - Can recover from negative conditions - Maintain Mood with Recreation - You'll want to borrow an MLB one from Friends |
| SR | |
| Aoi Kiryuin - Maintain Mood with Recreation - Can obtain a lot of Skill Pts |
Actual Career Flow and Strategy
Summary of Career Points
- Always Check for Wit Training in the Early Game
- If Using Tazuna, Start With Tazuna
- Early Game: Multiple Friendship Gauges > 1 Friendship Training
- Raise Stamina Characters' Friendship Early
- Be Careful Not to Raise Stats Too High
- Keep an Eye on the Director's Friendship Gauge
1. Until the Debut Race (Without Tazuna)

First, go on a Recreation to raise your Mood by one level, then train once to reduce Energy, and go on another Recreation to raise your Mood to Great. For training, basically choose options that raise the Friendship Gauge of multiple people at once.
Mood Guide| Tips! | If you get the karaoke event on your first Recreation, your Mood will increase by two levels, saving you one turn! You're lucky if you get it! |
|---|
Always Check Wit Training
Wit training, which raises the Friendship Gauge without using Energy, is ideal for the first half of the game. Always check and try not to miss any opportunities to train. If you play your cards right, you might even reach the debut race without using "Rest".
Until the Debut Race (With Tazuna)
 ▲This is the so-called "Tazuna First" move.
First, train with Tazuna to raise your Mood. If she's not there, go on a Recreation to raise your Mood before training. When Tazuna's Friendship Gauge turns green, it flags the "Recreation" event. Until then, prioritize following Tazuna.
How to Raise Friendship GaugeAim for "Recreation" to Trigger This Year
If the "Enthusiastic Pair" event occurs within the first year, you can get an Energy & Mood boost, Speed +20 (at MLB), and a Hint Lv for Tail Held High at the New Year's shrine visit event at the start of the second year. Try to trigger the event within the year if possible.
2. Strategy Until the End of Year 1
At this stage, prioritize training that raises the Friendship Gauge of multiple people over a Friendship Training with only one person, and adjust your stats while raising the Friendship Gauge of all Supports. If you don't have enough fans for your objective, enter one of the races below.
| Period | Race Details |
|---|---|
| Year 1, Early Dec | Hanshin Juvenile Fillies Junior / G1 / Hanshin Turf / 1600m (Mile) / Right/Outer |
| Year 1, Early Dec | Asahi Hai Futurity Stakes Junior / G1 / Hanshin Turf / 1600m (Mile) / Right/Outer |
| Year 1, Late Dec | Hopeful Stakes Junior / G1 / Nakayama Turf / 2000m (Medium) / Right/Inner |
| Tips! | If you don't have enough fans and can't meet the entry conditions for the races above, find a good time to enter a G2 or G3 race! |
|---|
It's Okay to Lose Races
Winning is always better, but in an all B-rank Career, the final fan count doesn't matter, so as long as you avoid "Objective Failed," it's okay to lose races. However, be careful, as losing too much will force you to enter many more races.
| Tips! | To minimize the number of races you enter, it's a good idea to acquire skills that make it easier to win early on! |
|---|
3. Strategy in Year 2
From here, switch to a strategy based on Friendship Training. In both 4 B-rank and Guts builds, Stamina tends to be lacking, so be conscious of raising the friendship of Stamina characters.
Friendship Training GuideTrain Lacking Stats at Summer Camp
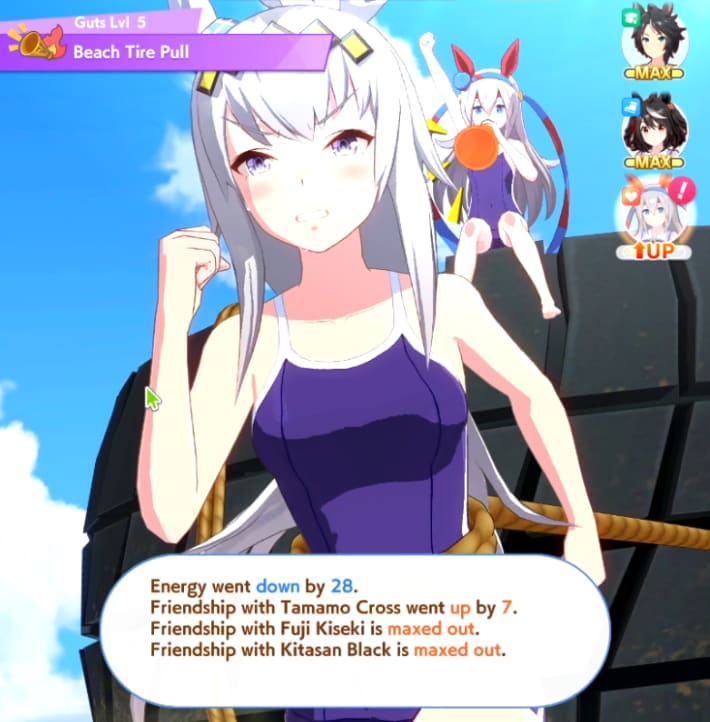
As mentioned before, during Summer Camp, train to supplement lacking stats like Stamina. Forming a Stamina friendship tag at camp will make Year 3 easier. It's best to avoid using Rest and combine it with recovery from Wit training.
4. Guideline at the End of Year 2
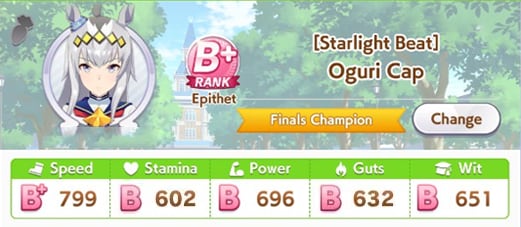
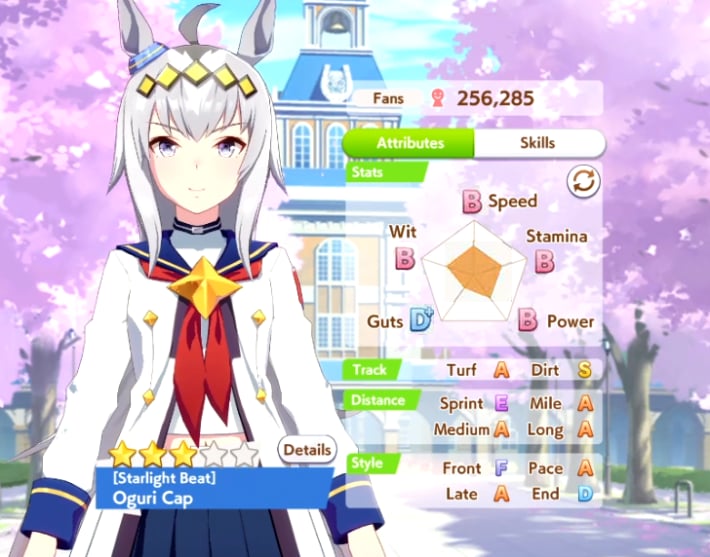
 ▲Example at Year 3 for a 4 B-rank build.
The guideline differs for 4 B-rank and all B-rank builds, but by the end of Year 2, you should raise all the stats you want to C or D. Cover any lacking Stats with training in Year 3, Summer Camp, and Inheritance.
| Tips! | For an all B-rank build, you'll want to aim for stats around CCDDC! If you haven't been able to do much Friendship Training, giving up on stats that seem unachievable at this point is one option. |
|---|
5. In Year 3, Watch the Director Too
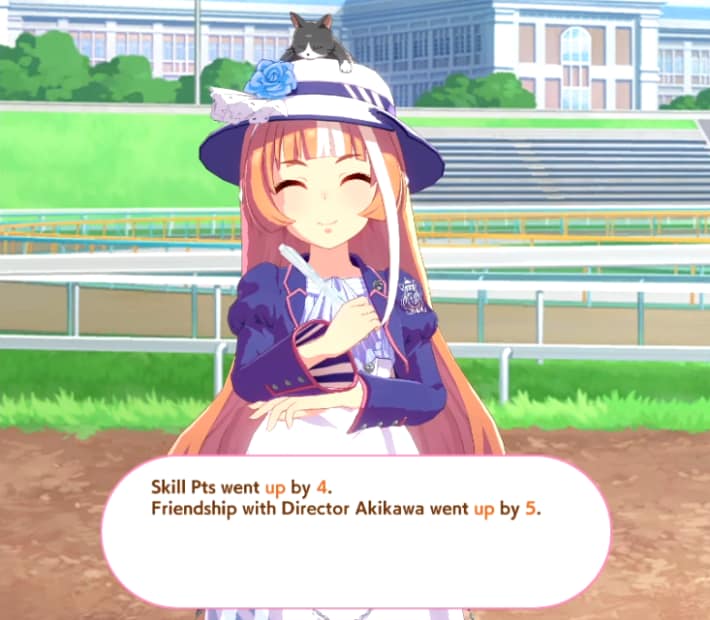
In Year 3, while raising lacking stats, also keep an eye on the Director's Friendship Gauge. If the Director's Friendship Gauge is MAX at the end of the URA Finals, you can receive the 'Director's Fan'.
Reinforce Stats with the Director's Fan
The Director's Fan is an item that adds +15 to all Stats. Combined with the Stats up from winning the three URA races, you can increase all Stats by nearly 50. You will conduct your Career with this in mind, aiming for a baseline of 550 in your stats.
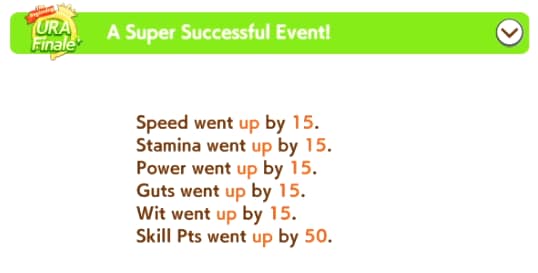
6. Towards the URA Finals
 ▲Example before the final objective with a 4 B-rank build.
As mentioned before, including the Director's Fan, all Stats will be increased by +50 assuming you win all races in the URA Finals. Therefore, you'll want to adjust your stats to aim for values just below B, like in the image above.
| Tips! | If you raise the target stat to around 520–530 by the end of Year 3's Summer Camp, reaching exactly 600 at the URA Finals becomes easier. Avoid exceeding 550 too early, as the stat may end up higher than needed. |
|---|
In the Case of an All B-Rank Build
This is for an all B-rank build. If you've managed to do Friendship Training well to some extent, you can achieve a stable Career by covering Stamina with Sparks. If you have a decent set of Guts characters, give this a try as well.
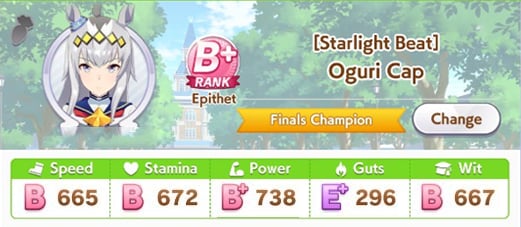
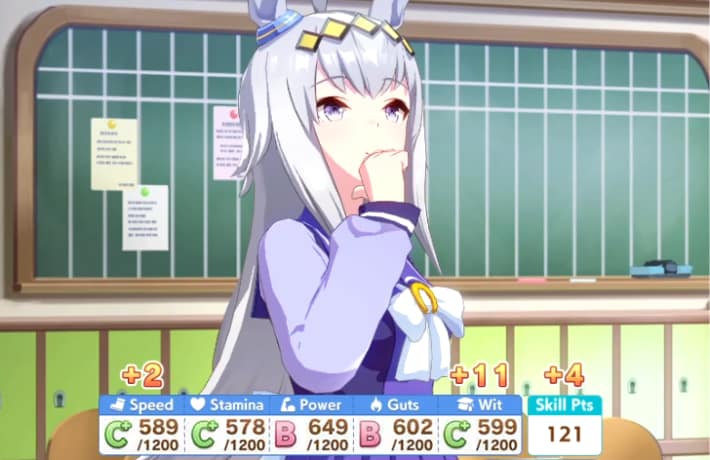
Be Careful Not to Raise Stats Too High
 ▲Example of missing all B-rank stats due to excessive Speed and Wit, and not enough Guts.
As shown in the image, you could miss achieving all B-rank stats by just one training session. Calculate how much you need to increase each stat by the end of the career.
7. Winning the URA Finals
Once the URA Finals are over, if all the Stats you wanted to raise is above B, the Career is complete. Repeat this process until you get a 3★ Spark.
If You Can't Win, Change Your Sparks
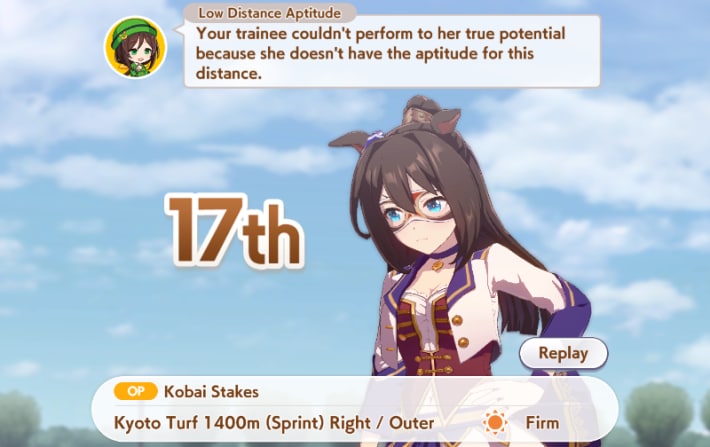
If you can't win the URA Finals, try changing the Sparks you inherit to gain Aptitude for Turf, Style, or Distance. If you have the right Sparks, your win rate in races will increase dramatically, making the URA Finals easier to conquer.
Aptitude and Stat Boost Effects Umamusume Wiki Top Page


 Mood Guide
 Voice Actor List
 Birthday List
 Height and Weight List
 Three Size List
 Scout Animation Guide
 Shop Items Guide
 How to Get Clovers
 How to Get Cleats
 Best Umamusume for Beginners
 How to Level Up Unique Skills
 Stat Growth Rates List
 Spark Farming
  Acupuncturist Event Guide
 Increase Stats Guide
 Daily To-Do List
 Claw Machine Event Guide
 How to Limit Break
 Recreation Guide
 How to Raise Bond Level
 Debuff Effects Explained
 Latest Events and Campaigns
 Race Position Guide
 Early Game Guide
 Room Match Guide
