Mystic Maze guide for Duet Night Abyss. Learn what Mystic Maze is, how to unlock it, its reset schedule, mechanics, tips, and strategies to beat Mystic Maze in DNA.
Table of Contents
What is Mystic Maze
This article was last updated on December 4, 2025 and will no longer be updated moving forward. Thank you for your support to this project!
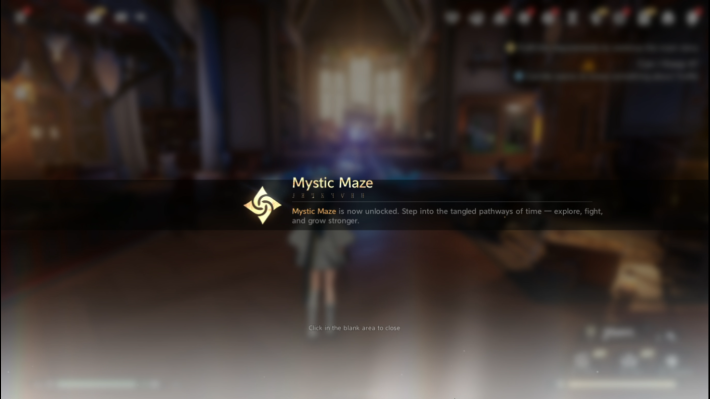
Permanent Roguelike Game Mode

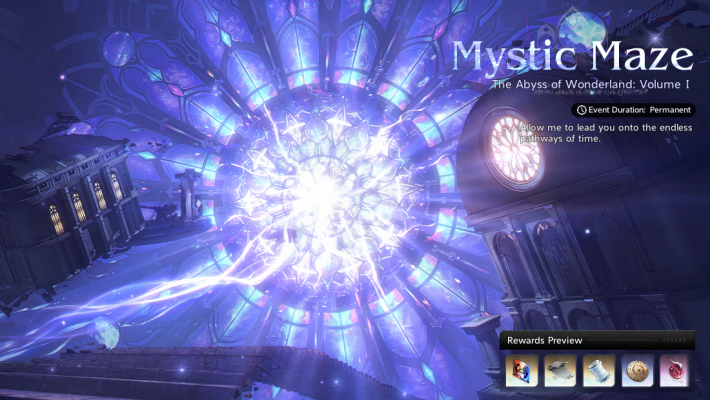
Mystic Maze is a permanent roguelike game mode in Duet Night Abyss. During each Exploration, you’ll progress through multiple Zones that may include enemy battles, Encounter Zones, and Rest Zones. Each run ends with a boss battle.
Get Trace Points After Exploration

Every time you finish an Exploration, you are awarded Trace Points. These points are cumulative, meaning the total from all your runs will be added together. You can claim rewards based on the total Trace Points you earn.
| Note! | The higher your Trial Rank, the better the rewards, but note that the number of Trace Points required also increases. |
|---|
The Spindle of Fate
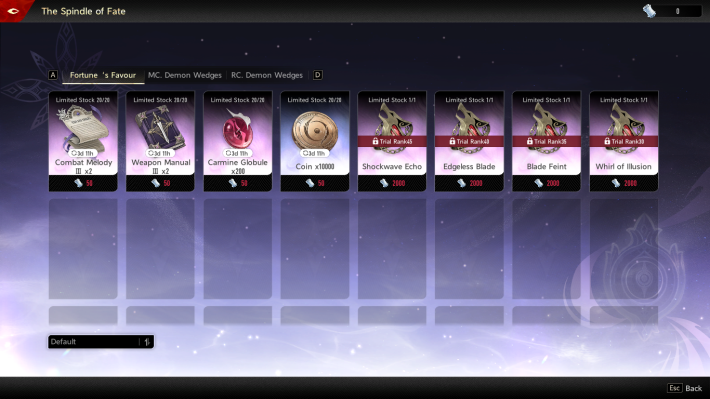
Aside from Trace Points, you can also obtain Thread of Time, which can be exchanged in The Spindle of Fate shop. You can get various upgrade materials and Demon Wedges there, so make sure to check it out once you’ve collected enough Threads of Time.
Resets Every Sunday 1:00 PM (PST)

Trace Point rewards and The Spindle of Fate shop reset every Sunday at 1:00 PM (PST).
Fill the Abyss Archive
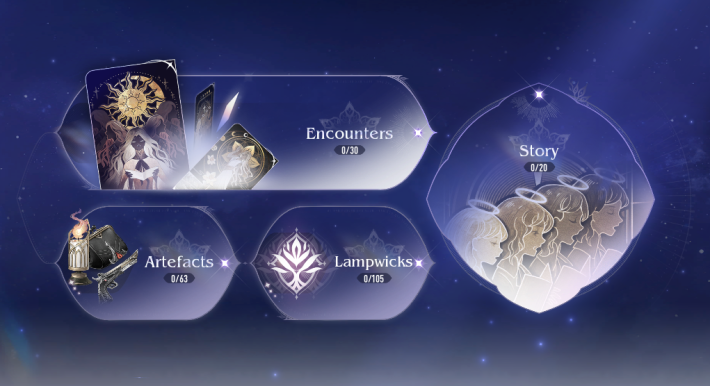
By completing Explorations, you can record Encounters, Artefacts, Stories, and Lampwicks in the Abyss Archive. As your collection progresses, you can get Secret Clues as rewards. Try to complete as many entries as possible to earn more Secret Clues.
How to Unlock Mystic Maze
Complete “On a Gentle Breeze” Main Quest
. You can access it from the Events tab or through the Combat tab under “Echoes of Misstep.”
Mystic Maze Mechanics and Gameplay
Select from Different Zones
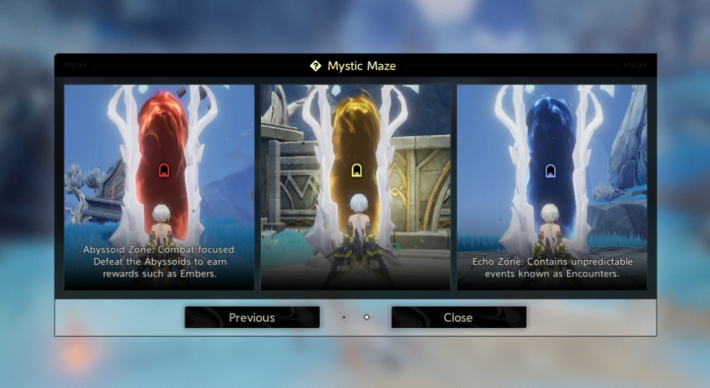
Each Exploration requires you to complete multiple Zones. These Zones have different effects; some involve battles, others feature shops, and some offer special encounters.
| Type | Color | Description |
|---|---|---|
| Abysmal Abyssoid | Red | The Boss Zone, usually appearing as the final stage of an Exploration. |
| Abyssal Echo | Blue | Encounter Zone. Rewards may include Lampwicks, Artefacts, or Embers. |
| Atrocious Abyssoids | Red | Zone featuring powerful enemies. |
| Penumbral Abyssoid | Red | Zone featuring basic enemies. |
| Scattered Abyssoid | Red | Zone that includes both basic and powerful enemies. |
| Rest | Yellow | Zone that restores your HP and features the Mysterious Merchant, where you can buy Lampwicks and Artefacts. It always appears before an Abysmal Abyssoid (Boss fight). |
Lampwicks
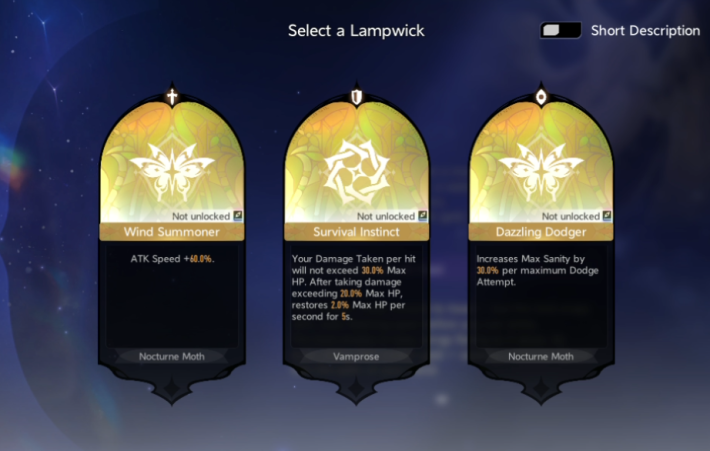
Demon Wedges are disabled in Mystic Maze. Instead, you’ll receive Lampwicks, temporary buffs that enhance your combat abilities during each Exploration. You can select from three Lampwicks after clearing an Abyssoid Battle or Encounter.
You Can Refresh or Skip Lampwicks
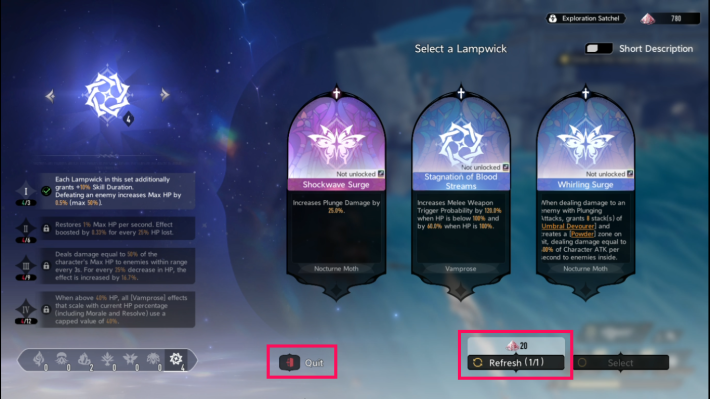
If you don’t like the Lampwick options, you can refresh the selection using 20 Embers. Alternatively, you can choose “Quit” to skip and receive a small amount of Embers instead.
Stack Lampwicks for Set Effects
Collecting 3/6/9/12 Lampwicks of the same type activates their set effects. These are added on top of individual Lampwick bonuses, so try to stack matching ones for stronger buffs.
You Can Upgrade Lampwicks
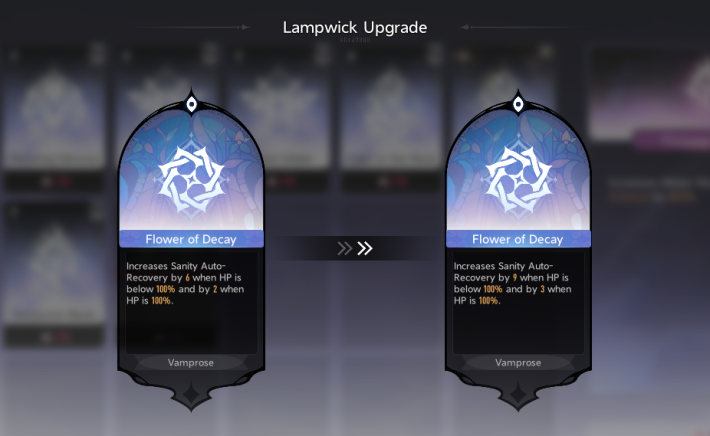
Obtaining the same Lampwick again upgrades its effect, increasing its overall effects. A ^ icon at the top right indicates that the Lampwick can be upgraded.
Types of Lampwick
| Type | Effect |
|---|---|
| Core Flame | [3-Set Effect] Each Lampwick in this set additionally grants +15% CRIT Chance and +15% CRIT Damage for melee weapons. Dealing damage with melee weapons has a 10% chance to apply 1 stack of [Molten Blaze]. [6-Set Effect] [Molten Blaze] deals 35% of Character ATK as periodic damage every 1s. [9-Set Effect] Extends [Molten Blaze] duration to 10s. Now stacks up to 20 times. [12-Set Effect] Targets afflicted with [Molten Blaze] suffer a [Molten Blaze Sabre] hit every 5s. Dealing damage with melee weapons has a 10% chance to trigger an additional [Molten Blaze Sabre]. |
| Glimmerfly | [3-Set Effect] Each Lampwick in this set additionally grants +10% Skill Range. Max [Glimmerflies] +1. [Glimmerflies] now deal AoE damage in a 2m radius. [6-Set Effect] Gaining a [Glimmerfly] has a 30% chance to spawn a Larger Variant. [9-Set Effect] Max [Glimmerflies] +1. Larger Variants split into 3 standard [Glimmerflies] on hit. [12-Set Effect] When [Glimmerfly] deals damage, inflicts 1 stack that permanently increases Damage Taken by 12% on the target, up to 5 stacks. |
| Luminite | [3-Set Effect] Each Lampwick in this set additionally grants +15% Max Shield. Grants +25% Skill DMG. [6-Set Effect] Gains 1 stack of [Gleam] per second (max 60). At 600 stacks, casting a skill consumes all [Gleam] and grants [Radiance] for 10s, increasing Skill DMG by 50%. [9-Set Effect] While under [Radiance], triggers 1 [Emission] every 2s, dealing Skill DMG equal to 810% of Character ATK to enemies within 6m. [12-Set Effect] Extends [Radiance] to 20s. |
| Lumitwig | [3-Set Effect] Each Lampwick in this set additionally grants +15% Summon DMG. Summoning a non-Lumitwig Summon also spawns 1 [Lumiseed]. [Lumiseed]: Detonates when an enemy enters within 3m, dealing 600% ATK as damage. Lasts 10s; up to 10 may exist. [6-Set Effect] Each [Lumiseed] has a 40% chance to evolve into [Lumileaf] when summoned. [Lumileaf]: Detonates when an enemy enters within 3m, dealing 1000% ATK as damage. Lasts 10s; up to 10 may exist. [9-Set Effect] [Lumileaf] spawns 1 [Lumiwood] on detonation. When healed, deals 4,000% of that value as damage to enemies within 6m. [Lumiwood]: Heals allies within 10m by 5% Max HP per second. Lasts 10s; only 1 may exist. [12-Set Effect] Doubles the chance for all effects that may summon [Lumiseed]. [Lumiwood] deals damage equal to 650% ATK per second to enemies in range. |
| Nocturne Moth | [3-Set Effect] Each Lampwick in this set grants +10% Max Sanity. |
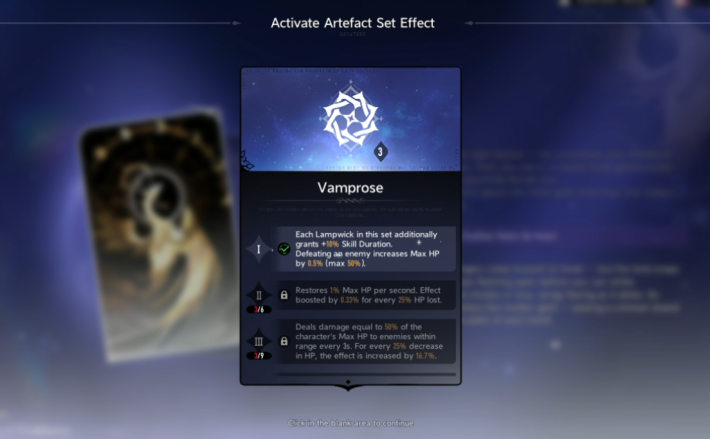
| Vamprose | [3-Set Effect] Each Lampwick in this set additionally grants +10% Skill Duration. Defeating an enemy increases Max HP by 0.5% (max 50%). [6-Set Effect] Restores 1% Max HP per second. Effect boosted by 0.33% for every 25% HP lost. [9-Set Effect] Deals damage equal to 50% of the character's Max HP to enemies within range every 3s. For every 25% decrease in HP, the effect is increased by 16.7%. [12-Set Effect] When above 40% HP, all [Vamprose] effects that scale with current HP percentage (including Morale and Resolve) use a capped value of 40%. |
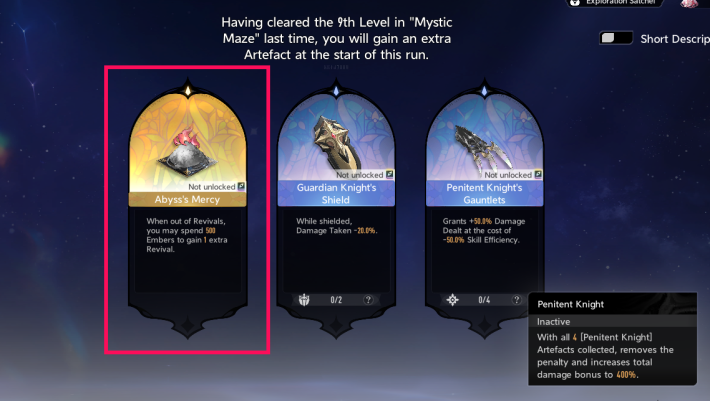
Artefacts
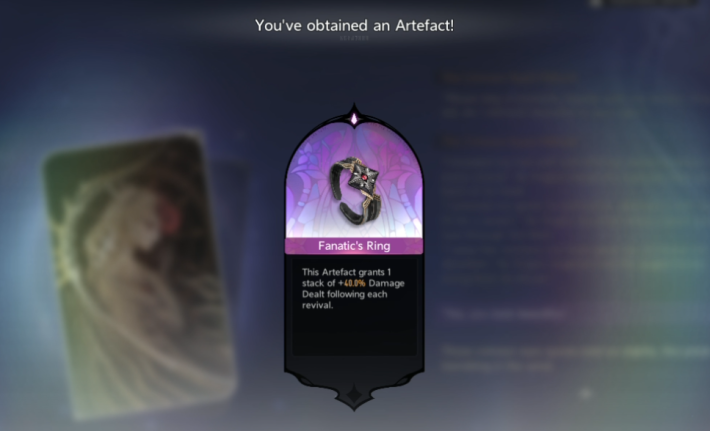
Artefacts are rare items that provide powerful buffs, usually stronger than Lampwicks. They can be purchased from the Mysterious Merchant before a Boss fight or obtained during special Encounters.
Can Activate Artefact Set Effects
Certain Artefacts belong to sets that grant additional effects when used together. You can check which set an Artefact is part of by looking at the icon at the bottom and tapping "?". Note that not all Artefacts have set effects.
Lantern Light-Up
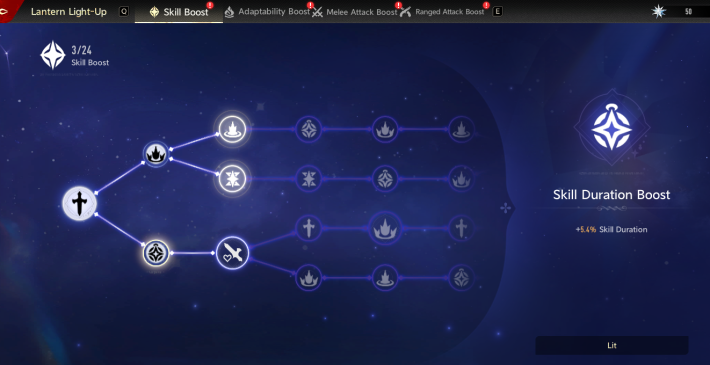
After completing an Exploration, you’ll receive Glazeystal, which can be used to light up nodes in the Lantern Light-Up. These are permanent buffs that apply only within Mystic Maze.
You Can Revive
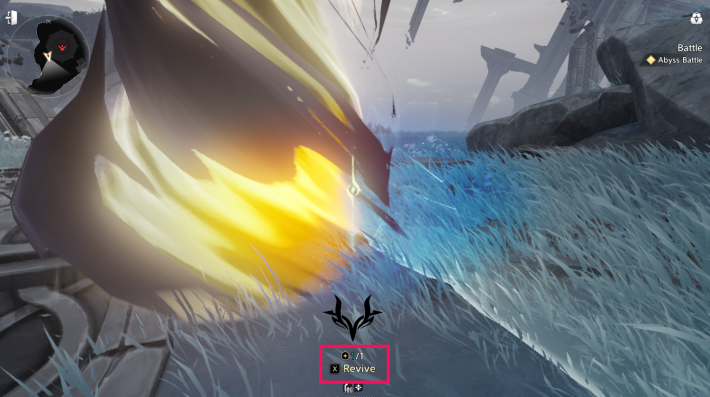
Initially, you can revive once per Exploration run. However, certain Artefacts allow you to gain additional revives. It’s still best to save your revives for the final Boss fight to maximize your chances of clearing the Maze.
Some Artefacts Can Grant Extra Revives
Certain Artefacts can grant additional revives, allowing you to survive longer in tougher stages. This is especially useful for high difficulty runs where every extra chance can help you reach and defeat the final boss.
Tips for Clearing Mystic Maze
Prioritize Red Zones

Red Zones grant Lampwicks and more Embers, which are vital for strengthening your character before the boss fight. Focus on clearing these Zones to gather enough resources to purchase upgrades in the final Rest Zone.
| Note! | If you are low on HP, enter Rest Zones instead so that you can heal HP. |
|---|
Stack Defensive Lampwicks

You'll be battling enemies continuously in each Exploration, so survivability is crucial. Stack defensive Lampwicks that provide Shields, damage reduction, or healing to endure longer runs.
Collect the Same Type of Lampwicks
Try to gather Lampwicks of the same type since collecting 3/6/9/12 of a kind activates powerful set effects. It’s best to stop at either 3 or 6 stacks (unless you’re aiming for a full single set run), then switch to another type to maximize your overall buffs.
Choose Buffs That Match Your Playstyle
Different characters benefit from different buffs, so pick Lampwicks and Artefacts that enhance your character’s strengths. For melee-focused characters, prioritize melee damage buffs. For skill-based characters, choose Sanity recovery or skill duration increase.
Save Embers for the Final Rest Zone

Powerful Artefacts usually appear in the shop before the boss fight. Save enough Embers to buy key Artefacts and complete Lampwick sets so you’ll be fully prepared for the final battle.
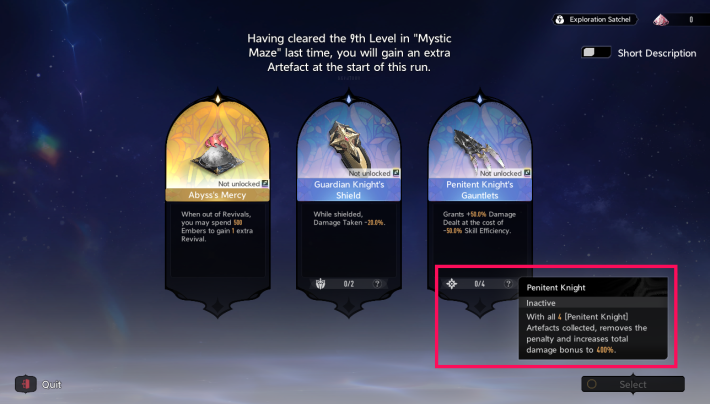
Try to Finish at Least to the 9th Zone
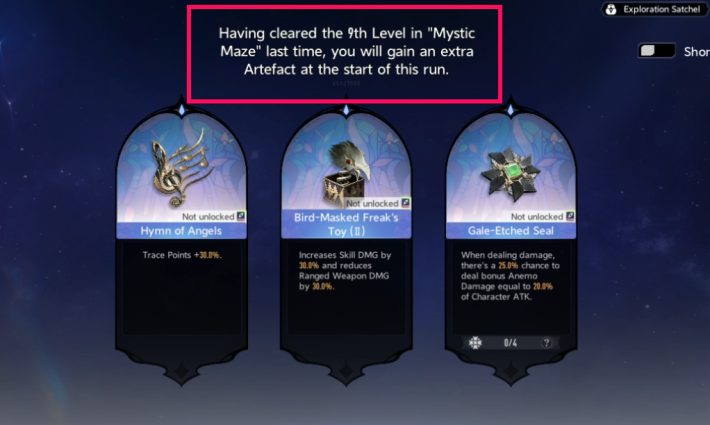
Reaching the 9th Zone grants you an extra starting Artefact in your next Exploration run. Aim to clear at least up to the 9th Zone even if you can’t finish the entire run, so plan your path and Lampwick choices carefully.
Upgrade Lantern Light-Up
After each Exploration run, use your Glazeystal in Lantern Light-Up to boost your damage and survivability. Upgrades in Lantern Light-Up are permanent and automatically activate in every run, so don’t forget to enhance them regularly.
Focus on Adaptability Boost
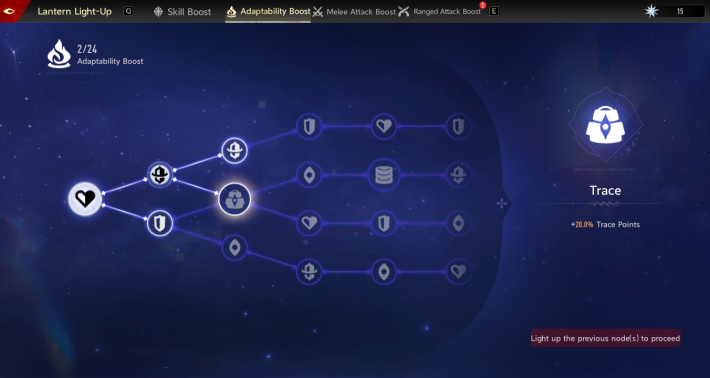
Prioritize Adaptability Boost nodes first since they benefit all characters, making future runs smoother. Also, unlock nodes that increase Trace Points and Embers gained to make your explorations more efficient.
Finish Trace Point Rewards Weekly

Since Mystic Maze Trace Point Rewards reset weekly, it's best to add this to your weekly routine when playing DNA. You can get a lot of valuable materials here each week.
Mystic Maze Rewards
Unlock Lisbell

Lisbell can be unlocked by collecting 30 Thought: Furyborne obtained by completing Mystic Maze stages up to Difficulty III for the first time.
First Clear Rewards
| Difficulty | Rewards |
|---|---|
| I | Secret Letter: Lisbell x10 Thought: Furyborne x10 Thread of Time x1,000 Coins x8,000 |
| II | Secret Letter: Lisbell x6 Thought: Furyborne x10 Thread of Time x2,000 Coins x8,000 |
| III | Secret Letter: Lisbell x6 Thought: Furyborne x10 Thread of Time x2,500 Coins x10,000 |
| IV | Secret Letter: Lisbell x6 Thought: Furyborne x10 Thread of Time x3,000 Coins x10,000 |
| V | Secret Letter: Lisbell x6 Thought: Furyborne x10 Thread of Time x3,500 Coins x12,000 |
| VI | Secret Letter: Lisbell x6 Thought: Furyborne x10 Thread of Time x4,000 Coins x10,000 |
Trace Point Rewards
| Tier | Rewards |
|---|---|
| 1 | Thread of Time |
| 2 | Secret Letter Clue |
| 3 | Commission Manual |
| 4 | Carmine Globule |
| 5 | Coin |
| 6 | Thread of Time |
| 7 | Secret Letter Clue |
| 8 | Carmine Globule |
| 9 | Coin |
| 10 | Twilight Thread |
| 11 | Thread of Time |
| 12 | Thread of Time |
Related Articles
 Return to Homepage
 All Character List
 Character Tier List
