
This article explains the best routes in Arena Breakout's Valley, divided into two types: exploration-focused and combat-focused. Explaining where to start, supply locations, and more.
Contents
Starting from the West Side
Best Exploration-Focused Route

| Image | West Side Route |
 | 1. Forward Base Move from spawn point to Forward Base - Inside the building: weapon cases and armor - Grenade cases and ammo cases available |
 | 2. Small Factory Move from Forward Base to Small Factory - Free safe on the 1st basement floor of Small Factory - Many weapon cases inside and outside Small Factory |
 | 3. RV Park Move from Small Factory to RV Park - Advanced weapon case in the central bus - Winter coat and first aid kit in the south bus |
 | 4. Escape Move from RV Park to extraction point |
Watch Out for Snipers in the South

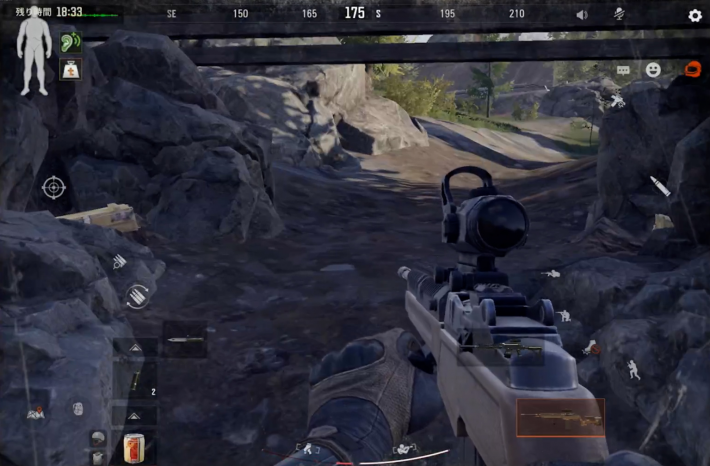
The south side is a contested area, and the high ground in the center of the map is an excellent sniper spot. When focusing on exploration, it's recommended to move along the north side using bushes and cover.
Best Combat-Focused Route

| Image | West Side Route |
 | 1. Radio Station Move from spawn point to Radio Station - Check if players are at the Forward Base - Large weapon case and first aid kit available |
 | 2. Seaside Villa Move from Radio Station to Seaside Villa - Two free safes available - Collect 3 dog tags and extract by helicopter |
 | 3. RV Park (if no enemy contact) Move from Seaside Villa to RV Park - Advanced weapon case in the central bus - Winter coat and first aid kit in the south bus |
 | 4. Escape Move from RV Park to extraction point |
Be Cautious of Your Surroundings at the Start of the Raid

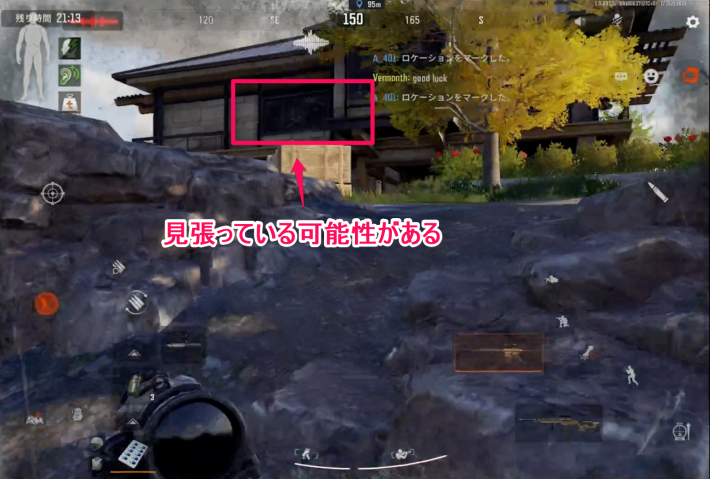
Player spawn locations are clustered on the west side of the map, leading to a high chance of early encounters. The Radio Station, in particular, is a sniping spot with a view of the surrounding area from high ground. If you spawn near the Forward Base, detour to the north and head towards the Seaside Villa.
Starting from the East Side
Recommended Exploration-Focused Route

| Image | East Side Route |
 | 1. East Farm Move from spawn point to East Farm - Weapon case in the building - 3x First aid kits around the building |
 | 2. RV Park Move from East Farm to RV Park - Advanced weapon case in the central bus - Winter coat and first aid kit in the south bus |
 | 3. Small Factory Move from RV Park to Small Factory (Note: Original text says "Move from Small Factory to RV Park", likely a typo, corrected based on flow) - Advanced weapon case in the central bus (Note: This description is for RV Park, likely a copy-paste error in original. Assuming Small Factory loot here: Free safe on B1, many weapon cases) - Winter coat and first aid kit in the south bus (Note: This description is for RV Park) |
 | 4. Escape Move from Small Factory to extraction point |
Recommended Combat-Focused Route

| Image | East Side Route |
 | 1. Pino Radio Station Move from spawn point to Pino Radio Station - Look for enemy players from the high ground - Winter coat and weapon case inside the building |
 | 2. RV Park Move from Pino Radio Station to RV Park - The area near the slope is a contested zone - Possible to extract using the safety harness (random spawn) |
 | 3. Seaside Villa (if no enemy contact) Move from RV Park to Seaside Villa - Two free safes available - Collect 3 dog tags and extract by helicopter |
 | 4. Escape Move from Seaside Villa to extraction point |
Be Careful Entering Seaside Villa Front
At Seaside Villa, you can be sniped at the main entrance from the central building. Avoid entering from the front; instead, use the west entrance or the entrance near the garage. If you want to enter from the front, breaking the second-floor window glass can help you spot enemies.
Tips for Achieving High-Value Raids
Collect Ammo from Defeated Enemies

Bullets can be stacked up to 60 rounds and can be sold for a high price if they have high penetration levels. Always check the contents if an enemy was carrying a magazine. If they had a large magazine, it's also a good idea to transfer the bullets and take them with you.
Check Weapon Attachments

If you are already carrying two weapons, it's difficult to bring back more due to inventory space. Individual attachments don't take up much space, so if there are parts with high value per slot, remove them and take them with you.
Use Backpacks and Rigs Efficiently

Some rigs offer more storage capacity than the space they occupy. If you want to bring back a lot of supplies, use rigs taken from enemies to store items efficiently.
Loot High-Tier and Mid-Tier Areas

| List of Mid-Tier and Above Landmarks | ||
| Seaside Villa | Small Factory | Port |
Landmarks with higher tiers are more likely to have higher rarity supplies. Earning by defeating enemies is good, but earning through exploration is also one of the ways to enjoy Arena Breakout. If you're not confident in combat, try exploring mid-tier or higher locations to aim for high-value raids.
Best Supply Spot List
- Weapon cases
- Drawers
- PCs
- Clothing
Locations for High-Value Supplies
Seaside Villa Offers Two Free Safes

Although it's a contested area, Seaside Villa has many spots where you can find high-value supplies. It has two free safes, and numerous weapon cases are also placed there. Once you get used to combat, try entering Seaside Villa.
Seaside Villa Has Three Key Rooms

At Seaside Villa, all key rooms have safes installed. In particular, the "Villa Master Bedroom" has an electronic safe, making it possible to aim for high-value supplies. When operating in Seaside Villa, don't forget to bring your keys.
The Main Goal is to Escape Alive
Once Equipped, Proceed to Extraction Point
If you fail to extract, you will lose all the supplies you've acquired. There's a limit to the amount of items you can carry out in a single raid, so if your backpack is getting full, heading to an extraction point is a viable option.
Utilize Conditional Extraction Points
| Location | Condition |
 | Submit 3 Dog Tags |
 | Submit Safety Harness |
 | Unlock with Dilapidated House Key |
 | Call Helicopter |
Except for Seaside Villa, these appear randomly, but remembering the conditions can increase your survival rate. The Dilapidated House extraction point allows you to escape if you have the key. The key is also very cheap, so if you have it, be sure to bring it.
Hidden Supply Spots in the Valley
Hidden Spots on the West Side
Road East of Radio Station

| Image | Supply Spot Contents |
 | - 1x Wooden weapon case - 1x First aid kit |
Tent West of Supply Camp

| Image | Supply Spot Contents |
 | - 1x Wooden weapon case - 1x Ammo case - Supplies around the tent |
Watchtower North of Supply Camp

| Image | Supply Spot Contents |
 | - 1x Wooden weapon case |
Hidden Spots on the East Side
Near the Pier South of Pino Radio Station

| Image | Supply Spot Contents |
 | - 1x Document case - 1x Expert toolbox - 1x Long weapon case - Supplies on the desk |
Granary

| Image | Supply Spot Contents |
 | - 1x Jumpsuit - 2x First aid kits - 1x Expert toolbox - 1x Gym bag |
Dilapidated House North of East Farm

| Image | Supply Spot Contents |
 | - 1x Wooden weapon case - 1x Gym bag |
Bridge North of RV Park

| Image | Supply Spot Contents |
 | - 1x Grenade case - 1x Ammo case |
