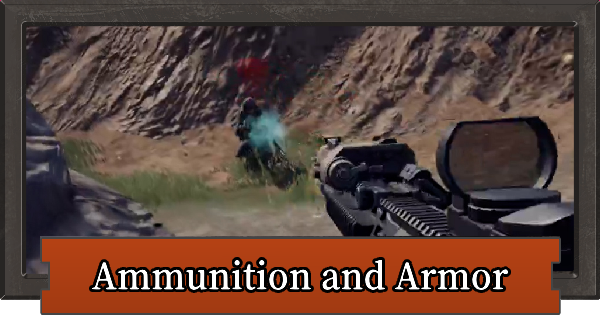
Relationship between Ammunition and Armor Class in Arena Breakout. Guide explains the relationship between Ammunition penetration level and Armor Level. Use this to learn more!
Table of Contents
Relationship between Ammunition and Armor Class
High Penetration Level Can Pierce Armor

If the ammunition's penetration level is higher than the armor level, it can penetrate the armor and deal damage. However, be aware that high-penetration ammunition is expensive to purchase, so wasting shots can easily lead to a deficit.
Tactics for Targeting Unarmored Areas (Flesh) Also Exist

There is also ammunition specialized in base damage, such as the 9x19mm Dum Dum. Instead of a high penetration level, it can deal significant damage by targeting areas difficult to protect with armor (legs and arms).
 Point! Point! | Generally, targeting the legs is common, and tactically, this is often called "leg meta." |
|---|
High Armor Class Can Prevent Damage

If the armor level is higher than the penetration level, it can prevent damage when hit. When you hit an enemy, a green effect indicates penetration, while a white effect means the damage was blocked. Also, as the armor's durability decreases, the probability of penetration increases.
Differences in Armor Materials
| Material Type | Details |
| Hardened Copper | Offers the best ballistic protection but reduces movement speed and ergonomics. |
| Aluminum | Offers excellent ballistic protection but reduces movement speed and ergonomics. |
| Ceramic | Offers excellent ballistic protection but slightly reduces movement speed and ergonomics. |
| Titanium | Offers moderate ballistic protection and loses minimal durability when repaired. Very sturdy. |
| Composite Material | Ballistic protection is lower than titanium, but it loses minimal durability when repaired. Very sturdy. |
| Aramid | Offers average ballistic protection and loses minimal durability when repaired. Very sturdy. |
| Polyethylene | Offers average ballistic protection and loses minimal durability when repaired. Very sturdy. |
Recommended Equipment Level by Map
Recommended Equipment Level List by Map
| Map Name | Penetration Level | Armor Class |
| Farm | 2-3 | 3 |
| Valley Northridge Port | 3-4 | 4-5 |
| Each Lockdown Zone | 4-5 | 5 |
| Armory TV Station | 5-6 | 5-6 |
Farm

For Farm, it's recommended to bring equipment with penetration level 2-3 and armor class 3. As it's an initial map, low-budget weapons are often used, so you can manage sufficiently even with minimal equipment. Expensive supplies are less likely to appear, so deploy with cost-effective gear.
Valley & Northridge & Port

For Valley, Northridge, and Port, it's recommended to deploy with equipment of penetration level 3-4 and armor class 4-5. Players deploying to these three maps tend to have relatively high-quality gear, so if your armor class is low, you risk instant death upon being hit.
Always Prepare High-Class Armor When Going to Hot Zones
When going to hot zones like "Seaside Villa" in Valley or "Northridge Hotel" in Northridge, prepare the best possible armor to increase your survival rate and then deploy.
Each Lockdown Zone

This is a high-difficulty mode requiring minimum equipment value and an entry fee, so prepare relatively high-grade equipment. Gear worth 30,000 Koen or more is essential, and many players bring armor class 4 or higher. You should also load high-penetration ammunition to face them.
Armory

When deploying to the Armory, it's recommended to equip the best gear you currently have available. Both players and NPCs use high-level ammunition, so a low armor class carries the risk of instant death upon being hit. Be sure to wear equipment that can counter them when heading to the Armory.
TV Station

As this is the highest difficulty indoor map, deploy with close- to mid-range weapons and armor class 5 or higher. NPCs often use penetration level 4 ammunition and wear armor class 4-5. Bosses may have armor class 5-6, so approach the TV Station with maximum caution.
Recommended Ammunition List
| Ammunition Caliber | Recommended Early Game Ammo | Strongest Ammo |
| 7.62×39mm |  7.62×39mm PS 7.62×39mm PS |  7.62x39mm AP Round 7.62x39mm AP Round |
| 7.62×54mm |  7.62×54mm T46M 7.62×54mm T46M |  7.62×54mm 7N37 7.62×54mm 7N37 |
| 5.56×45mm |  5.56×45mm M855 5.56×45mm M855 |  5.56×45mm M995 5.56×45mm M995 |
| 9×19mm |  9×19mm AP6.3 9×19mm AP6.3 |  9×19mm 7N31 9×19mm 7N31 |
| 12×70mm |  12x70mm Type 8 Buckshot 12x70mm Type 8 Buckshot |  12x70mm Armor-Piercing Slug 12x70mm Armor-Piercing Slug |
| 7.62×51mm |  7.62×51mm BPZ FMJ 7.62×51mm BPZ FMJ |  7.62×51mm M61 7.62×51mm M61 |
| 5.7×28mm |  5.7×28mm SS197SR 5.7×28mm SS197SR |  5.7x28mm SS198 Round 5.7x28mm SS198 Round |
| 9×39mm |  9×39mm SP6 9×39mm SP6 |  9×39mm 7N12 9×39mm 7N12 |
| 5.45×39mm |  5.45×39mm PP 5.45×39mm PP |  5.45×39mm BS 5.45×39mm BS |
| 12.7×99mm |  12.7×99mm M2 12.7×99mm M2 |  12.7×99mm M2 12.7×99mm M2 |
| 7.62×25mm |  7.62×25mm Pst 7.62×25mm Pst |  7.62×25mm Pst 7.62×25mm Pst |
| 0.338 Caliber |  .338 UPZ .338 UPZ |  .338 AP .338 AP |
