This is a beginner's guide to Arena Breakout. Read to learn more about the game's mechanic, rerolling, raiding basics, controls, storage, accepting missions, and combat.
Table of Contents
About Rerolling
Rerolling is Unnecessary

In Arena Breakout, there is no gacha system, so there's no need to reroll. Guns and equipment are mainly obtained by picking them up in raids, purchasing from traders, or completing missions.
Lobby Screen Explanation

| Item | Overview |
| 1. Character | - Check equipment/storage - Check health status |
| 2. Trader | - Trade items with traders - Manage trader missions |
| 3. Gunsmith | - Customize guns |
| 4. Market | - Trade items with users - List items here as well |
| 5. Missions | - Check mission list - Manage daily/weekly missions |
| 6. Clan | - Create/join a clan - Clan management |
| 7. Customize | - Change character skin |
| 8. Map | - Check each map - Check item spawn locations |
| 9. Store | - Open the premium store |
| 10. Battle Pass | - Collect Battle Pass rewards - Upgrade Battle Pass |
| 11. New Recruit Campaign | - New recruit exclusive login bonus - New recruit exclusive missions |
| 12. Event Center | - Check event information |
| 13. Deploy to Raid | - Select mode/map and deploy |
Character

You can check your current equipment, inventory, storage, and health status. Set up equipment, organize storage, and heal from here.
Trader

You can trade items with each trader and accept missions (tasks). When going on a raid, check if there are any tasks you can accept.
Gunsmith

You can customize guns you have acquired. Save your customizations to recall them anytime, attach parts, and take them into raids.
Market

This is the market for items listed by users. You can buy items from other users or list your own items for sale.
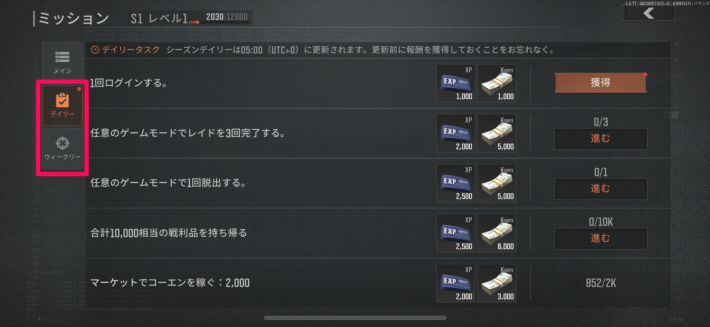
Missions

| Weekly | Unlocked at Lv.18 |
You can accept main missions and weekly missions, separate from trader missions.
Clan

Manage your clan, such as joining or leaving. Check here if you want to create your own clan or switch clans.
Customize

You can change your player character's skin. It's fine to have a unique skin, but be aware that being too conspicuous will increase visibility to enemies.
Edit the message
| Order | Image |
| 1 |   |
| 2 |  |
| 3 |  |
| 4 |  |
Map

You can check the map of each area. It also displays where resource locations are.
Store

Opens the premium shop. You can purchase a "Safe Case" (subscription) to safely bring back items, or buy Koen directly.
Battle Pass

Collect Battle Pass rewards and upgrade your Battle Pass here. Rewards reset each season, so be sure to collect them regularly.
New Recruit Campaign

After completing the tutorial, you can access new recruit exclusive missions and login bonuses. Note that these are available for a limited time.
Event Center

Check currently ongoing events. Event rewards can include weapons and ammunition, so be sure to check the rewards.
Deploy to Raid

Select a mode and map, then deploy to the raid. If you have enough supplies or are confident in firefights, choose Contractor. If you are unfamiliar with the game, it is recommended to deploy as an Impostor.
Basic Game Flow
Prepare Your Equipment

| Equipment Item | |
| 1. | Healing Items |
| 2. | Weapons (Guns, Ammo, Grenades) |
| 3. | Armor (Armor, Helmet, Headset) |
| 4. | Rig |
| 5. | Bag |
First, equip the items necessary for the raid. Depending on your storage situation, you generally can't go wrong by bringing the items listed above.
Accepting and Completing Missions

If there are missions, don't forget to accept them. If you have completed missions, collect the rewards.
Go on a Raid

Deploy to a raid to acquire loot. There are two modes: Contractor, where you deploy with your own equipment, and Impostor, where you deploy with random equipment.
Organize Loot

If you survive, organize the items you brought back. Sort out what you need and sell unnecessary items.
Accepting and Completing Missions
Trader Missions

As you play the game, trader missions will appear. Trader missions will not progress unless accepted, so check them regularly.
Weekly Missions
| Weekly Mission Update Time |
| Every Monday at 14:00 |
Weekly missions, which are updated every week, can be progressed by accepting them from traders. You can get bundles and Koen, so accept them before heading into a raid.
Completing Missions

You can check your progress and collect completion rewards from the mission screen or from traders. Don't forget to collect them once you've completed a mission.
Raid Basics
Check Character Status Before Deploying

When playing Contractor mode, check your character's health status before deploying. Check HP, energy, and hydration levels, and be sure to recover if they are low.
Loot Items and Survive
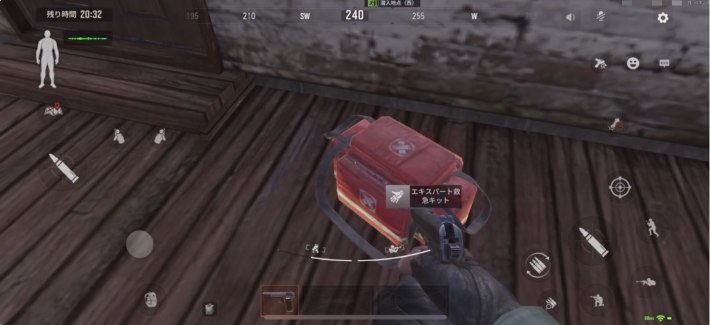
The basic goal is to pick up various items on the map and return alive. Getting kills allows you to loot those enemies, increasing the items you can pick up, but survival is the primary objective, so combat is not always necessary.
Complete Missions

▲Weekly missions are unlocked from level 18
By completing trader missions and weekly missions, you can obtain various items and player experience points. It also helps improve your gameplay, so try to progress through the game while tackling missions.
Aim for Rare Items

If you can bring back rare items, you can sell them for a high price and earn a lot of Koen. Once you get used to it, you can try to remember where rare items tend to spawn and aim for a big score.
Shooting Practice at the Training Ground
Equip the Weapon You Want to Practice With

At the training ground, you can test-fire the weapons you have equipped. Check recoil and the feel of attachments. However, be aware that you cannot shoot unless you also bring ammunition. You can also practice throwing grenades if you bring them.
Go to the Training Ground from the Mode Selection Screen
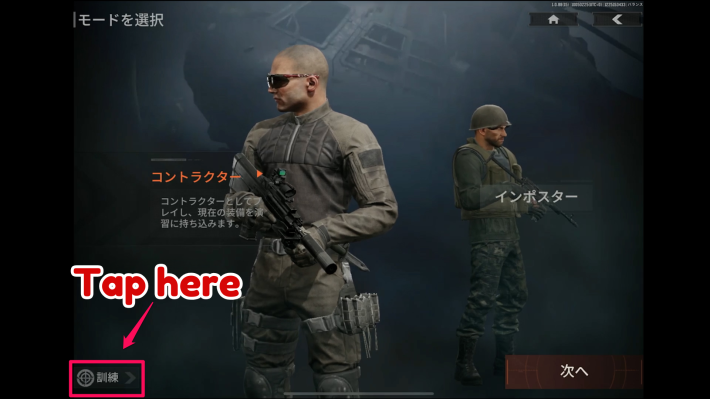
Tapping "Start" on the main menu will take you to the mode selection screen. You can go to the training ground by tapping the bottom left of the mode selection screen.
Press the Start Button When Ready

When ready, tap the start button to go to the training ground. You can also go to the storage by tapping the area above the start button.
Try Test-Firing at the Training Ground

Even if you test-fire, ammunition will be returned when you leave the training ground. Practice shooting without worrying about ammunition.
No Problem Even if You Run Out of Ammo

Stand near the ammunition case in the training ground and tap the "Supply" button to replenish ammunition.
Change Customizations Anytime

By examining the desk in the training ground, you can access the storage and gunsmith anytime. Switch the gun you want to test-fire or change attachments.
How to Return to the Menu from the Training Ground
There is a return spot where you entered the training ground to go back to the menu. The "Return" button will appear when you stand on the spot. Tap this to return to the menu screen.
You Can Also Return from the Settings Screen

You can also go to the menu screen from the "Return" button at the bottom right of the settings screen. This allows you to return from anywhere in the training ground.
Organizing the Storage
Store Items

You can store items obtained in raids or purchased items in the storage. Make sure to leave items not used in raids here.
Organize Storage with Quick Sort

Using the quick sort function automatically sorts items in the storage. Items are arranged by category, making the storage much easier to see.
| Tip! | Quick sort may leave some gaps. If it bothers you, organize it manually. |
Roll Up Bags and Rigs

Bags and rigs can be folded smaller using the roll-up function. They will fit into a smaller space, so it is generally recommended to roll them up.
Check if Items Are Inside

If you roll up an item with things inside, the items inside will automatically be moved to the storage. If there are many items, leaving them inside without rolling up might save more space in some cases.
Don't Hoard Too Many Items

If you put everything you get into storage, it will fill up quickly. Sell unnecessary items to turn them into Koen.
Getting Used to Controls
Utilize the Training Ground

First, use the training ground to learn the controls. It's recommended to practice aiming and shooting, and to check basic operations like crouching and proning.
Learn Map Layouts by Deploying as an Impostor

When deploying as an Impostor, there's no risk of losing supplies. Use this risk-free opportunity to learn the map layouts. Note that after deploying in Impostor mode, there is a 15-minute cooldown.
Aiming for Consistent Extractions
Checking Extraction Points is Essential

When the raid starts, first open the map and check the extraction points. Deciding which route to take to the extraction point makes it easier to determine your course of action. Extraction conditions vary depending on the icon color, so be careful.
Extraction Conditions for Each
| Icon Color | Condition |
| Green | Can extract unconditionally |
| White | Can extract with conditions |
| Red | Currently unavailable |
Recommended Routes for Each Map Here
Precautions During Extraction

When heading to an extraction point, be careful not to move through open areas. Using bushes and obstacles for cover while moving to the extraction point will make it harder to be spotted from a distance.
Getting Used to Combat
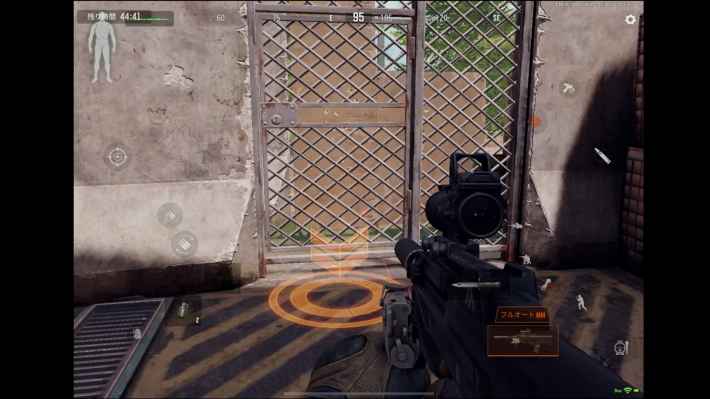
Understand Soundprints

If an enemy makes a sound, a soundprint will appear near the coordinate bar, so be alert if it reacts. If you make a sound, enemies will also detect your soundprint, so you need to quickly decide whether to engage or not.
 Tip! Tip! | Red soundprints indicate gunfire from an enemy and its direction! |
|---|
Wait on the Spot to Suppress Sound

Running while a soundprint is active will alert enemies. If you don't want your location to be known, stop for a moment and wait for the enemy to pass.
Utilize Cover

Learn to Defeat Enemy NPCs

Unlike Contractors, enemy NPCs may sometimes stand unguarded. First, try to defeat enemy NPCs to get used to combat. When attacking, it's recommended to lean from behind cover or fight while prone in bushes.
Check Surroundings Before Looting
After defeating an enemy, always check your surroundings for safety. If an enemy finds you while you are looting, you will be shot at defenselessly.
| Tip! | When looting a defeated enemy's body, other enemies may have been attracted by the gunfire! Check for soundprints before looting! |
|---|
Saving Money
Purchase Better Equipment

By saving money, you can upgrade your equipment. Purchasing better equipment and high-performance ammunition can significantly increase your chances of winning in combat.
You Can Participate in the Lockdown Zone

By paying Koen and raising your equipment to a certain standard, you can participate in the Lockdown Zone. The supplies from defeating enemy NPCs and enemy Contractors will be more luxurious, and items looted from supplies will also be more luxurious.
| Tip! | The difficulty is set quite high, but if you can survive in the Lockdown Zone, your income will stabilize! |
|---|