
This is a leveling guide for Unicorn Overlord. Read to learn how to level up your character faster, the best formations, and which quests to repeat.
Table of Contents
Leveling from Lv. 1 to 10
Sigil Trial, Beginner 1


It's recommended to repeatedly clear Sigil Trial, Beginner 1, located southeast of Cornia. Assist Shots and Magic from watchtowers are effective, so recruit Rolf and Yahna before attempting it. Besides Josef, Level 5 is sufficient to clear it.
Best Formation and Strategy
Best Strategy Formation
| Alain's Unit | ||
 Alain Alain |  Josef Josef |  Aubin Aubin |
| Rolf's Unit | ||
 Rolf Rolf |  Clive Clive |  Chloe Chloe |
Yahna can be used instead of Rolf. Alain's unit will be the main combat force, while Rolf's unit provides support with Assist Shots from the watchtower.
Strategy
- Deploy Alain's Unit and Rolf's Unit
- Defeat Minor Enemies
- Defeat the Boss

You can deploy up to 3 units, but it's fine to deploy only two to save Bravery for skills. Deploy Rolf's unit near the watchtower.

Fight with Alain's unit and support with Assist Shots from Rolf's unit. Assist Shots can be activated by pressing □ or Y on the battle start screen. While stationed at a watchtower, Assist Shots can be performed without consuming stamina.
Depending on skill activation conditions, not assisting might reduce damage taken or increase damage dealt. Decide whether assistance is needed on the battle start screen.

After defeating the minor enemies in front, fight the boss with Alain's unit. Station Rolf's unit at the watchtower near the boss and focus on Assist Shots. Using Royal Order when defeating the boss can earn even more experience.

When a unit runs out of stamina, recover it with Aubin's "Vitalize". The boss periodically summons additional minor enemies, so be careful not to rest near the boss.
Leveling from Lv. 11 to 20
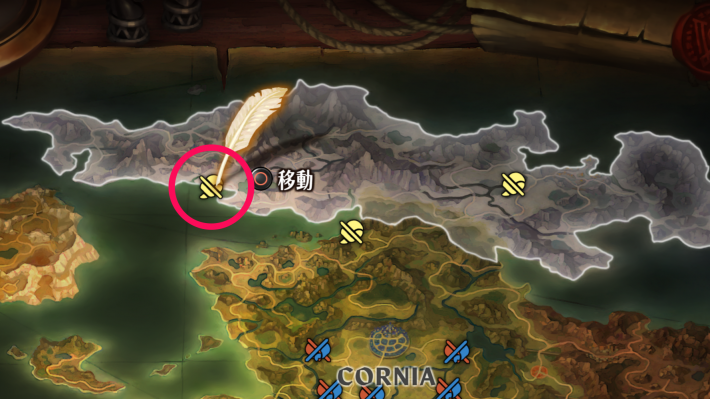
Sigil Trial, Intermediate 2

Located past the forest on the left side path, from the road northwest of Baumratte Coliseum. Using flying units is very efficient. Enemy levels are somewhat high, so members other than Josef should at least acquire their Lv. 10 skills.
Best Formation and Strategy
Recommended Strategy Formation
| Flau's Unit | ||||
| Clive | Josef | |||
 Flau Flau | Aubin | |||
Deal with the front line continuously with Aubin and Flau's row attacks and Clive's Assault Rush. Ideally, annihilate them before the Gladiator and Shooter can act, but if a Shooter targets Flau, protect her with Josef's White Guard.
Strategy
- Deploy Flying Unit
- Fly Over Mountains to Boss

First, deploy a flying unit. At this time, deploying the unit from the top left of your base allows you to avoid battles along the way.

Cross the mountains and defeat the boss directly. Depending on the enemy's placement, your base might be captured if you don't move quickly. To increase mobility, be sure to use Fast Yell.

If it's difficult to defeat the boss with only the flying unit, first reduce its health with a catapult. The catapult unit won't receive experience, so any unit that won't lose in battle is fine.
Leveling from Lv. 21 to 30
Sigil Trial, Advanced 3
Located west of Citadel Solbaquad, past the bridge of Port Town Zagatul. If all members are level 25 or higher, it can be cleared smoothly. A feature is that you can use a catapult to give experience to members other than the main ones.
Best Formation and Strategy
Best Strategy Formation
| Ramona's Unit | ||||
 Dinah Dinah |  Hodrick Hodrick | |||
 Ramona Ramona |  Rosalinde Rosalinde |  Ochlys Ochlys | ||
Break the enemy's front line with magic attacks. It's recommended to remove skills that activate at the start of battle other than Rosalinde's "Spirit's Wrath" from the tactics. Setting cover-type skills to target flying allies can protect Ramona in the back row from Shooters.
Strategy
- Deploy Flying Unit and Catapult Unit
- Defeat Enemies Along the Way
- Cross the Sea and Defeat the Boss

First, deploy a flying unit and a unit that uses a catapult. The unit using the catapult can earn experience without risk, so include characters you want to level up.

If the catapult is fired to hit the watchtower and the enemy units further back, each can be defeated in one shot. Defeat the remaining enemies in front by fighting with the flying unit.

After defeating the enemy units, advance towards the boss from the sea. You'll take ballista attacks on the way, but ignore up to 2 hits and proceed. When the 3rd shot is loaded and you're targeted by the catapult, enter the jump range. Jump to them.
If you're struggling with ballista attacks, prevent damage with Hoplite/Cataphract's Fortress. Efficiency will drop slightly as you can't use jump, but you can use other Brave Skills to fight advantageously.
Leveling from Lv. 31 to 40
Sigil Trial, Expert 2

Located on the coast west of Roastford Town, after passing Citadel Paistonn. To clear smoothly, all members should be at least Lv. 31. Clearing it at night is very efficient, so don't hesitate to use Slumbering Flowers.
Best Formation and Strategy
Best Strategy Formation
*You can check character equipment and tactics by switching tabs.
| Ramona's Unit | ||
|---|---|---|
 Yunifi Yunifi | ||
| Ramona |  Yahna Yahna | |
| Equipment Setup | |
|---|---|
 Vorpal Bow Vorpal Bow |  Astral Talisman Astral Talisman |
 Crimson Pendant Crimson Pendant |  Azure Pendant Azure Pendant |
| No. | Action | Condition 1 | Condition 2 |
|---|---|---|---|
| 1 | Glacial Rain | ||
| 2 | Fast Charge |
| No. | Action | Condition 1 | Condition 2 |
|---|---|---|---|
| 1 | Night Vision | ||
| 2 | Restore | ||
| 3 | Quick Dispel | ||
| 4 | Circle Barrier |
| No. | Action | Condition 1 | Condition 2 |
|---|---|---|---|
| 1 | Ice Coffin | ||
| 2 | Magic Missile | ||
| 3 | Magic Saber |
It's recommended to defeat the boss by instantly activating Yunifi's charge attack using the Astral Talisman, obtainable by clearing the main quest "A Fleeting Dream". For the remaining 2 slots, it's fine to include characters you want to level up.
Strategy
- Deploy Ramona's Unit and a Defense Unit
- Night Raid to Boss with Ramona's Unit

Deploy Ramona's main unit and a defense unit from your base. Any formation is fine for the defense unit. Deploy the defense unit near the forest, and the main unit to the bottom right of the base.
 To increase Ramona's movement speed, be sure to use a Slumbering Flower to make the stage night. At night, you can go straight to the boss without being hindered along the way.

Move the defense unit to just before the forest to draw the enemy's attention. The watchtower's Feather Bow will start targeting the defense unit.
Leveling from Lv. 41 to 50
Sigil Trial, Highest Grade

Located southwest of Somme Town after liberating it. The boss's formation is well-crafted, and if you let the enemy's front line act, you might be defeated. When going for the first time, ensure your party members are level 35 or higher.
Best Formation and Strategy
Best Formation
*You can check character equipment and tactics by switching tabs.
| Hilda's Unit | ||
|---|---|---|
 Miriam Miriam | ||
 Selvie Selvie | Yahna | Yunifi |
| Equipment Setup | |
|---|---|
 Black Iron Sword Black Iron Sword | Black Iron Sword |
 Spirit Necklace Spirit Necklace |  Bronze Bangle Bronze Bangle |
| No. | Action | Condition 1 | Condition 2 |
|---|---|---|---|
| 1 | Line Heal | Lowest HP Ally | |
| 2 | Quick Cure | Back Row Ally | |
| 3 | Holy Guard |
| Equipment Setup | |
|---|---|
| Black Iron Sword |  Angel Feather Ornament Angel Feather Ornament |
| Bronze Bangle |  Talisman of Life Talisman of Life |
| No. | Action | Condition 1 | Condition 2 |
|---|---|---|---|
| 1 | Defense Curse | ||
| 2 | Quick Curse | ||
| 3 | Follow Wind |
| Equipment Setup | |
|---|---|
 Magic Barrier Staff Magic Barrier Staff |  Gold Bangle Gold Bangle |
 Demon's Shackles Demon's Shackles |  Heavy Infantry Medallion Heavy Infantry Medallion |
| No. | Action | Condition 1 | Condition 2 |
|---|---|---|---|
| 1 | Magic Saber |
| Equipment Setup | |
|---|---|
 Wind Bow Apeliotes Wind Bow Apeliotes | Astral Talisman |
 Crimson Crystal Pendant Crimson Crystal Pendant | Azure Crystal Pendant |
| No. | Action | Condition 1 | Condition 2 |
|---|---|---|---|
| 1 | Glacial Rain | ||
| 2 | Fast Charge |
Miriam will take attacks from Thieves, and Yunifi will receive buffs from Miriam, so be sure to fix their positions. Place characters you want to level up, even Clerics, in an empty spot in the front row.
Strategy
- Deploy Main Unit From Right Side of the Base
- Okay to Capture Bases First Time
- From 2nd Run, Go Straight to Boss

Deploy the unit from the right edge of the base. Placing them near a road will increase their movement speed.

If you're unsure about the main unit's level on the first attempt, defeat enemies along the way to catch up in levels. Enemy bases give a lot of experience, so capturing just these is efficient.

On subsequent playthroughs, while the main unit is tackling the boss, you can level up characters in a separate unit. Form a unit with characters of disparate levels alongside strong characters and capture the intermediate bases.

From the second time onwards, head towards the boss while avoiding enemies. Placing a waypoint to the top left of the watchtower allows you to pass with only one battle.

When Swordmen are lined up, you can reach the boss directly without a fight. Check the enemy positions and adjust.
Farm Free Quests Repeatedly
Collect Experience Items

To earn experience efficiently, it's recommended to collect "Tomes of Experience" from clearing Sigil Trials. Make a highly mobile unit the leader and defeat the boss as quickly as possible. If you can follow a path, cavalry is recommended; if you need to cross obstacles or forests, a flying leader is better.
Recruiting Selvie is a Condition for Unlocking

To unlock Sigil Trials, you need to recruit Selvie. An event occurs at the first Sigil Trial, but even if you refuse, you can talk to her again to recruit her.
Manuals Have a Cap of 99
The manuals obtained as rewards from free quests have a holding limit of 99. Any excess will be lost, so be sure to use them regularly to avoid exceeding the cap.
Equip EXP Up Items
| Item | Effect Amount | How to Obtain |
 Silver Goblet Silver Goblet | Character EXP Gained +200% | Quest "Sigil Trial" |
 Rookie Egg Rookie Egg | Character EXP Gained +100% | Mia Town |
 Chloe's Charm Chloe's Charm | Character EXP Gained +30% | Chloe's Initial Equipment |
 Recruit's Dagger Recruit's Dagger | Character EXP Gained +20% | Port Town Ouvrir |
 Recruit's Shield / Greatshield Recruit's Shield / Greatshield | Character EXP Gained +10% | Conquiage Town |
When farming experience by repeating quests, equip EXP items on the characters you want to level up. Note that they won't be effective in combat while equipped, so switch back to their normal equipment after farming.
Lowering Difficulty Increases Efficiency

As a last resort, you can lower the difficulty to increase farming efficiency. It doesn't affect rewards or the amount of experience gained, so if you simply want to speed up farming, lowering the difficulty for free quests is an option.
Hard to Level Up from Enemies 3 Levels Lower

Experience gained from enemies that are 3 levels lower than your battling unit is significantly reduced. If you're no longer gaining experience from the current stage or free quests, it's recommended to deploy different units.
Save Miracle Fruits

Even if a significantly higher-level ally joins, be careful not to recklessly use Golden Fruits on them. The number of these items is limited, and Miracle Fruits should be saved for leveling up near level 50.

